


![]()
|
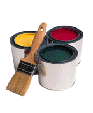
Two-part epoxy paints. Perfection 709 is a two part paint from International. Reading what it says on the can makes it a very nice paint to use. On the sides of the Riptide, this paint lasted 7 years without further attention and it still looked white. With previous ‘conventional’ schemes on "Mikros" I have found myself re-coating each spring. Actually, don’t do what it says on the can! What it says on the can is to "tip the small can into the big can and stir." Even with a 750ml set up you have enough paint to do one side of a battleship if you could get it on fast enough before it cured. Buy a cheap vernier calliper gauge that has a depth measurer. Use cleaned out baked bean, soup or similar cans as mixing pots. Work out say, that if you put in 3 cm of base how much more you need to add of the curing agent. If it’s 3:1 then pour in the 3cm of base. Then extend the depth gauge to 4 cm and then pour in curing agent until it just touches the mark. Beware that the top coat and under coats have different ratios. The topcoat is 3:1 and the undercoat 2.5:1. Clean the vernier gauge straight away. If you let it dry it will be well stuck and won’t work. Stir the mixture well and leave it for the prescribed time to allow the bubbles to rise and disperse. Then paint it on. Contrary to rumour you can brush or roll it on. If you choose to use rollers do the usual brushed edge and then fill in the big areas with the roller. Don’t get carried away with doing too much edge before you fill in or you will find the edge has started to cure before you get the middle rolled. For rollers use the small gloss paint sponge rollers available from the bigger DIY stores. If you want to do a good job don’t stint. Buy a load of them and keep the receipt. If you have some left over you can at least take them back for a refund. One roller will not be enough to do a boat as the paint will start curing and/or the roller may start breaking up. When it needs replacing, cover it with cling-film to save your hands. Pull it off and fit a new one. Use the small plastic roller trays from the DIY store. Before you put the paint in, line the tray with cling-film. Actually you can use that trick with any sort of paint – even in the home! When the job has been finished and the paint cured, remove the cling film and you have a clean tray. If you find cling film breaking, use a more substantial plastic bag. Put the tray into the bag and smooth it in. When rolling-on this type of paint, you will find that the sponge rollers leave small bubbles behind. Some collapse of their own accord but to remove the rest you must ‘tip them out’. Buy a good quality large (3 inch) paint brush. By hardly touching the rolled paint with anything other than the tip of the brush, go gently back and forth to remove the bubbles. The knack is to do it as lightly as possible and then you don’t get brush lines in the paint. You retain the nice, very finely textured surface provided by the roller. Don’t let the tipping-out brush dry or next time you ‘tip out’ you will leave behind slivers of cured paint. If the roller starts deforming or getting stiff, throw it away and fit a new one. I know they’re not cheap but if the paint job will last 7 years… I also had the benefit of a Kingfisher (B+Q) 20% discount card! In addition, I used 709 that I had bought in 1994. It was, in 2002, way past it’s ‘use by date’ but it had been kept in reasonable conditions and I expected no problems and got none. A tip about primer for this scheme: If you are using this paint directly on top of West epoxy you don’t need another primer. Just scrub off with a ‘greenback’ and water and then rinse well and dry. If you are putting 709 onto wood then you need to use their ‘UCP’ (Universal Clear Primer) first. This is straightforward enough to use but… When it is dry if you have to sand then use some more on top. If you have to wash/wipe it don’t use the UCP thinners anywhere near the rag as it solves and then wipes off the primer you have just put on. Use a Tak Rag or simply clean water. We couldn’t work out on "Thalia" why the two part varnish we used on top of UCP came off almost straight away. Then we realised it was coming off the ‘outside’ edges of things where the thinners in the rag had cleared the UCP most effectively. Actually I don’t rate their two-part "Crystal" varnish and rapidly went back to ‘conventional ‘Blue Peter’. It lasts just as short a time and costs a fraction… One other tip with this type of scheme concerns the undercoat. I think that they (International) only do three colours of undercoat. When I wanted to paint a part of the Riptide ‘Burgundy’, there was no red or even remotely red undercoat. What you do is to make up the undercoat mixture with part Burgundy topcoat and part white undercoat and then add the correct ratio of curing agent. In my case you got a very fetching pink undercoat. I have to say that you need two topcoats to ensure the pink is covered. When you use this type of paint piecemeal, instead of pouring one can into the other, you will find that you run out of curing agent before you use up the base. You then go along to your friendly International stockist who will say that you can’t get it separately. Yes you can but they have to go through to International Help Desk to find out how. You will only get a large (750ml) tin so make sure you want it! Deck paint. When using Perfection 709 as a deck paint, I added a spoon or two of their plastic flakes/powder. This produces the ‘non-slip’ quality. Some comments: Remember how much you add and to how much mix or otherwise you will get a different finish on the next bit. It’s one sachet to 750ml of mixed paint and so you scale down to a number of accurately measured/replicatable amounts. See the website elsewhere for a source of powder that will also help the website! The finish that this produces is far superior to the more usual Interdeck finish. It is easy to wash off mud etc. with water and a cloth without shredding the cloth or your knuckles. Another thought is that when you paint it on use the following method: Paint on ordinary 709 topcoat (i.e. no powder added) to a 40mm strip around the edges of everything. When that has fully cured, mask off a strip of, say, 30mm around everything. Then roller the powder added paint onto the open areas. This produces a very pleasing panel effect. Your foot will not use the last 30mm… The last comment is that when you are rolling on the powder-added topcoat, try not to re-roll any area because if you do you will get more particles on the re-rolled area. You will get the knack after a while. Geoffrey Hyde Fynn. YMS 779 "Mikros" Senior Advisor, see Advisors Page. March 2003, updated Nov 2004
|
|