
1979 Golden Hind 31 Refit Project Part 1
Background
I have long been a fan of Maurice
Griffiths designs and attitude to cruising and for many years owned a fine
example of the Eventide 26, perhaps his best known design. The Golden Hind is a
development of the Eventide concept and during the 1970s was hugely popular as a
go anywhere cruiser with around 40 Atlantic crossings during that period.
However much more modern designs came in and by the mid 80s demand had fallen so
effectively production stopped after around 240 boats, roughly half with wooden
hulls and half GRP. Later, about half a dozen were built by Mark Urry using the
original hull mould but with some updating mainly to meet the RCD design
requirements.
I had kept my Eventide even after buying
a
By 2020 it looked like my health would
be sound for a few more years and the Covid restrictions got me thinking about
whether I should take on another project so started looking around for a good
“traditional” boat. I looked at some all wood boats, but quickly decided the
fettling/sailing balance would be unbalanced, plus most of the size I felt I
could handle were very cramped and restrictive. So my search went round to a
Golden Hind.
The challenge was to find one that was
original but in usable condition such that it could be kept afloat while I
refitted and upgraded. The boats are now pretty cheap to buy, particularly the
earlier wooden hull ones (unlike when new when they were priced well above
production boats) and many have been messed about with (improved?) over the
years. When restrictions eased in 2021 I found an almost original wood hulled
boat that had been with the same owner for 20+ years and kept reasonably up to
date with good sails and a modern Beta engine. I inspected it afloat in
A week later another one, this time with
a GRP hull came on the market. Also very original and in working order – but in
Neyland,
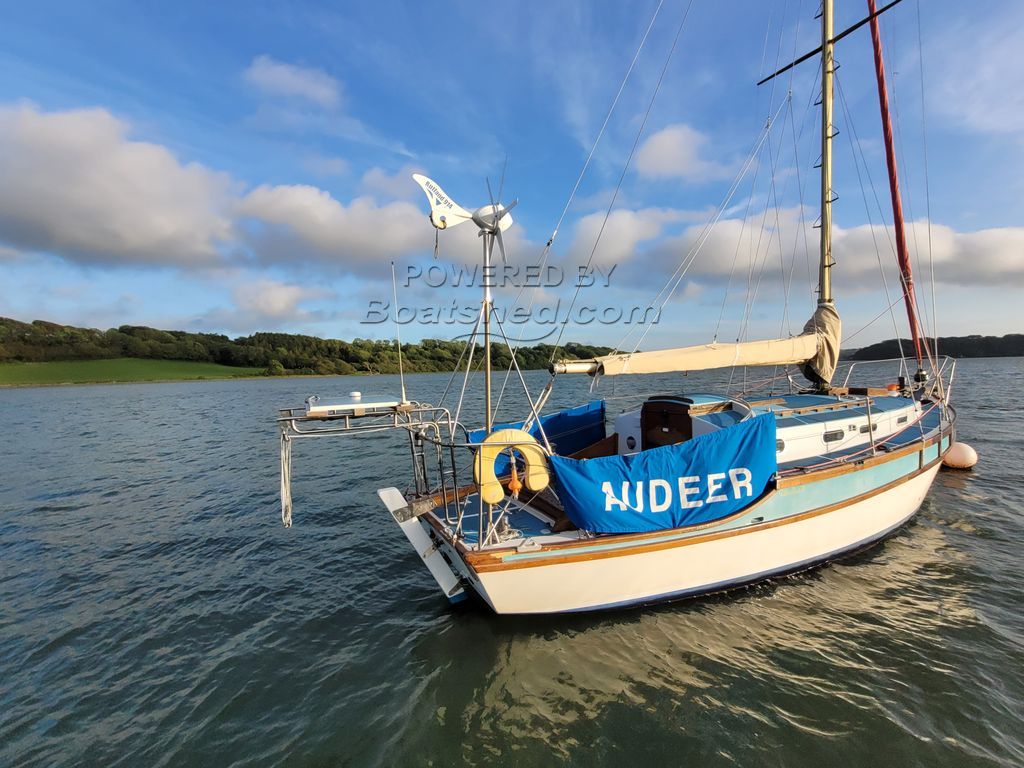
Audeer as purchased on her mooring at
Neyland
This account covers first the scoping of
the refit project with the reasons for the choices made.
The Project
The first thing was to decide what the
end product would be. It is obvious that such projects rarely make economic
sense. There is a truism that even after you have made a careful estimate the
work will take at least twice as long and cost twice as much. For me the project
itself is as important as the final outcome – I enjoy the work, but not really
up to doing it all myself so it was clear that I would have to pay professionals
for much of it. So it became a question of deciding what to do and how/who to do
it. After 20 years of modern/new boats I have got used to things that work
properly so essentially the goal was to bring all the systems up to date,
recognizing that the cost of this would exceed the market value of the boat –
but for me the value would be partly in the doing and partly in the 4 or 5 years
of sailing I hope to get at the end.
The proposed work breaks down into 6
main areas: Engine, Stern gear and rudder, Electrics, Rigging and sails,
Exterior, Interior.
The Engine
The first major decision was whether to
keep the engine. The original engine was a Lister 20hp, but some time in the
early 2000s this had been replaced with a rather odd Perkins/Volvo rated at
35hp. The engine ran well but was badly installed and very shabby but was
arguably too big both physically and power for the boat. My initial thoughts
were to replace it with a secondhand 30hp Perkins/Volvo and even before I bought
the boat had identified that these were then fairly easily found. However when I
actually came to buy there were none available in the configuration I needed.
2021 was a strange year for buying engines as supplies of new engines had dried
up meaning less re-engine jobs, so less used engines. Next option was to have
the old engine out refurbish it and re-install it properly. The cost of this
would however go a long way toward a new engine plus it would still be a 20 year
old engine and not ideal for the boat.
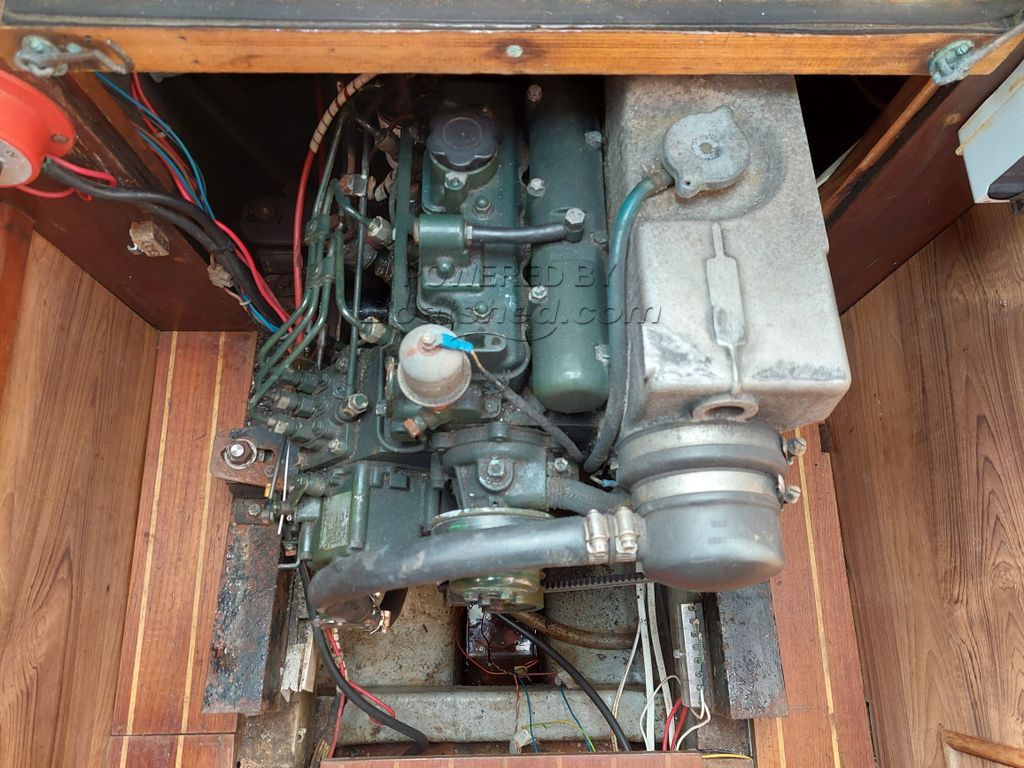
This photo shows the engine as it was
when I viewed the boat, the water strainer was buried behind the bulkhead on the
left hand side and the fuel and oil filters on the engine were also difficult to
reach to change. The fuel cut off and filter were likewise mounted behind the
bulkhead on the other side. Although the engine looks quite clean there was
significant corrosion on the housing for the water pump drive at the bottom
left.
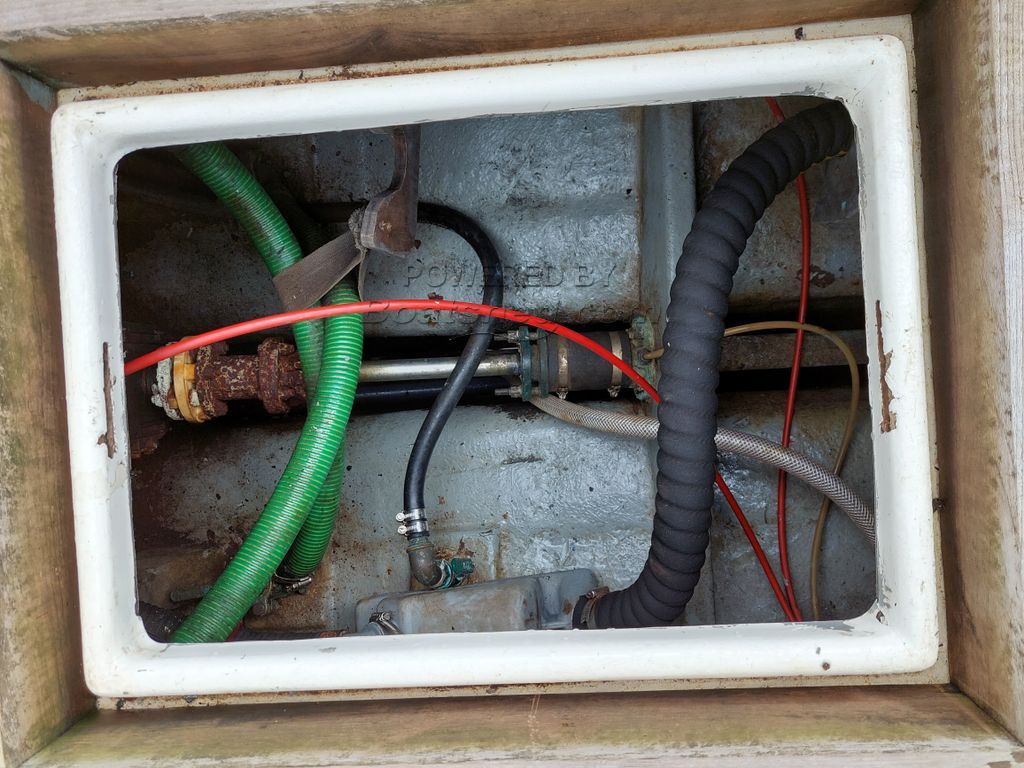
Access to the water intake seacock was
through a hatch in the cockpit sole. The shaft and stuffing box is also visible
here.
I could not do the complete installation
myself as although I have done 2 re-engine jobs in the past they have been much
smaller (and I was much younger and more flexible). So the search started for a
new engine and installer, only to discover that lead times were 3-4 months at
least and several of the installers I talked to did not express any enthusiasm
for doing the job at all! Apart from the engine, I wanted to replace the
flexible coupling, shaft, inboard shaft seal and propeller. The new propeller
would be a Featherstream 17” and I did a lot of research to find the best
combination of engine and reduction box to get the most out of the propeller.
All this was very time consuming and it
was the end of April before I was finally in a position to place an order by
which time prices had gone up and delivery extended to July. The combination
chosen was a Beta 30 with a TMC 2.65 reduction. Coupling is a Vetus Bullflex and
inboard shaft seal a Radice one piece lip seal. The shaft is long (over 1.6m)
and the inboard fitting of the stern tube would be machined to have a bearing
inside and to take the Radice seal rather than the old style stuffing box. This
was an arrangement I also used when I re-engined the Eventide. The advantages
are that the shaft is supported at the aft end by the cutlass bearing and at the
forward end of the tube by this new bearing. The engine is then allowed to move
on its own with the flexible coupling isolating any movement from the shaft. The
result should be almost complete lack of vibration transmitted to the structure
of the boat.
Propeller and rudder
One of my major concerns with taking on
a GH was the poor handling at low speeds, particularly being able to get in and
out of the berth on my own. Being a long keel boat it is slow to turn and does
not like going backwards. Part of the steering problem is due to lack of balance
on the rudder, which also means a heavy helm at times under sail. I had the same
problem with the Eventide and partly solved by building a new rudder with more
area forward of the pivot point.
The last few GHs had a different rudder
from the original with forward balance area and I had the drawings for this, so
decided to rebuild mine to a similar shape. Not quite the same because the
Featherstream prop needs space for the blades to pivot. So I took careful
measurements of the stern gear, aperture in the keel and rudder then drew it out
full size on a board. I had a full size template of the propeller hub and blades
in feathered position indicating where clearance is required from the rudder.
When working out the position of the prop in the aperture I had to take into
account the length of the cutlass housing from the keel plus the amount of
exposed shaft including space for a rope cutter then the length of the prop from
the front face to the aft of the lower feathered blade. The rudder is raked so
the clearance is least at the lowest point of the propeller blade. The result of
my calculations gave me confidence that the chosen propeller would fit and the
revised rudder profile would give about 15% of the new blade area forward of the
pivot.
As I was planning to put the boat back
in the water before the new engine was ready I decided to complete the rudder
rebuild during March and refit it for the short run from Davis’s round to the
club berth. The rudder is made out of solid Iroko and coated in epoxy (but not
sheathed). The forward extension was cut from a piece of Douglas Fir left over
from a spinnaker pole that I made 30 odd years ago for the Eventide! just
waiting in the garage for such a job. After checking it fitted and the prop
clearance was as I calculated it was epoxy bonded, faired and glassed to the
existing rudder.
This photo shows the rudder and stern
gear as it was with the proposed addition to the leading edge of the rudder
being trial fitted.

Electrics
One of the outstanding moments of the
survey day was when Richard reported that “all the electrics work – but don’t
ask me how or why!” Like many old boats the original system was very basic and
owners have added “stuff” over the years so wires run all over the place with no
sense of a plan.
This is the single main battery for the
engine and domestics.
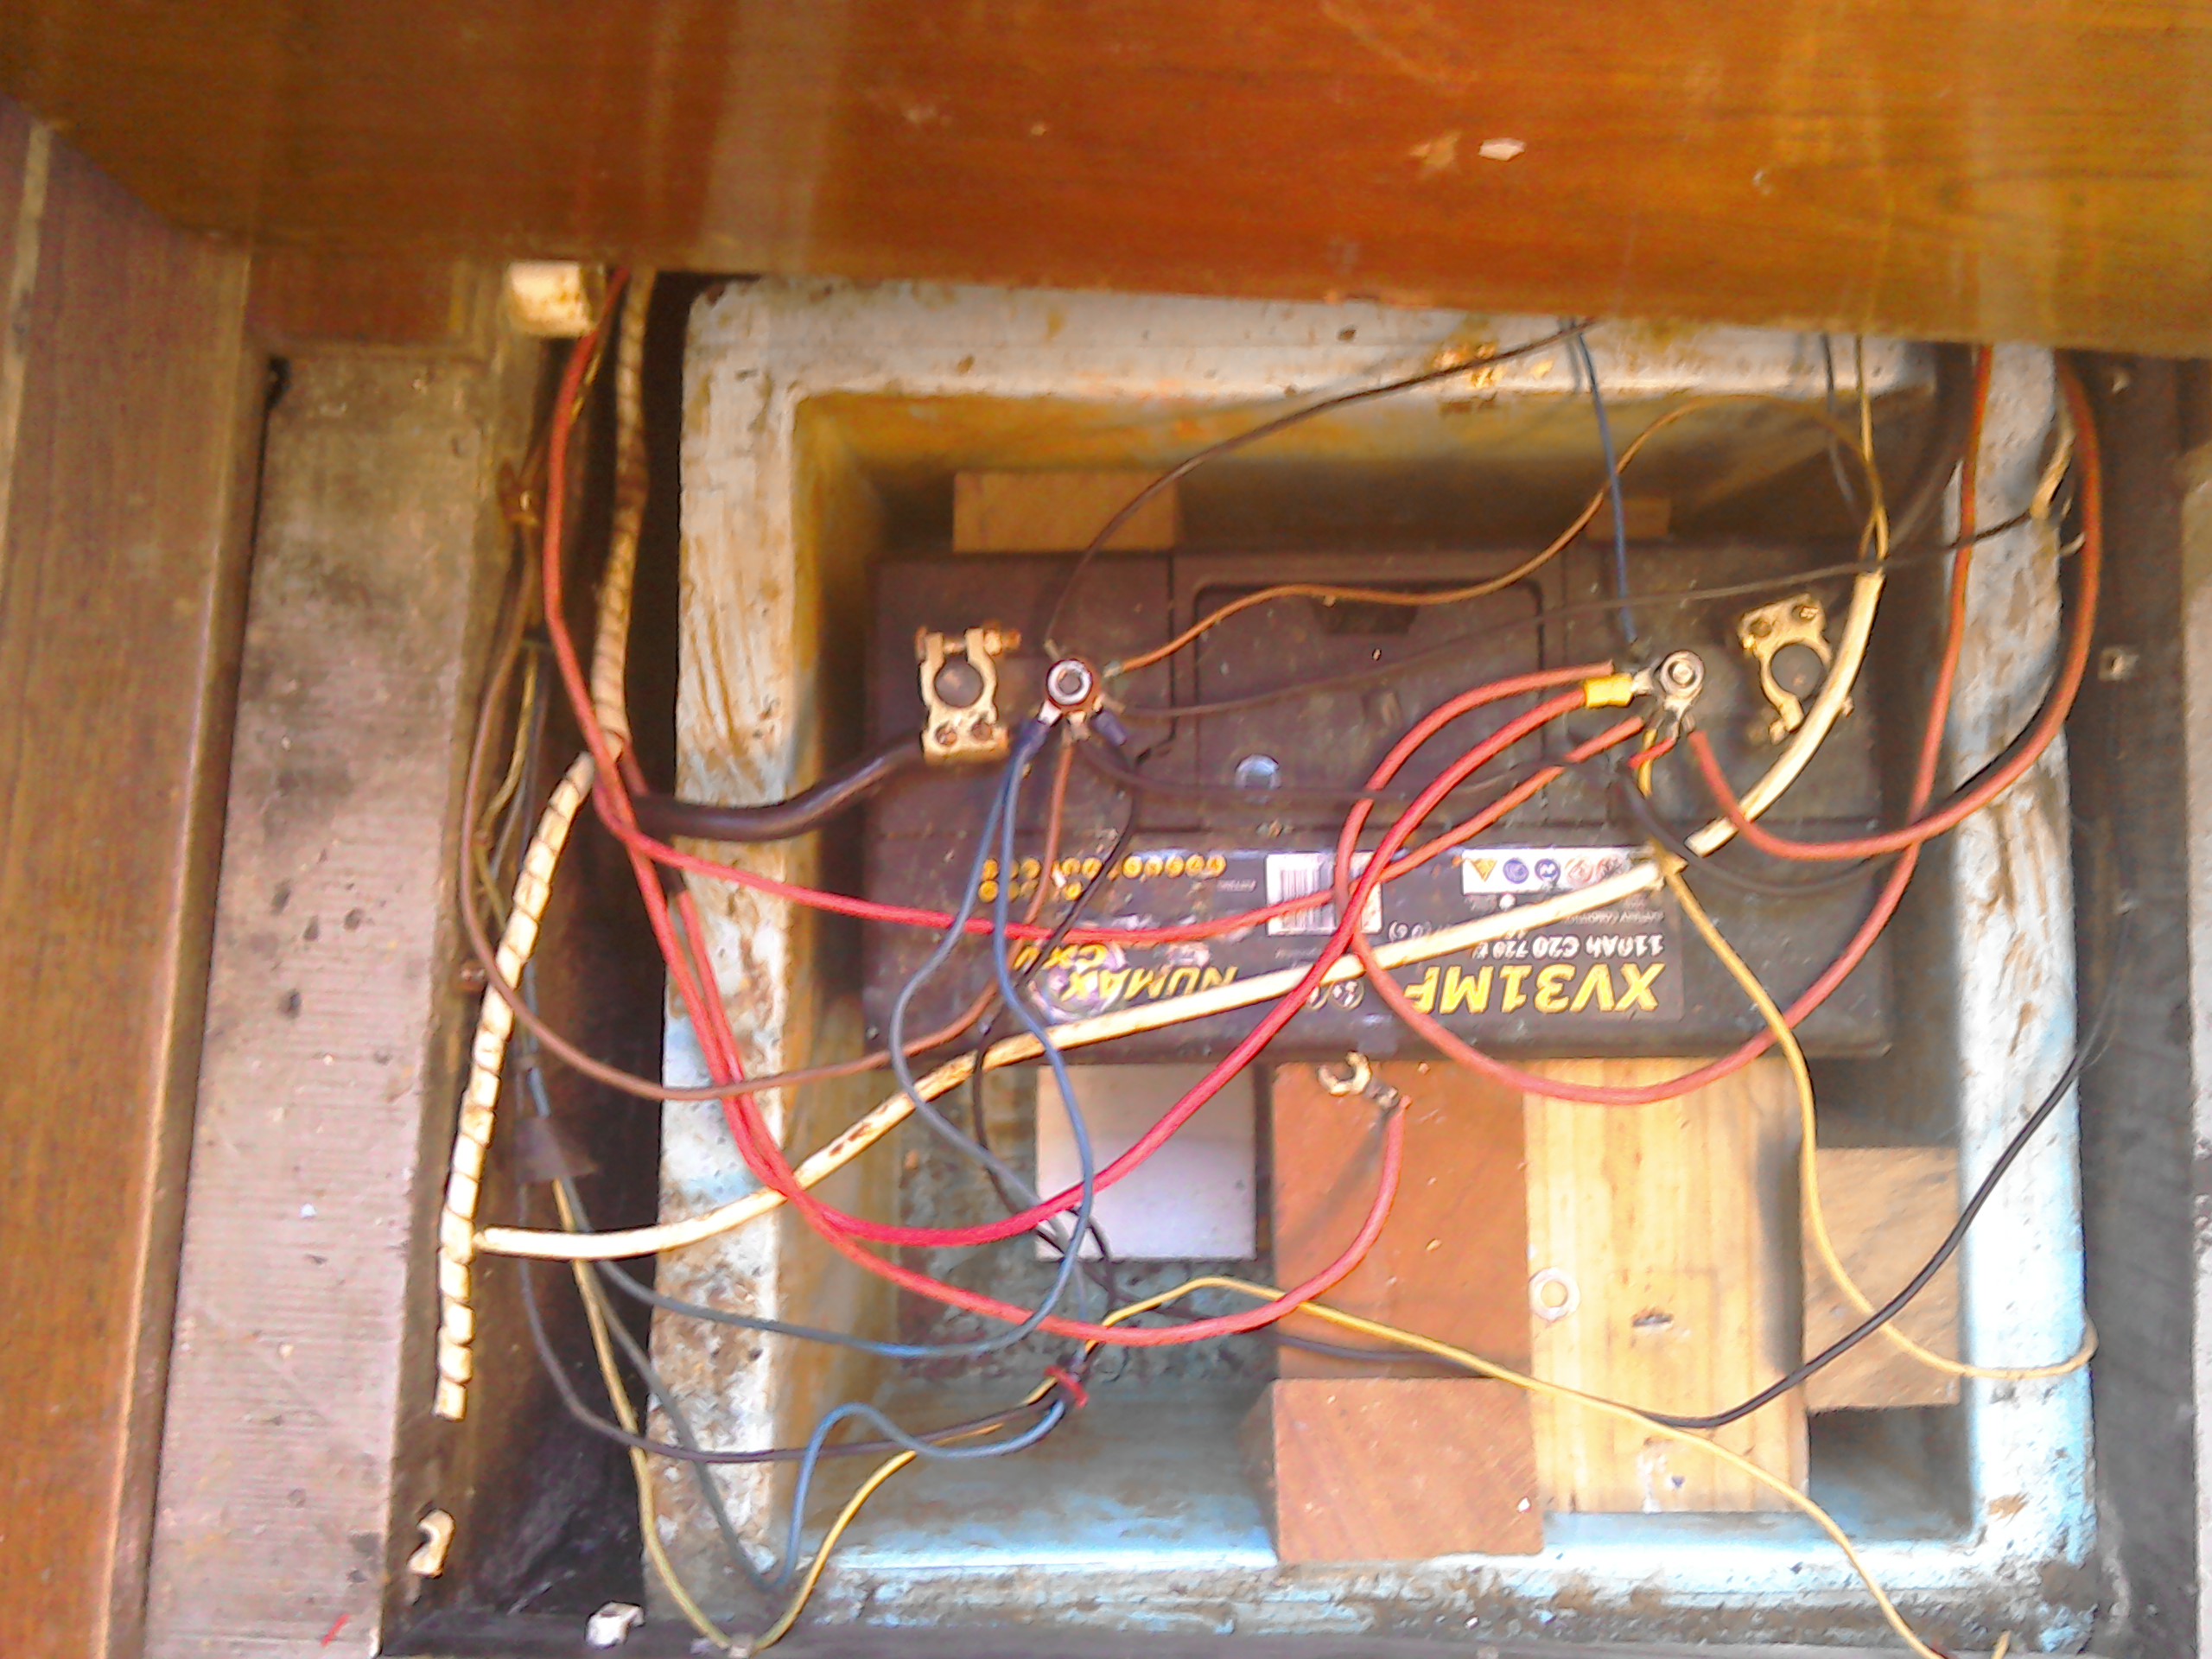
There were no bus bars, fuses nor any
indication of what wires went where. There was a single 1.2.both isolator
switch, but in reality it only switched the engine circuit on and the domestic
switch panel was fed direct from the battery. In addition there was a bow
battery to power the recently installed windlass and that was charged from the
solar panel and
It was clear that the only way forward
was to rip the whole lot out and start again, although the interior lighting
circuits were good enough to be retained, so needed to be linked to the new DC
distribution panel.
The plan was to junk all the old nav
gear apart from a good Garmin GPS and the switch panel and build a new
distribution panel on the aft bulkhead. The new VHF and the Garmin would be
located on a new panel replacing the old switch panel shown in the photo.
The bow battery would be charged through
a new B2B charger from the engine start battery. This is a common arrangement
that avoids running heavy cables through the boat if the windlass and/or the
thruster are powered from the house bank.
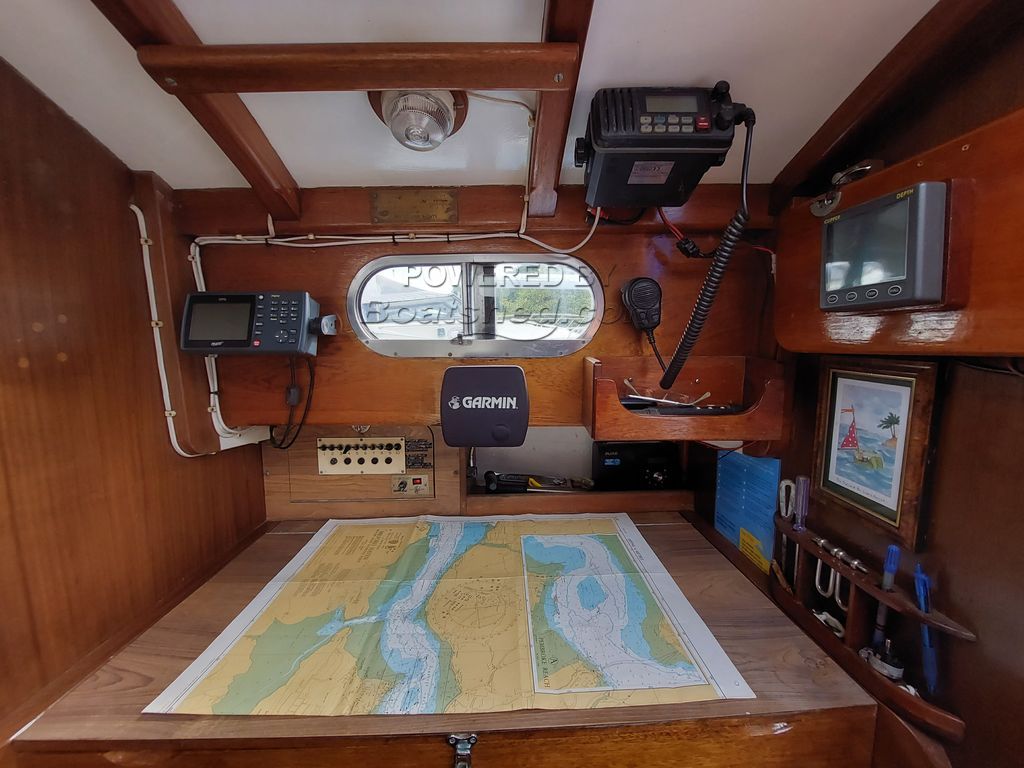
Chart table, switch panel and nav gear
There was a rudimentary 240V system but
it was only one outlet from an RCD. That was removed but the shorepower inlet in
the bridge deck retained.
Rigging and sails
The GH has a stubby single spreader
masthead rig with a split backstay and two forestays, one to the stemhead with a
Furlex and genoa and the second to a short bowsprit. The large main was
originally roller reefed but converted to slab reefing. All lines handled at the
mast. This modest rig suited the original purpose of the boat, particularly long
distance cruising, but performance is not good in light airs or going to wind.
The mainsail was poor but usable, but
the genoa was an excellent lightly used Hood made of Vectran. Standing rigging
looked OK, but from the sketchy records that came with the boat was probably 15
years old. Running rigging was a bit shabby but all intact. It was clear that
although the rig was usable, insurers would insist on standing rig replacement.
As the mast had to come down anyway for road transport there was an opportunity
to complete overhaul the rigging, including assessing the sails and canvas work.
Exterior
The GRP hull is very sound (originally
moulded under Lloyds supervision) and epoxy coated below the waterline. Moisture
readings were low and consistent. There were some spots where the epoxy had
become detached. The gel coat is original but faded and stained. The ballast is
encapsulated so no worries about keel leaks and the attachment of the steel
bilge plates is sound. The plates however had patches of rust where the
galvanizing had failed.
There is a lot of wood trim on both the
hull and the coachroof, most of it teak but some iroko on the toerails and
rubbing strake. Probably repairs at some time in the past. Although the colour
mismatch rather spoils the look the repairs seem to have been done properly.
Varnish was mostly intact but faded and starting to break down.
The main deck and coachroof are sheathed
ply with Treadmaster covering in non slip areas. The aft deck and cockpit are a
one piece moulding with solid teak coamings and trim. The boat was one of the
first to have the GRP moulding which is a big plus as it largely eliminates the
weak spots of the all timber construction. However, water had got in around the
framing for the companionway which sits on the join between the GRP moulding and
the main bulkhead. There was evidence off earlier repairs on the forward end of
the coachroof and the starboard foredeck. While the latter seemed to still be
sound, the coachroof showed evidence of further water ingress and localized rot.
Overall much as expected and better than
other boats I had considered. I have experience repairing this sort of damage
from work I did on the Eventide. I sealed the places where water was getting in
with a plan to investigate further in the spring.
Interior
One of the attractions of the GH when
new was the willingness of the builder to incorporate individual owners’ ideas
because there were no internal mouldings and the only fixed point was the mast
step on the coachroof that needed a fore and aft bulkhead
plus two transverse bulkheads. In reality this fixed the position of the
toilet compartment and in almost all boats the central part of the cabin was the
same. The variations came mainly in the aft where chart tables and galleys
varied and in the saloon where some boats had dinettes. Most forecabins had
normal V berths but a few like Audeer had a large single on the starboard side.
Buyers tended to follow what had been built recently but make small changes such
as lockers and tables. Sometimes a buyer would ask for major changes such as the
dinette and that would become the “standard” for the next few boats. Apart from
the forecabin Audeer has the most common layout.
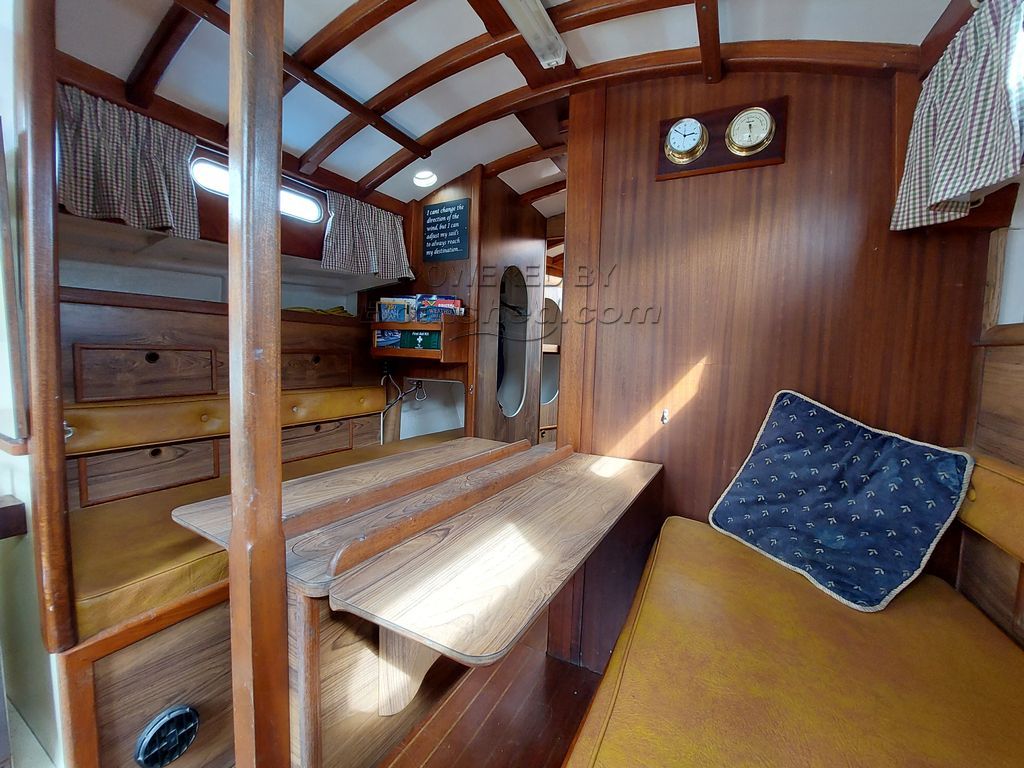
Saloon of Audeer
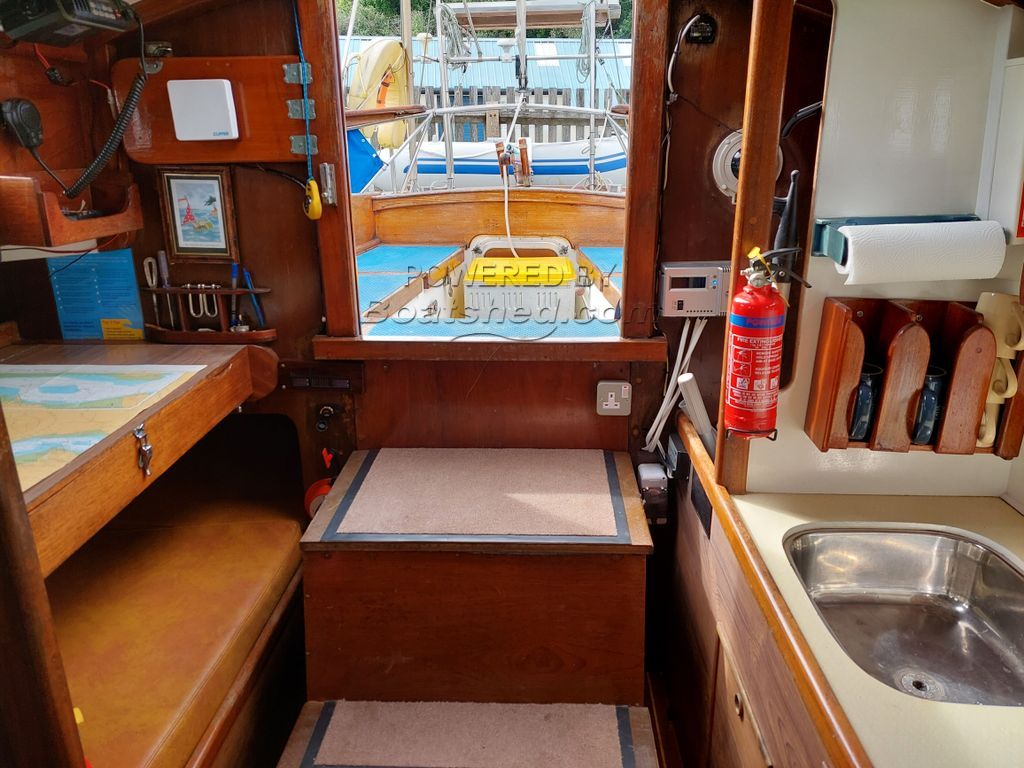
Chart table, galley and hanging locker
Audeer
Fortunately this is the layout I like
most except that I would prefer the conventional fore cabin, but can live with
what there is. The woodwork, mostly teak with sapele veneered bulkheads is in
excellent condition and the previous owner had done a lot of work cleaning and
painting the under berth lockers and bilges so compared with many old boats it
had no mould or hidden nasties.
The only really negative point is the
paneling of the berth fronts and hanging lockers plus the table tops are
finished in “teak” Formica which was very popular at the time. It looks cheap
now as well as being dark, but shows no wear. A number of boats I have seen have
white painted panels and even bulkheads which looks both more modern and
traditional. I had refinished the inside of the Eventide in a similar way with a
mixture of white and mahogany trim with light blue denim style fabric for the
upholstery so decided to do the same here.

Interior of Eventide 26 Tranona
E-mail us at enquiries@eventides.org.uk