|
Now just look what I have turned
up here. The builder, John was well known to me, he lived but a few
hundred yards away! I remembered I still had a copy of this and thought
Paul, and a few others might like to see it. J.W.
BUILDING Tango Two 26ft. E1012
February, a couple of weeks after the boat was turned over,
the
weather was bitterly cold and the only work we could do was to remove the
building moulds and replace them with struts at raised gunwhale level. This enabled
us to see the interior as a whole and to transfer planned measurements to actual
locations. From there we went on to prefabricate the various internal
joinery that we had decided to put in next. Before proceeding too far, however,
we painted the inside to chine level with P.C.P. penetrating wood preservative,
metallic pink primer and Danboline. As this will undoubtedly be worn in
places before we finish the interior fitting it would seem extra work but should
the building shelter leak the paint will prevent the planking getting sodden.
And the shelter does now leak.
I decided upon the
major points with my partner, Les Gilby. We had drawn this layout into our own
set of plans for at this stage the official plans have a very limited use.
We only referred to the bought plans for details of fastenings, the occasional
measurement and hoped for guidance. However a separate article will be needed to
cover the shortcomings of the official plans and that most frustrating piece of
literature " Building Chine Boats ".
The frames,
futtocks and bilge stringers were all cut and fixed prior to planking when one
can see what and where to cut and fit much more easily. A suggestion here is
that the bulkheads too be fitted if one has sufficient confidence and certainty
in his interior layout. In this manner a much closer fit can be obtained with
the framing and they are really built into the boat due to the fairing off and
tighter fastening. With the bulkheads also faired off to the planking the glue
will seal the end laminates and obviate the tedious job of getting paint into
inaccessible places next to the skin. I would watch out that if one is going to
sheath it is almost essential to build in the frames, futtocks and bilge
stringers in this manner to avoid putting screws or nails through the sheathing
; this job being best done when the boat is inverted and the weight of resin and
fibreglass working for you. The alternative of sheathing the right way up is
messy and uncertain with resin and mat.
An obvious point
from the photograph is that we have rather more than the usual frames and
futtocks. Some of these were installed due to the rather uncertain attitude of
the plans as to where they should be positioned, the plan and profile of the 26'
version being somewhat inconsistent, and some of them built in by our own desire
to strengthen what we considered vast areas 0of planking between '0', '2' and
'3' bottom frames, that lacked support. One could understandably mistake
the resultant framing as belonging to a Water Witch ! Similarly the breast hooks
were our own additions to the construction. Funny maybe, but we prefer it. A
point of possible interest is that when fashioning the raised deck futtocks we
took the side frame through from chine to main g'n'l and through the side. That
part of the frame which protruded past the side was then sawn off and replaced
upon the inside.
This provides a
much stronger union than butting the ends at mid main g'n'l. Similarly, where
side and bottom frames butted due to bulkheads or other interior members, we
screwed and glued knees. On top of the chine we glued fillets to prevent the
collection of water from bilge or condensation. This was in preference to
fairing the chine away on the inside to allow a free run off of moisture.
The constructional
members in place, are the four mast supports and their cross braces at raised
gunwale level. (Loo to starboard and wardrobe or sail bin to port). Aft, the
main bulkhead framing is taking shape, the posts being angled to take wash
boards in preference to doors. The change in sheer has been carried aft to the
main bulkhead, the resultant space gained below being of great benefit. The
drawback of water rushing along the side deck to empty into the cockpit will be
overcome by carrying the cockpit coaming past the main bulkhead and forming a
deflecting knuckle on the cabin sides.
The bilge
stringers were copper nailed through the frames, two nails per frame, round on
the inside. We had quite a time getting copper nails of the necessary size and
length, 3~ to 4 inches. The odd nail seen protruding at a drunken angle from the
bilge stringer was to prevent a pilot hole from being blocked with paint, we
bored these pilot holes at the fore and aft ends of the bilge plates, using the
bilge plate template when the boat was inverted. Thus the bilge keels will be
readily located and only the intermediate holes will need boring.
Incidentally, the
cramps in use were made by bending mild steel bar to shape and drilling for a
set bolt. With jaws of 4 to 4-2~ inches they make simple and strong cramps. The
other cramps5. 5", 6" and 12" were similarly constructed by a blacksmith friend
utilising 8" x1" m/s bar curved in the flat, the screw being just studding
through suitable nuts welded to the upper end of the jaws whilst the lower end
had a simple pressure pad welded on. Crude but cheap and effective.
We have come a
long way although not afloat as we had hoped to be. This would have meant
launching with only the bare necessities of interior fittings and the prospect
of finishing off far from home and its building facilities. Couple with that two
wives with long lists of jobs to be done" and understandably we decided to carry
straight on. Of course, this also helps to keep down insurance costs and mooring
fees, to say nothing of travelling time. However, roll on next SPRING !
We have completely
decked, including cabin and coach roof. The deck has been sheathed with resin
and fibreglass, 50 % of the interior work has been done including, cooker,
galley layout, oilskin locker and engine.
Tango Two " has
several modifications from the original plans, mostly with M.G.s knowledge. I
list the main modifications below.
1.extended
deadwood as per plans.
2.transom hung
rudder as per plans.
3.enlarged cockpit
to 'accommodate helmsman in separate cockpit aft of "crews"
cockpit.
4.extended coach
roof forward to give much better headroom below.
We had a builders
meet at the end of September, a highly successful one, despite several heavy
downpours of rain. About 35 attended and at one time we had 15 people in the
boat. I had visions of the boat on its cradle sliding rapidly downhill due to
the mud underfoot, taking with it trellis, rose gardens and cherished dahlia
beds finally coming to rest in a small swimming pool in a neighbours garden 100
yards away.
The first guest
'arrived at 2.15 p.m. and the last departed at 7.45 p.m. Unfortunately due to
the weather and the continual preoccupation with building discussions we did not
obtain any photographs. However I hope that by next March we will have the boat
out ready for launching.
John P. KEENE.
August 2005, 'Fram' update.


The above two pictures sent in by Paul, show
Fram with the new planking epoxied into place and sanded off ready for coating.
the second picture shows the epoxy and glass cloth in place, more work to do but
the back of it certainly broken! He has covered all of FRAM in cloth and
epoxy, not just up to the water line and the ply around the hatch is 3 x 6mm WBP
ply
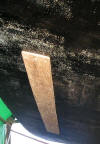 Left. the bilge keel holes lined up ready for redrilling and refitting
keels.


 Left, a new double coaming M.G. hatch under construction, focsle marked out,
then hatch glued in place...
Keep at it Paul, it looks good.
John
August 2005
At the Trafalgar night
Celebrations, October 21st 2005, Paul pressed a CD into my hand, 'progress
to date' he said. Wow. He has been busy! Browse through all
the great pics below to get a taste of his handiwork. I am certain John
Keene, the original builder would be pleased to know she was being so well
looked after.
_small.jpg)
 Here the stern deck area comes under repair, a new central beam going in.


 Real timber being marked and cut!

 the new ply panels seen against the old beams and frames that were still OK.

 Hull panels going on.


 Braced and clamped, new panels round the cabin, cockpit and on deck.

 The cabintop and using weights to hold down the ply. Is this two layers
of thin ply I wonder?

 Repairs to the forefoot and keel area.
 Bilge keels. these were salvaged from 'Francharlie' cleaned up and
galvanised? Or are they just painted with 'Zinga' This magic coating is a zinc
rich goop that you are supposed to be able to paint over...


 The new panels being filled with epoxy and faired off.
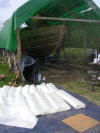


 Now the cloth goes on. not easy to do upside down....


 But many hands get the job done. Epoxy and glass to the WL. Epoxy
all over.

 Now what looks like a black epoxy tar, for beneath the WL.
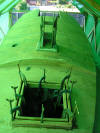

 Cabintop faired off, MG double coaming hatch rebuilt...


 The effect is great, all one colour!


 Timbers sawn, scarf joints made and glued together.
 Finally for now, the cockpit/cabin bulkhead, showing the high standard of
finish to date.
Well done Paul, she will be a credit to you.... Next
instalment soon.
October 2005,
John
November 2006
Jenny has just sent in these
pics of 'Fram'
and Paul. You can tell by the grin that it has all been worth it!
Dear John,
Paul Usher and I launched Fram at Buckler's Hard on the Beaulieu River
on 1st Sept 06. We've been too busy since then to down load all the
photos onto a disc and send them to you. Here's a few to be going on
with.. We'll be pulling her out of the water soon (she's moored in
Portsmouth Harbour for the moment, awaiting our club berth at Fareham
Yacht Club on Fareham Creek). The old Stuart Turner engine
(reconditioned) is doing great, though we've had a small problem with
water ingress into the bilges through the few mid-keel bolts we didn't
replace, so we'll do them soon. Otherwise, she sails like a dream.
Promise to get you the full CD of pictures soonest.
kind regards
Jenni
They will be hauling her out
shortly, with just the keel bolts needing attention now.
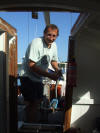


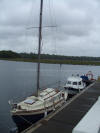

In the pics you can see the
Stuart Turner inboard, love them or hate them.... I had two and they were
great, just not enough poke for me, bet that one will eventually be swopped for
a 15hp diesel! She is on her mooring here at Portsmouth looking very smart!
John
October 2007. The builder of Tango
Two had a daughter, Debbie, who whilst browsing the web found this site and
the references to her father's boat. She was so impressed that it was
still sailing and being enjoyed that she asked to be put in touch with the
new owner, we were able to oblige. Debbie has now rummaged the family
photo album and sent in these pics of Tango Two in the building in that back
garden in Cranham, Upminster... |


![]()