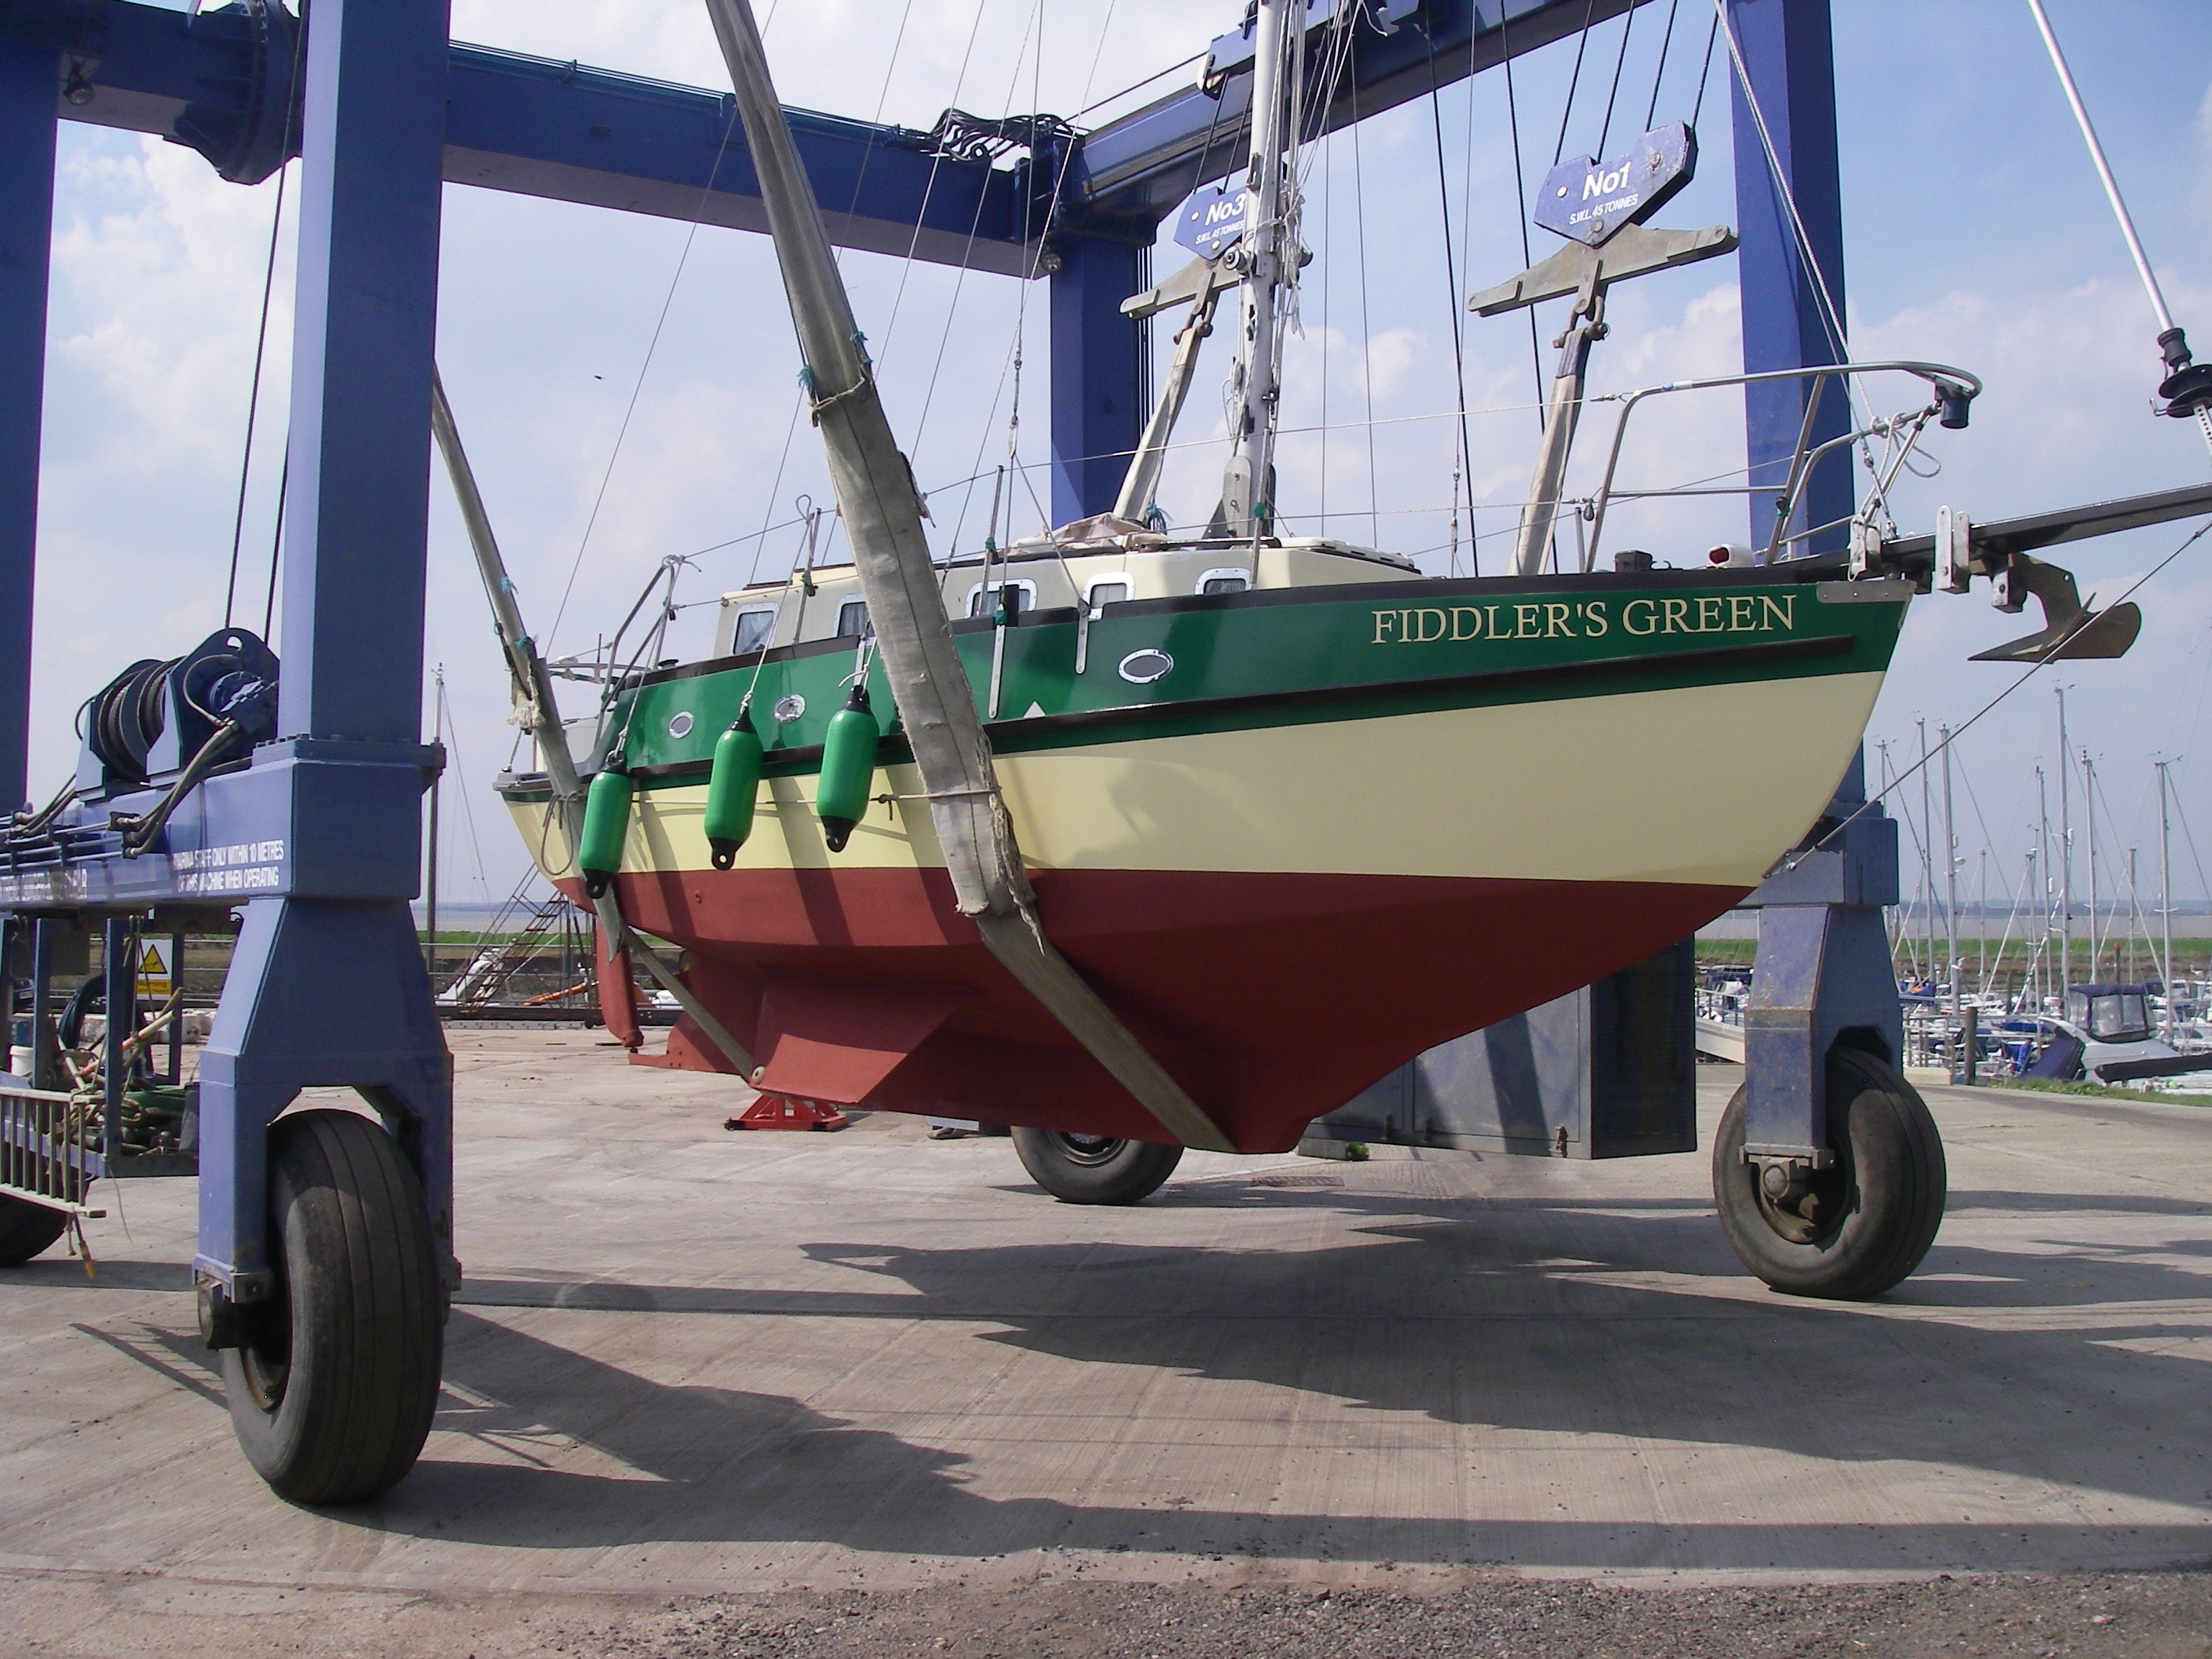
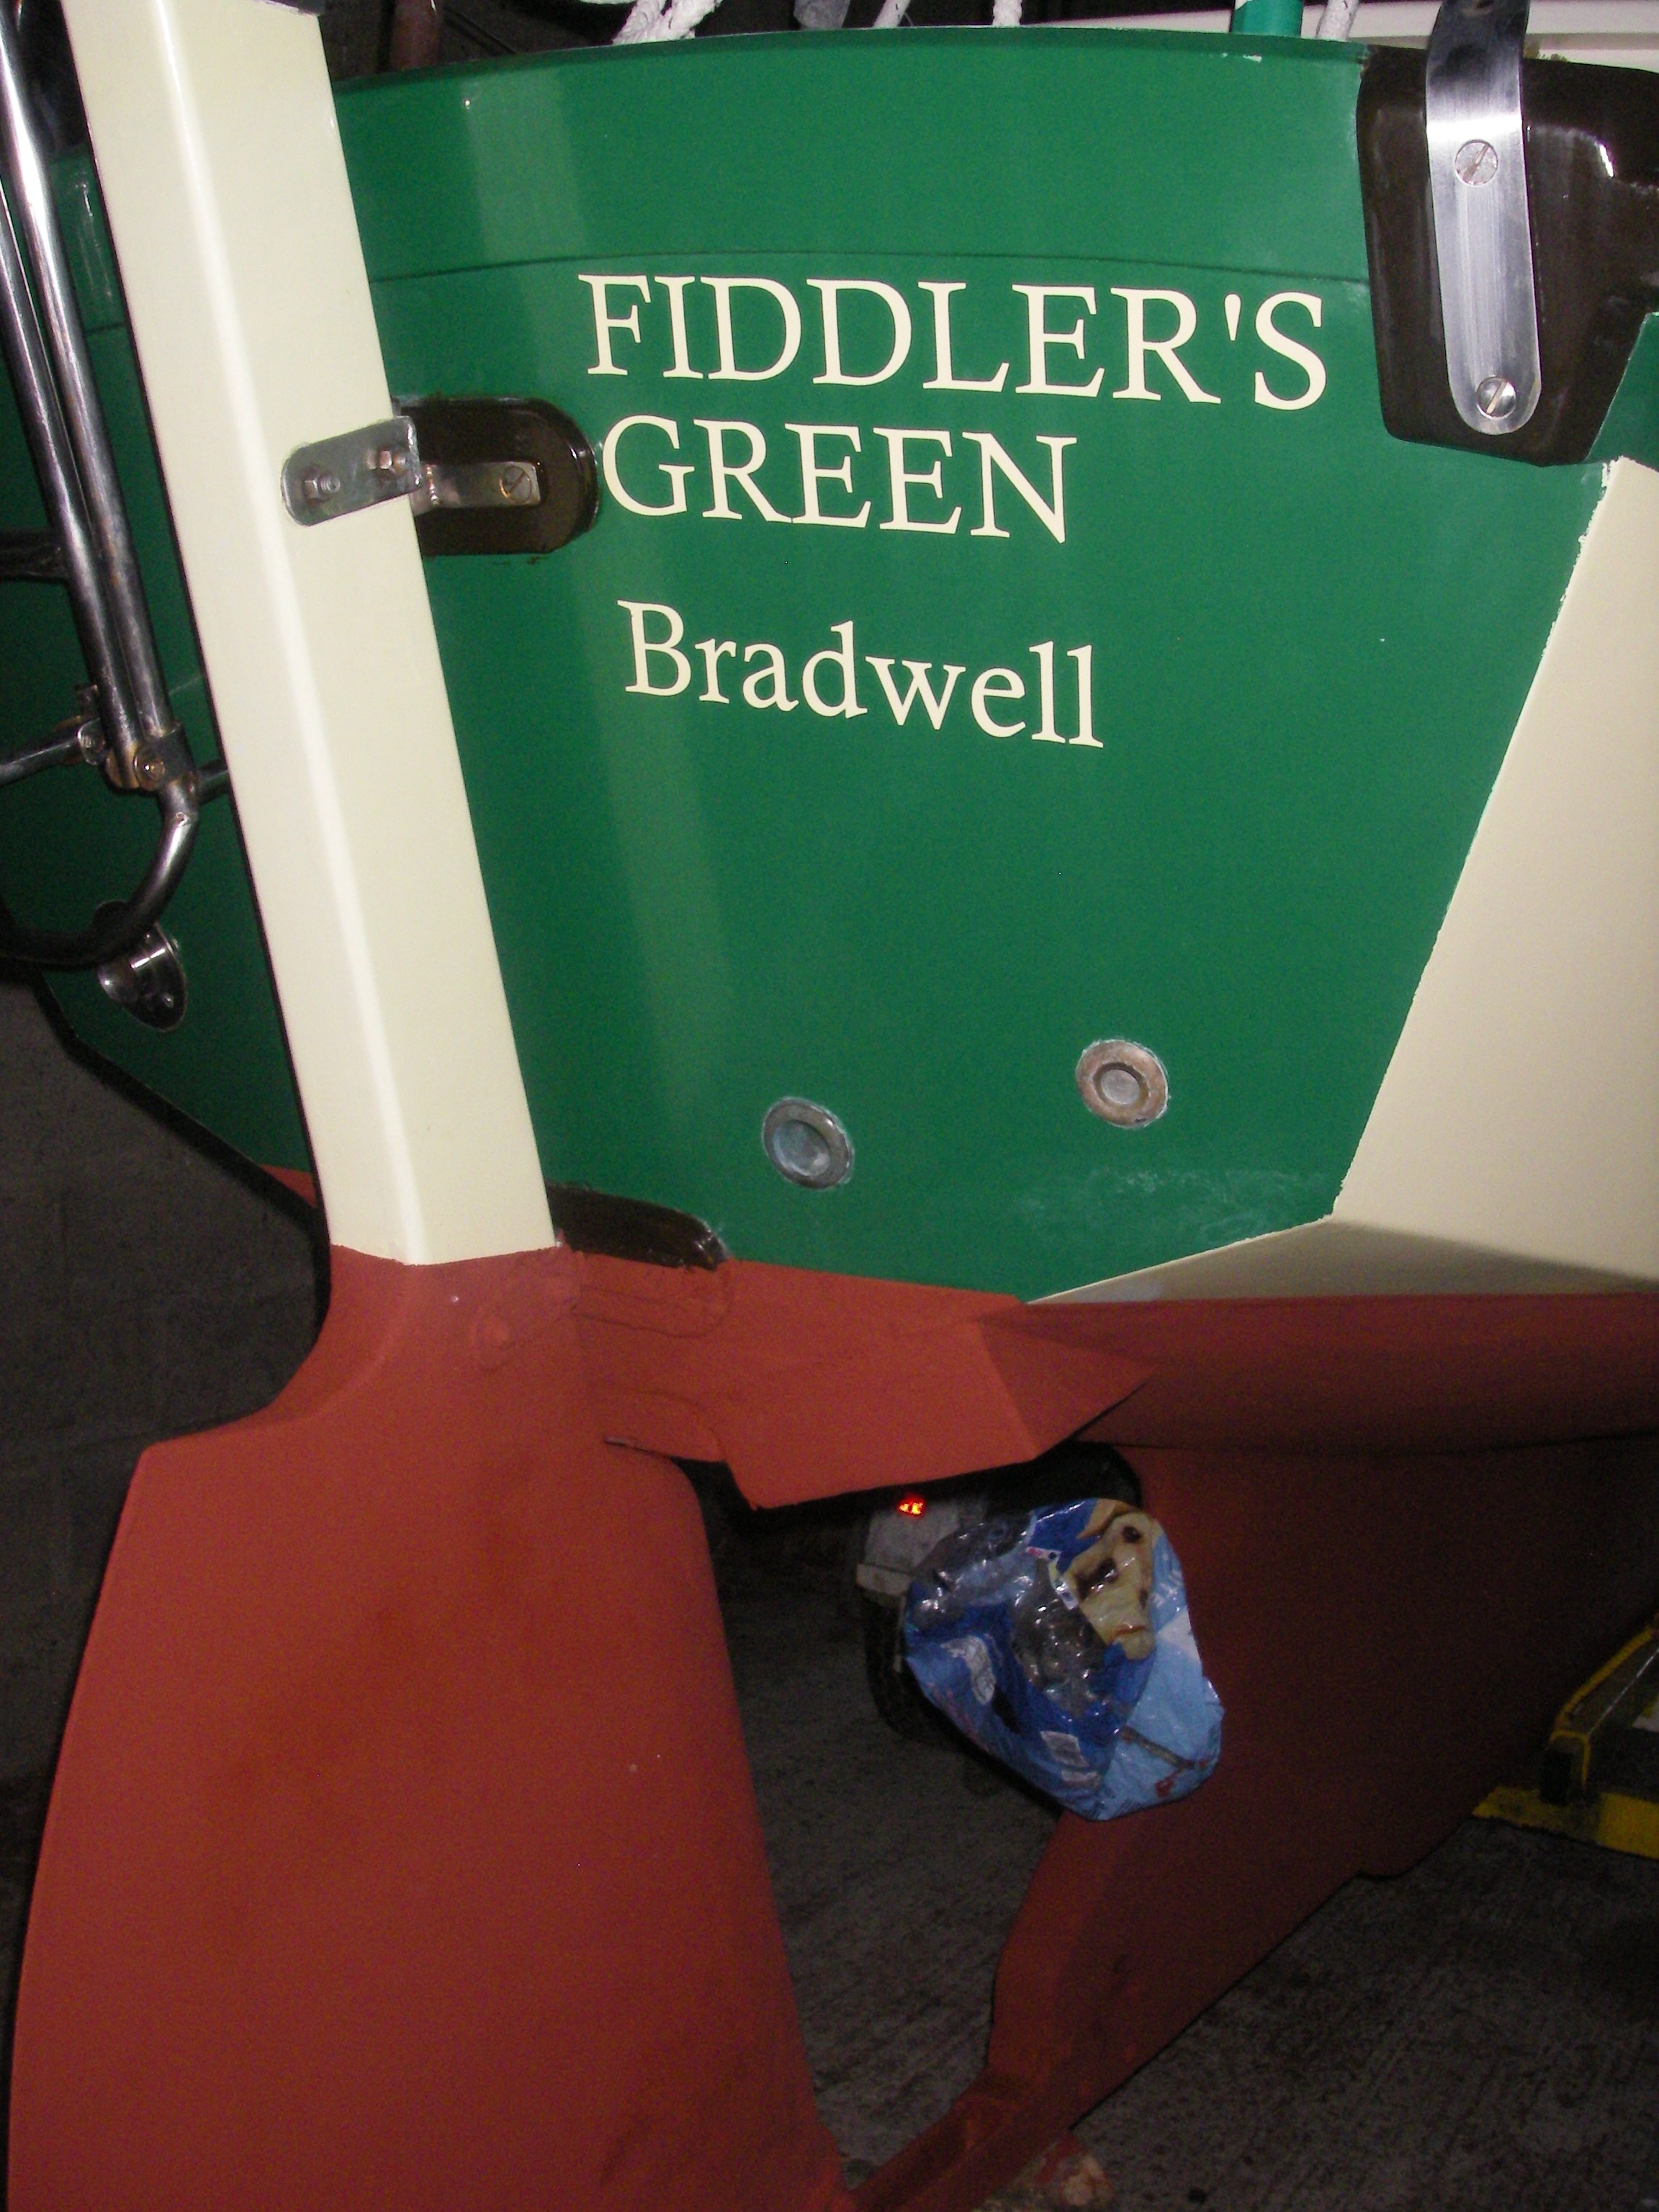
Preparing Fiddler's Green,
first for her 2013 adventure, sailing round England, Wales
and a bit of Scotland! We got over half way..
The preparation goes on, for the planned
second leg. South then west to the Scillies and thence north back to Scotland...
(and home on the back of an Artic!)
It was postponed, but now on for 2018. Mid June to mid August, anyone up for a cruise in company!????
(you have to scroll to the bottom of the page of course, for the latest bit!)
These pages will be updated on an almost daily, certainly on a weekly basis, as the boat is prepared and then the log itself, as often as possible as we set off on our big adventure.
The big plan....
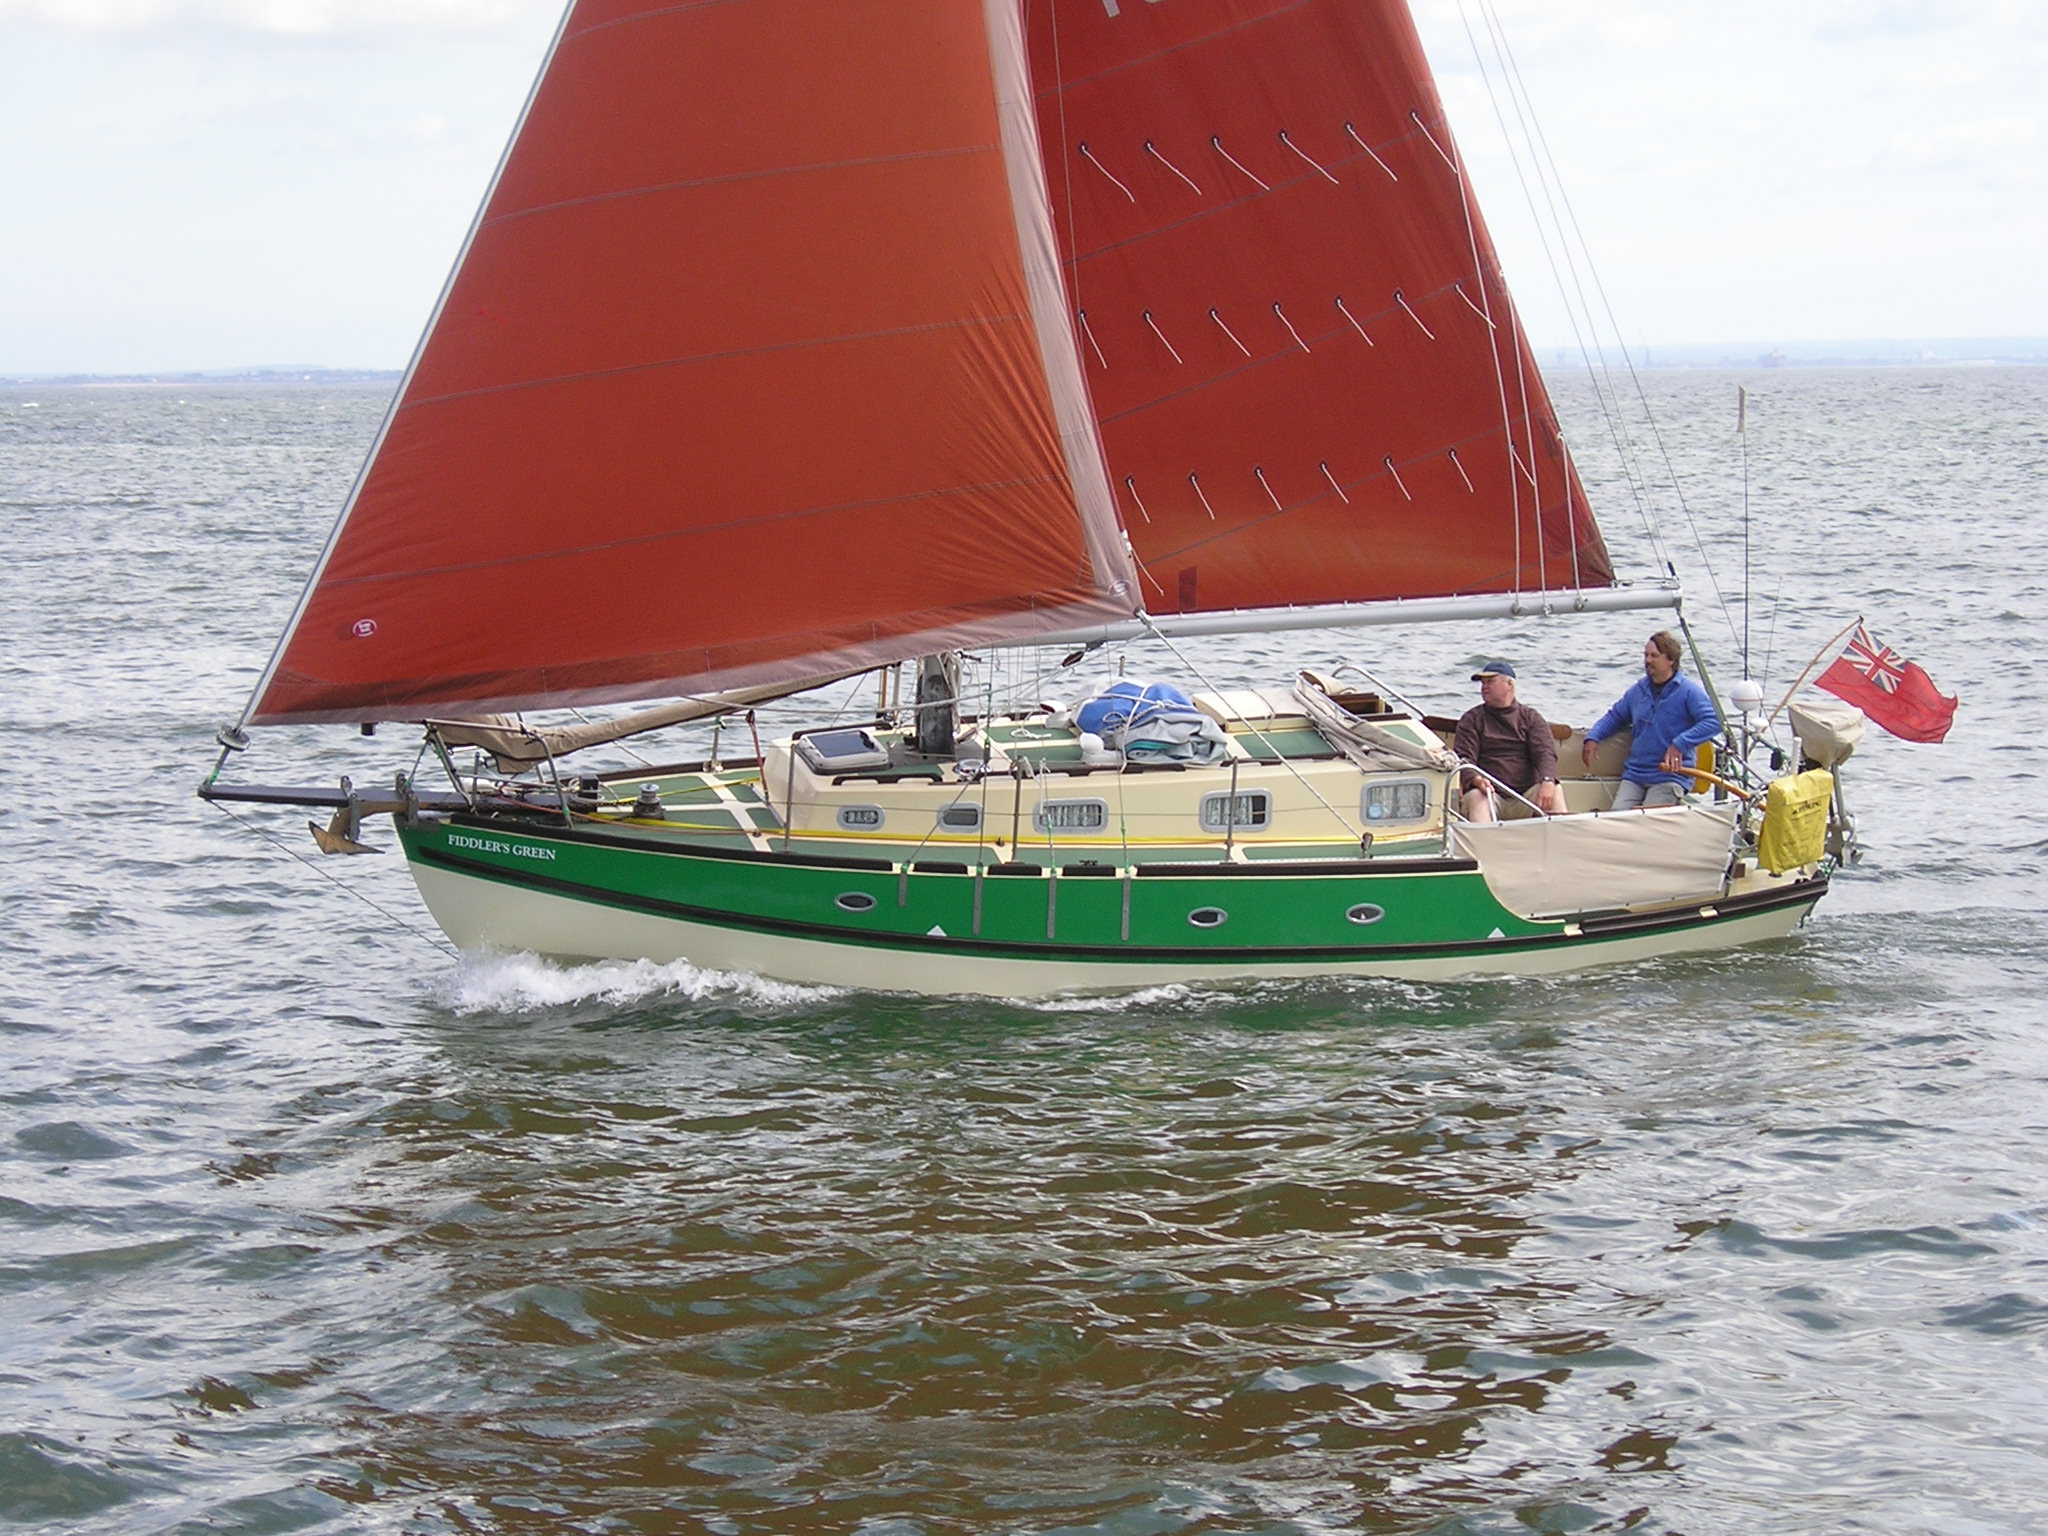
John wants to sail his Eventide, ‘Fiddler’s Green’ round England, part of Scotland, touching in at Ireland and Wales, maybe the Isle of Man and the Scillies, on the way.

The basic idea is to leave the Blackwater, in May 2013 and head north, coastal sailing, up the east coast, stopping off at various ports of call, sailing by day with no leg longer than 50 miles if possible. The intention is to turn into the Moray Firth and head for Inverness and the Caledonian Canal. Crossing Scotland, via Loch Ness, then down the west coast of Scotland and England, going where the wind blows, so long as it blows gently!
Could be the trip of a lifetime, or fizzle out in Lowestoft if the weather is against me!
The trip to Cornwall 12 years back showed me that you have to be flexible. This time I have arranged to close my business for 3 months, passing all work onto the main Seagull dealer, but continuing to answer their technical queries as normal. I hope to be in touch by phone most, if not all the way. I am also looking into an easy way of writing up the log and publishing on the net all the time, by using modern technology, most things are possible. I’ve just got to get my head round it.
The study table is already covered in new charts, the boat is as fit as it will ever be, fully surveyed OK 2 years back and just needs the normal fitting out. Motor is good and will just have the normal oil and filter changes before launch. The sails have been checked by the sail maker, the rigging replaced 2 years ago and all checked OK. All gear OK, I hope I am fit for it!
This trip will not be tackled without a crew and I have already spoken to a few about this. You have to be prepared to join the ship wherever I might be. Flexibility will be the key. If anyone with sailing experience would like to sail part, (or all) of the trip with me, (or sail in company in your own boat) please get in touch.
John
P.S. now in 2018, planning to set off on the second leg, Mid June to Mid August approx.
John was awarded the Barry Sturrock Seamanship trophy in 2014, for the content of these pages.
(2018 and we are getting her ready to complete the circle. )
|
|
Over the coming months I will explain what we
are doing during the winter fit out and what gear we are renovating or
repairing, and what extras we have to buy to undertake the trip. As you probably are all aware I run a small business, a hobby gone mad, supplying parts for British Seagull Outboards. One of my first concerns was how to go off sailing and still help my customers. Here I have struck lucky, as I have an excellent relationship with the parent company, British Seagull and the owners Sheridan Marine. Indeed Jackie who runs Seagulls is the daughter of Pip Sporle the surveyor who helped me in the building of F.G.! Jackie has stepped in to take all the mails, and supply spares so long as I carry on answering all the technical enquires for her! No problem. |
||
|
The Crew... |
|||
|
Skipper John
|
The next major issue was crew. I would
not attempt this alone. (I have serious issues with solo sailors! It is
impossible to comply with the look out provisions of the collision regs!).
Fortunately I have a number of stalwart friends who often sail with me, so
it has not taken long to fill the vacancies, but there is always room for a
third hand. At the moment the plan is to start with Phil as crew till end of May, then Brian the fund Manager steps in, mid June Keith the brother in law joins for a couple of weeks. 1st July my daughter, an accomplished sailor and RYA coastal skipper, practical, will join me for the duration of the trip, or at least till the 28th. Mid July, when the schools break up, the grandson, Brandon will come aboard!
|
||
|
Phil
|
Phil, long time friend and work colleague from our days on the London river, has sailed with me all over the place, Netherlands to Cornwall. Regular crew. He will be crew from day 1 till June. Sails his own 21ft Pandora in Norfolk. | ||
|
Brian
|
Brian, long time friend and sailing companion, also our fund Manager. Has sailed to the Netherlands with me. (This prove handy as he speaks Dutch). Has his own 30ft cat that looks just like an Eventide side on! Joins the ship 1st June. Wants to sail into Anstruther instead of being towed in! (another story!) | ||
|
Keith
|
Keith, long time friend and my brother in law! Ace tractor handler and tow master for F.G.'s trips on the road and oft my sailing companion. Has sailed to Holland and to and from the west country with me and back to the Blackwater. Many years of coastal cruising with me. He will be with me mid June for a couple of weeks. (at least). Says as a retired farmer he is skilled at 'Fettling'! (normally involves the use of a 4lb hammer!) | ||
|
Jenny
|
Jenny my daughter, an outdoors person, leads treks across the Sahara, travels the world guiding explorers and walkers. She has her Coastal Skipper theory and practical, Good crew. Will be with me from July till 28th. One day she will be F.G.'s Skipper! | ||
|
Brandon and Paul
|
Brandon the grandson, and his dad Paul are going to join me for the last leg along the south coast and back into the Thames Estuary. Brandon sails an Oppie, as well as plays with the 9ft dinghy in the picture, but has been forward lookout on many occasions on board! Paul is a novice sailor, but as he is a plumber, good man to have aboard! will keep the water where it belongs! | ||
|
I was hoping to be back by the end of July,
well a bit ambitious maybe, the trip will probably take till early to mid
August... got to be back for my birthday on the 12th so I can say I
did this when I was 65! Doubtless will be looking for more crew, so nearer the date....
|
|||
|
Preparing the boat and gear! |
|||
|
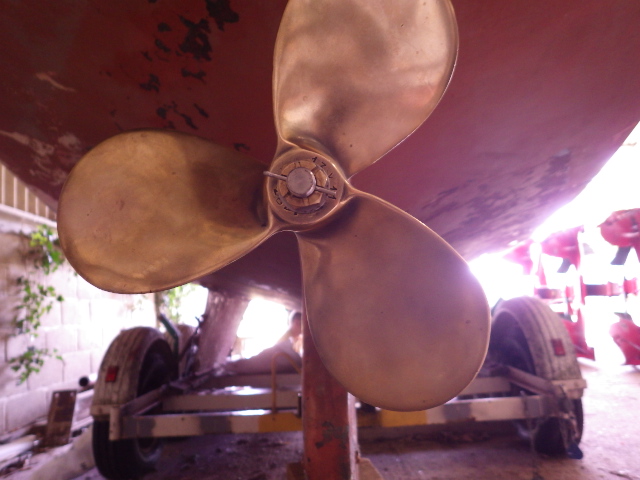
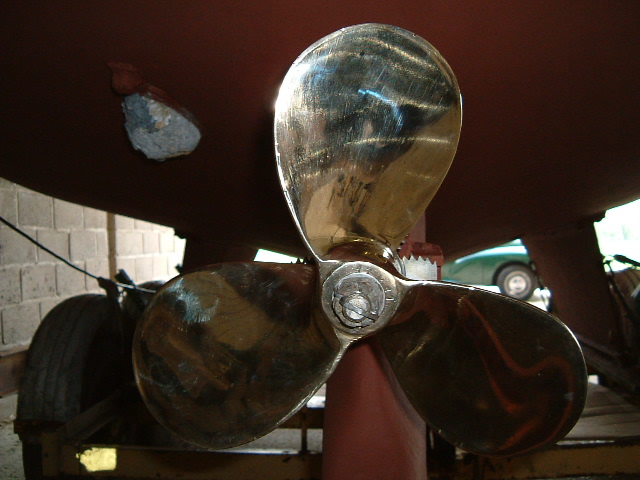
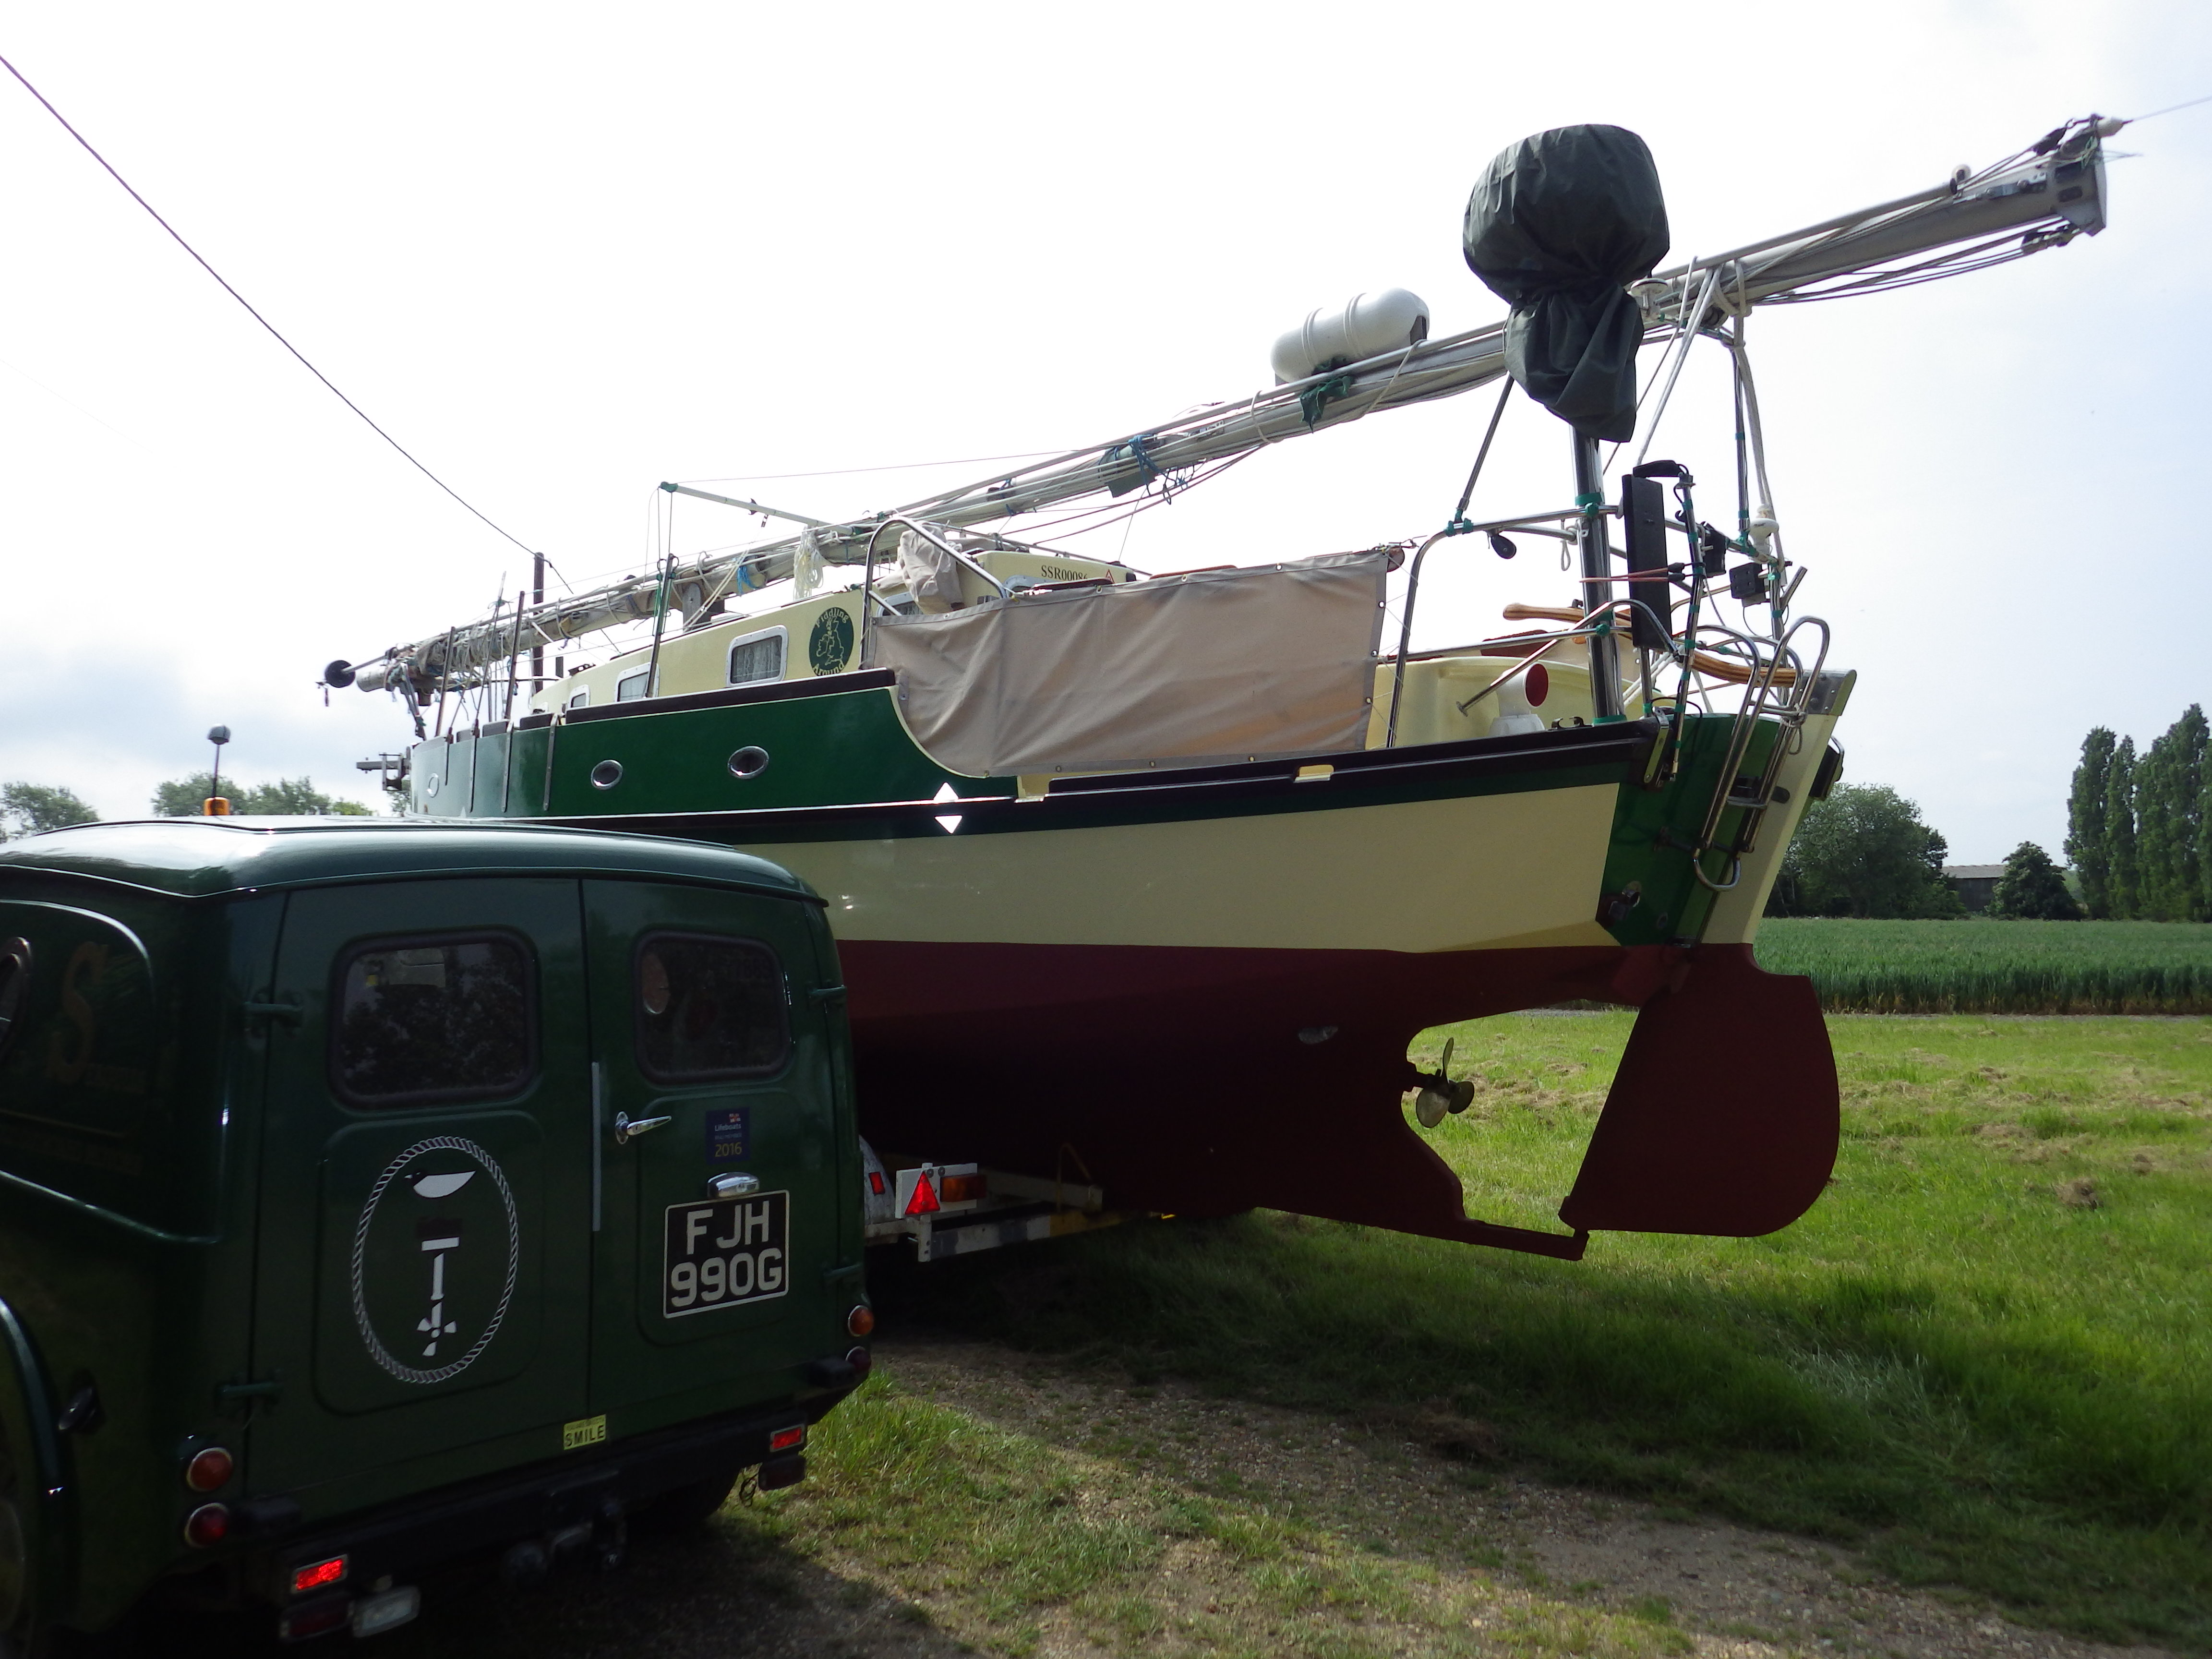
ready to go back in 2012 note shiny prop and wedges under the transom to prevent the stern digging un under power, works! |
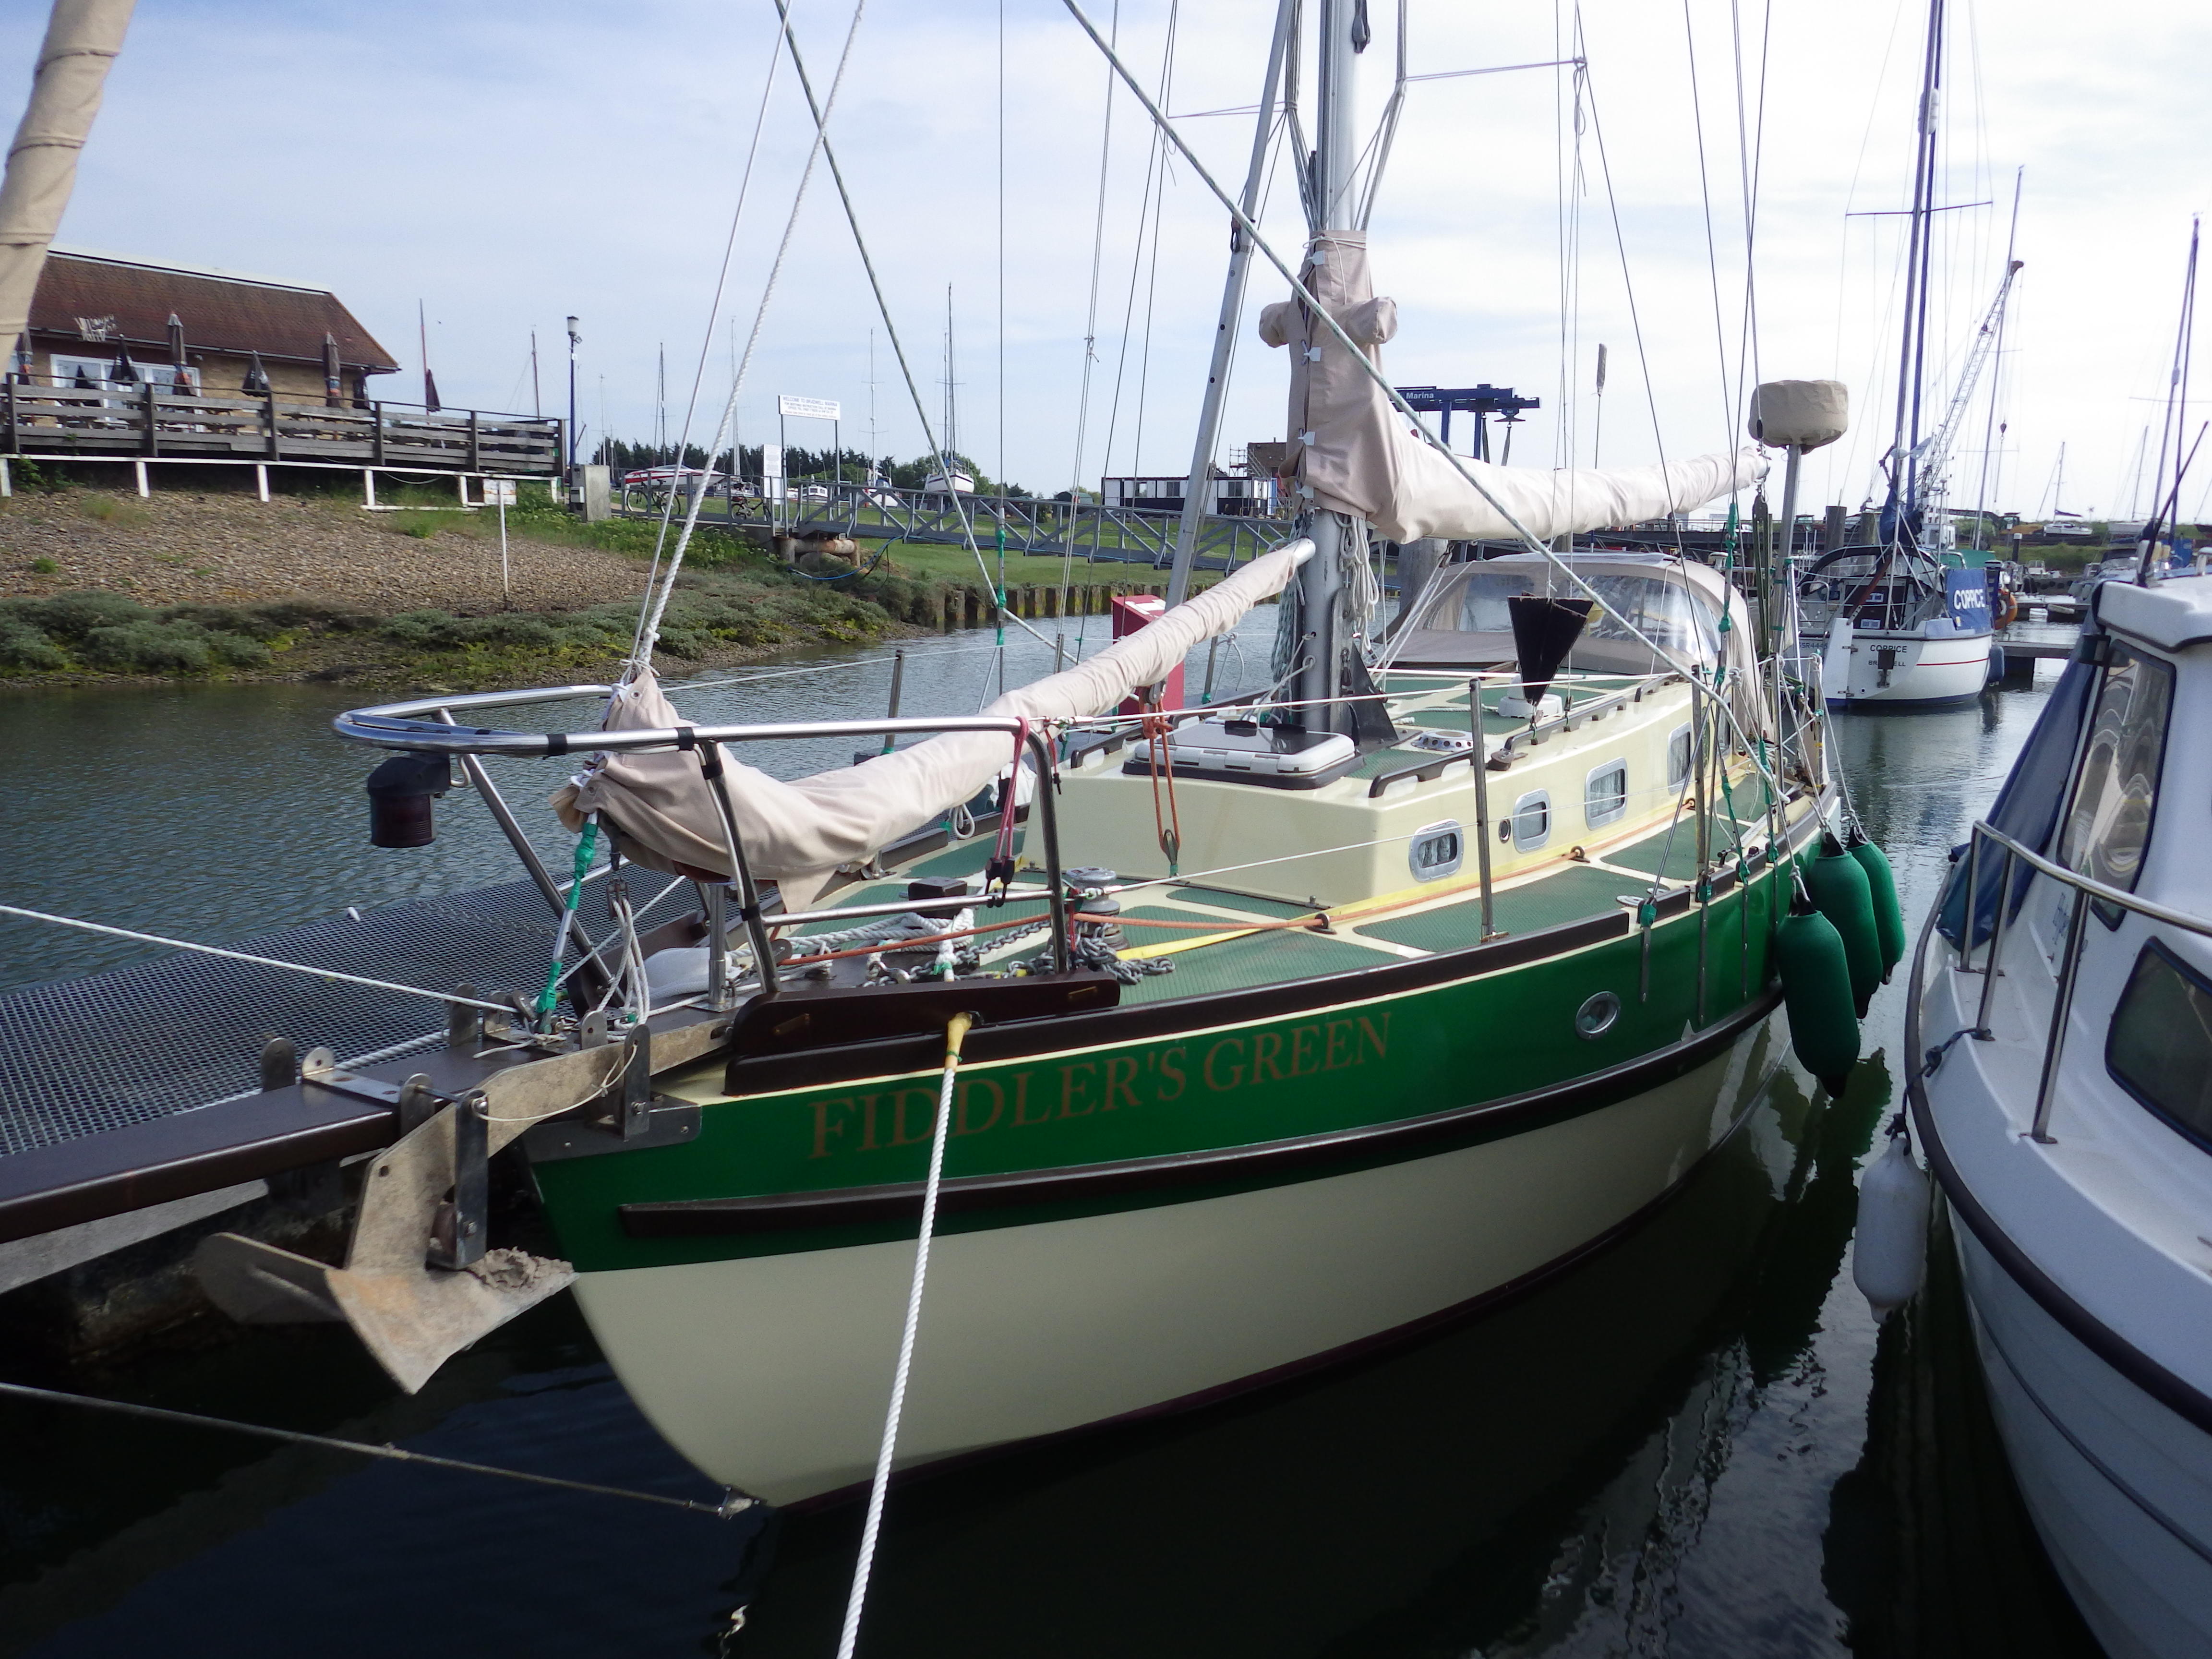
Rigging, sails, motor and ground tackle and warps etc. Fiddlers Green was launched in August 1990 and after 20 years or more afloat has, in recent years had a few major jobs done. The rigging was replaced 2 years ago and 3 years ago the Beta 17 inboard had a very thorough overhaul. Fuel capacity 36 litres, in cans further 30. Rig and motor tip top. The sails are valeted every year and 2 years ago I replaced the mainsail, the genoa is in at the moment for small repair and washing. I carry main, genoa and boomed staysail, all on the spars, also spare yankee jib on wire luff to set flying and a cruising chute, in a snuffer, with large green fiddle on it! Also below is a storm jib with sheets ready attached and separate fairlead blocks on deck for it. (Never been used in anger!) The main has 3 sets of reefs and the genoa is on Plastimo roller reefing gear. All in top condition. All running rigging checked annually, washed and any problems rectified. Last year the main halyard and topping lift replaced, the year before the genoa sheets and staysail halyard. As they were 20 years old plus the annual washing and checking had paid dividends. Look after your kit and it will repay you. Fenders and mooring lines get the same treatment. (fenders are green of course!). The main bow anchor, is a 35lb Delta with 2 shackles, (55m) of 5/16 chain, marked every 5 metres with cable ties! Operated with a vertical spindle windlass, wound with a standard winch handle. The main anchor is stowed on the bowsprit, ready for instant use. Last season I replaced the heavy, stiff kedge warp, with a new 50m multiplait with chain attached. I also have a reel of 'Ankerlina' flat warp in the stern. 2 kedge anchors small Danforth and 20 lb Delta . The latter was the main anchor for a time and it's holding power is phenomenal, but it could not drop through kelp, so was changed for a much larger version.
|
||
|
echo sounder and log VHF speaker and rev counter |
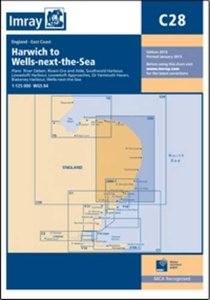
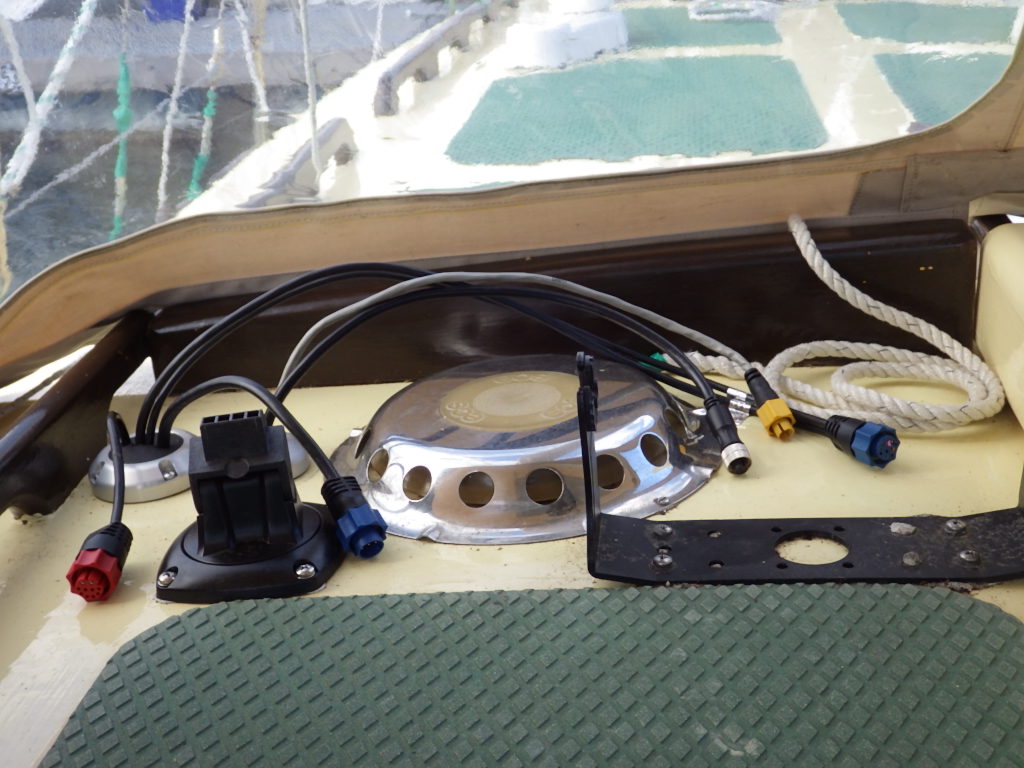
Electronics and navigation gear aboard. We have VDO echo sounder and log, a matched pair, the log's head unit was replaced a year back and in good working order. In addition I now have a Stowe trailing log mounted on the stern rail, independent, with it's own internal battery. The engine has a rev counter. Very useful. at 2000 revs motor uses approx 2 litre per hour and attains 4 knots in calm water. At 3000 revs, 3 litres per hour and 5.5 to 6 knots. (Tank holds 36 litres.) (Tank replaced with larger capacity one after the first leg!) Navico tiller pilot. Main steering compass a Sestrel grid under the tiller and a hand bearing compass is carried. An MLR GPS is linked to a ToughBook laptop with AIS input and a SeaPro plotter program. If I can afford it I may get a second , small, independent, GPS plotter that I can see in the cockpit. VHF is old school, not DSC, but with a telephone hand set, good to be able to hear if it's noisy. 2 waterproof hand held radios are carried, one in the charger, the other in the panic bag. Skippers Binoculars, please no twiddling the knobs! Also another small pair carried for the forward lookout! Full navigation lights at deck level, steaming light on mast. (no mast head tricolour). Spare bulbs carried. Auto, dusk till dawn riding light, LED. Also day signals. Night lights below. Full set of Imray charts will be carried, Admiralty folios on board for normal cruising area already, plus pilot books, half are already purchased and being browsed. Normal half Admiralty size chart table with dividers rules etc.
|
||
|
Our life raft, serviced and up to date! |
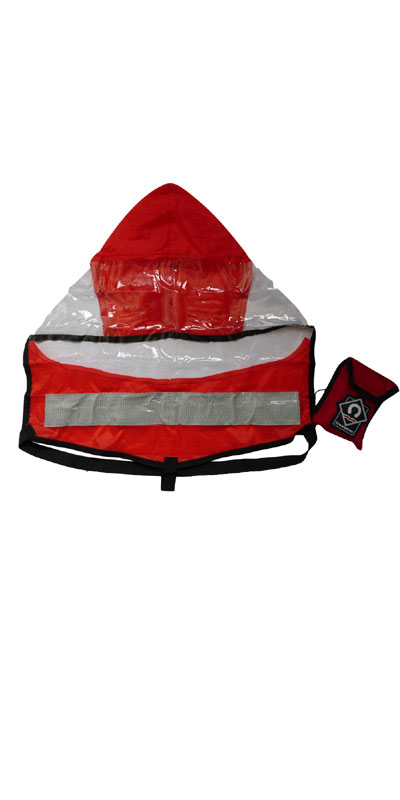
Safety gear etc. A Seago 4 man life-raft is carried, (as well as an Avon dinghy), serviced and up to date. (after the first leg the old life-raft was sold and replaced with newer one..) The panic bag will have water, 3 survival suits, the hand held waterproof radio, a water proof camera, chocolate and an EPIRB. Topped up with other safety gear too, small pack flares. For the next leg we now have an additional 2 personal location beacons and an LED flare. There are conventional flares. Large container full! 1 set in date, others a year or two out. Anti collision white carried. Rechargeable search light, Maglite, head mounted torch. Again for the second leg the old type flares replaced with LED flares, longer durability and no danger of singeing eyebrows! 5 Fire extinguishers inc auto in engine box and fire blanket in galley. Firdell Radar reflector on mast. Emergency VHF antenna carried. Full first aid kit, to be updated. Air horn and mouth trumpet carried. Skipper and mates life jackets, with harnesses, plus 2 spare slim fits new and 3 older type lifejackets, all tested every year. (plus a couple of kids jackets...) Crew will probably bring their own. 2 spare adult harnesses. Webbing jackstay fitted on deck, ends being stitched this week. Large hook on U bolt in cockpit. 24" high guard rail wires, double, with stern rail and pulpit. A keel bolt is drawn every 4 or 5 years and this winter I will draw another, just to check... so far all have been like new.
|
||
|
Fridge battery monitor showing charge rate and condition |
Comfort. Galley has electric fridge with ice box, running from own 200amp batteries and 2 burner and grill cooker with oven with regulator. Heater in fore cabin, though hope we do not need that! 2 small size Calor bottles carried in gas tight, self draining locker. Paraffin cabin lamp (and also a spare paraffin riding light). Fuel carried in self draining locker. All internal lighting now converted to warm white LCD, uses very little electricity. Batteries, 3 banks, start, services and fridge, all separate, 400 amp hours, charged by 32w solar panel on spray hood and by X-Alt controller and X-Spilt, fully automatic. Batteries monitored by Nasa Battery monitors, picture on the left shows fridge battery bank charging at 22 amps! Water, 25 gallons in tanks with 3 gallons in cans for emergency. Fuel, 8 gallons (36 litres) in tank with further 6 gallons (30 litres) carried in cans. Water to galley filtered. Heads, a Lavac with holding tank, fitted with gauge. 5 berths, 2 in focsle, main saloon converts to double, (but will probably just be used as a single on the trip), and 1 in quarter berth, the skippers bunk if needed! Cabin carpeted! (Waterproof kitchen carpet!). This boat was built for comfort.! Bound to have missed something of the list, ask if you have a query!
|
||
|
Fitting out 2013. This part will contain details of the work undertaken and items acquired or serviced and the whole page will read chronologically, so you may have to scroll down to the bottom to read the latest.... |
|||
|
|
|||
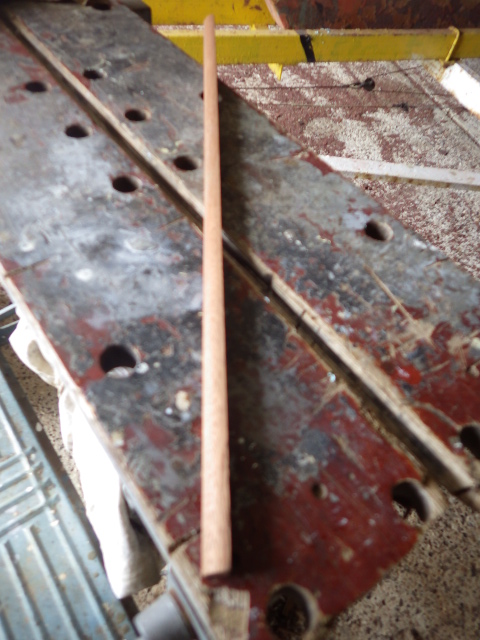
 massive 3/4 drive socket wrench with extra extension. You can just see the splintered wood on the pole, another job to sort!
As it came out
you can still see the old grease in the threads |
Wednesday January 9th 2013. Spend a few hours on board and lifted out the fridge batteries, all 200 amp hours of them, taken home for de-sulphating and charge. Broke out the heavy socket and 3/4 drive to remove a keel bolt. I took the first bolts out in the 2001/2 fit out, No's 4 and 7, they were fine. In 2005/6 fit out I removed another, no 1. Again bright and shiny. This time I removed No 5. At first I was going to admit defeat after straining for 5 minutes on the floor with both feet braced against the tommy bar. Then reason prevailed and I broke out the stainless mast lowering gear. One of the tubes was exactly the right diameter to act as an extension. Again with feet on the tube, I heaved, after a second or two it moved! However I managed to chew a little off the cabintop and table support pole where the spanner rubbed, so have to clean that up and re-varnish it. The bolt unwound slowly at first, so I squirted WD40 down it, eventually it began to move easier and I fitted the ratchet to the top and wound it out. It is screwed 4 inches down into the top of the cast iron keel! As you can see the bolt was bright and shiny so it was duly re-greased with waterproof grease and wound back in. I tightened it as much as I could, but will let it sit for a week and then have another go as the grease may prevent it going fully home. I am very happy the bolts are still good. Mild steel, galvanised and into cast iron! John.
|
||
|
|
|||
 About half the charts I will need |
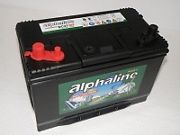
Wednesday January 16th 2013 Today I was back down the boat and got another 1/6th of a turn on that keel bolt. That was as much as I could tighten it without doing myself an injury! It is tight! Whilst I was aboard I removed the start battery, still showing 13v, but it will be put on a trickle charger till spring. I also measured up to see if I could fit another battery to beef up the service battery capacity. At the moment I have 100Ah and for this trip, although I suspect the motor will be working half the time and hopefully the 32w solar panel will get some sunshine, I figure a bit more battery would not go amiss. Sadly the space next to the services battery and just aft of it, was too small to fit anything of any decent size. Measuring up and using the start battery as a guide, I realised the best I could do was get another the same size as the start battery, 88Ah (90) and fit it under the step, where the start battery used to be, a year or two back till I opened up a void at the side of the engine under the bridge deck and made it into a battery and store compartment. So I am looking at batteries and so far have found the same battery as I already have on our EBay page for £15.00 less than I paid 2 years ago for the additional identical 88Ah battery for the fridge. So an order to go in shortly for a new battery, using our page. Last month it paid out £50 plus to us for the webmasters time! Whilst searching for charts, I have also looked for Tidal Atlas's. I like the Admiralty ones, used to using those for teaching. I was amazed to find so many for sale above the list price of £10.30! Not everything on the Bay is cheap, you have to keep your wits about you! I have my eye on one tidal atlas, and another chart at the moment, but have found that at Maldon's chandlery, Marinestore, they can beat everyone on the net on Imray charts and Tidal atlas's, so eventually I will go there to buy all the ones I cannot find cheaper! I am also saving for a new chart plotter, I am after a 7 inch screen, stand alone device that I can fit just inside the aft facing, opening, cabin window, so I can see it and use it from the cockpit. Whittled the list down to 3 now. The Lowrance Elite7M, or it's newer model the HDS7M, or the Standard Horizon 300i. Off to play with some at a chandlers shortly, already have an emulator for the Standard Horizon downloaded and working on my P.C., the wonders of modern electronics. Whilst on board today I double checked the fuel and oil filters I have and just need to get one or two as spares. Will get another Vee belt for the motor as well, so I have 2 spares aboard. Looking for a Jabsco water pump to sort and renovate as a spare too. Already have a Speedseal fitted, but will upgrade to the new run dry pump as well. Sadly found a bag of dry cell batteries that I had forgotten, in the bottom of a locker, and to my dismay one had leaked, so all the dozen or more batteries in the sealed poly bag were corroded and had to be tossed! Can't win them all! I will be working on the dinghy's Seagull outboard shortly, a job I can do in the warm, as it is minus 2 outside! John
|
||
|
|
|||
 The new Speedseal life
filters 'o' rings new pump and exhaust water injection bend |
Friday 18th January 2013 Just taken delivery of a load of Beta marine spares for the boat. I had been looking for a used Jabsco pump to renovate and take with me as a spare, but could not find one, and the new price was alarming, £500! How on earth can a pump be worth that!? Beta Marine came up trumps, they have replaced the Jabsco with a Johnson, and I have one for less than £100! Brand new! Well worth it. (So much easier to change a complete pump than to fiddle about trying to replace bearings and seals.) I have to modify the pump slightly, as I had to the Jabsco already fitted, as I have a different pulley system now on the Beta. It is a Beta mod for A section belts and to speed up the alternator to assist cooling. Beta supply an installation drawing and it will take 10 minutes to file off a small part of one of the supporting webs, to ensure the belt does not foul. Whilst I was on to Beta I got more spare fuel and oil filters, an air filter, another set of 'O' ring seals for the heat exchanger, 3 impellors and an exhaust fitting, the cast water injection part and all for half the price of a pump elsewhere! (why injection bend? well they only last 5 to 7 years so as the last one was fitted 4 years ago....) I also spoke to 'Speedseal' yesterday and have ordered a new 'Speedseal life' up grade cover for the Jabsco. It ensures longer impellor life and run dry capability, if the water inlet gets blocked by weed or a poly bag. Sadly though the present 'Speedseal' cover plate will not fit the other pump. I may work out which Speedseal life cover that Johnson will need. Probably not invest in one, as the Johnson is to be just a spare and I will get the Jabsco rebuilt if it fails, that is easy enough to do in a workshop and seals and bearings are cheap. Used our EBay page again last night and bought the 2013 Cruising almanac. Always liked the CA book , but last one 12 year old, so about time I had a new copy! Snow forecast and minus one outside, so chart correcting today! Boss has just told me I need to get the net curtains off for her to wash, OK, but not today! John
|
||
|
|
|||
|
CA Almanac
some of the courtesy flags
Y chart of Isle of Man
|
Tuesday 22nd January. The Cruising Almanac and a chart of the Isle of Man arrived yesterday. Also the Speedseal Life water pump cover, so I will be down to the boat shortly to fit engine parts and prepare for the engine oil change etc. First of the courtesy flags has arrived too.! Plus a new webbing strap to hold down an extra battery! The rather nice thing this page has produced is the interest and offers from members, I now have Tony with 'Iona' and Jackie of 'Cevamp' in Wales interested in escorting me, also Ron in Scotland with 'Gypsy' and Tony in 'Eric's Avocet' as escort round the Wash! Tony in Wales has sent me a couple of DVD's of views of the pilotage round his neck of the woods, Jack Sound, Pembrokeshire! scary stuff! Busy, busy, busy! But 2" of snow still on the ground here, so downloading corrections! Trying to buy a few charts on the Bay, (using our page of course!) but the seller is being odd, seems to have sold them outside the auction, wonder why he has a feed back of Zero and another account? Very odd. You have to be so careful. However I have found that Maldon's chandlery, 'Marine Store', beats every other seller in the UK on price, so if I do not get lucky buy half price, in date, charts, I will give my local shop the business! They are also the cheapest on Admiralty Tidal Atlas's too. Off to post Seagull parts, then home to correct another chart and scare myself silly looking at the warnings in the pilotage notes! John |
||
|
|
|||
 This pic of john was taken at the annual meeting last weekend, john is holding 'Pusscat 3' one of the 2 kittens he brought along to the bar for the manager, Mike.
Yes there are 'Pusscat' and 'Pusscat 2' as well, but the other kitten a real cutie, is called 'whiskers'! Apart from being trained mousers they are great fun in the bar, so long as there are no dogs about! |
Tuesday 29th January 2013. Today I lifted off the last of the main batteries, a heavy 110amp service battery, it was still showing 12.6v and powering all the lights etc, but is is now being charged with my special reconditioning charger and the 4 other batteries, already reconditioned, are all on trickle chargers. To keep the onboard lights working I have fitted a very small, 5 Ah sealed lead acid battery to the system with simple crocodile clips, this makes the lights work and working on board easier! I am still looking for a good position for another battery to add to the services bank... and may soon purchase that extra battery so I can actually offer it up into the available spaces. A safety strap to hold it down arrived in the post today. A couple of days back I dropped in at our local bearing and belts shop and purchased a couple of new Vee belts. There seemed to be a slight variation in size to what I already had as spares on board, so today I fitted one of the new ones to replace the slightly stretched belt on the motor. It was a real tight fit to get on. I will take the two other belts I had back into the shop tomorrow, for the lady to carefully measure them against the other new belt. If they are too long they may not be of much use! At £6.00 a belt the new ones were not cheap, but I am assured they are as strong as I can get in an 'A' section belt. 10 years or more ago I changed the flimsy 'Z' section belt drive and belts on the Beta to 'A' section and even though I have a smart charger on the Alternator, an X-alt, the belts last a full season. I was getting through 6 belts a year in the thinner 'Z; section. Totally unsuitable. I know my feedback to Beta Marine was partly responsible for them up-rating the belts on later motors. I also picked up another set of oil and fuel filters, so I now have 3 sets, one to fit, soon and two to stow on board, just in case... and I have found a suitable sized, sealed plastic box for them. I rummaged through my boat store today and sorted out some books. I carry on board Tidal stream Atlases for Dover Straight, The Thames Estuary and the Southern North Sea. I have just taken delivery of the Atlas for the North Western North Sea, so all the east of England and Scotland now covered. Looking for the rest... Sadly I realised that the Dover Straight chart I had carried was out of date, so there is another to add to my list to buy! Sorted out the lifejackets too, will bring those indoors to blow up and test and get the little CO2 cylinders weighed in the post office... With the temperatures up into double figures suddenly, nipping down to the boat is rather more appealing than of late so ticking jobs off the list. We have a crew meeting here this Sunday and all but young Brandon will be able to attend, Lots to explain and lots of questions to answer I am sure. From sleeping bags to life rafts and torches, suggested harbours and possible timings.... Thanks to Tom Greenwood for the 3 DVDs of the Welsh coast, some interesting places to visit and some rocks to try and avoid! Back to the day job.... John
|
||
|
|
|||

Meet 'Salty' The new ship's mascot for the trip. Complete with lifejacket! (designed by me over 30 years ago and used by all manufactures since, with my blessing!) |
Tuesday 5th February.
The crew all met here at the weekend!
Pleased to say all could come, my daughter Jenny from Devon and young
Brandon and his dad, Paul who are now geared up to join F.G. on 28th July... Not sure some were impressed with the 2 fold up bikes though! Too much like hard work maybe! Lifejacket rules and harness rules discussed, lifejackets all the time and harnesses clipped on when on on deck, except in flat calm, and at all times if alone in the cockpit! Finished off the get together with an Indian takeaway. A good afternoon and evening. Some of the crew will need new Fiddler's Green crew jumpers and shirts, so measurements awaited so I can order them. I have to scan the GPS instructions to send out to all, just in case they have to use it! All bar Brandon and Paul have VHF tickets and first aid. (though some a little out of date!). All in all think we have it all sorted, just need the boat back in the water and an order in for 3 months of decent weather. Took daughter back to the station for her trip back to Devon and on our return the new, extra 90Ahr battery was waiting for us! Finished watching the DVDs that Tom sent to me today and put them back in the post, some spectacular scenery and some scary tide races! Feel we are getting there, things are dropping into place. lots yet to do, but we are on the way John
|
||
|
|
|||
|
Saturday 9th February. I tested my EPIRB during the week and the battery failed the test, so removed it, it was dead as a dodo! Just 2v in a 9v lithium cell. Sadly though, to get the battery out the base cover split... with little hope I tried phoning the telephone number, to find it was unobtainable. I then worked out that I have bought the device a 'SeaMarshall PLB' in 2000, so it was 13 years old. the seals and arming protector had perished too. I was thinking time to spend £200 on a new one.... I tried the internet. Yes the company was in business. I phoned. I managed to obtain a new base cover, the seal for it and the large rubber band that stops you from activating it by accident, all for less than £20.00. A new Lithium cell for £6.00 using the EOG EBay page and it is all back together and tested OK! A result! I circulated a mail to the crew with the instructions for the MLR GPS, but have to be honest and say that unless you are standing in front of the GPS the crib sheets did not seem to make a lot of sense! I am waiting for sizes to come in so I can get some crew sweats and polos printed up, I have primed my printer friend that I have an order on the way, get those sizes in crew! I have sorted out a launching date with Keith and Phil, my normal helpers, week starting 21st April, so that should give 3 weeks afloat to get all the kit on board and tested! Will be servicing the Seagull tomorrow with any luck. The main drive shaft casing tube is going to be replaced, the old one a nasty plastic coated device, has rusted badly. I have been saving a good casing tube for just this day! Heard from Tim of 'Wedjit' yesterday and he has, as promised, removed the folding Ali mast steps from his boat and is parcelling them up to send to me. I will be fixing them to the ali mast. These could be a great asset, for spotting the coral heads off.... hey ho we can wish! All for now, antifoul on order! Jobs to do!!! John |
|||
|
|
|||
|
Sunday 10th February 2013. Spent a couple of hours servicing my Seagull today. It normally lives, chained up, on the sternrail under a cover. It has been on the back for at least 16 years and is 23 years old, one of the last they made. Over the years it has been used in creeks and canals, in The Netherlands and anywhere Fiddler's Green went. Being one of the latest ones she has a water injected silenced exhaust, that I have updated with the fitting of a small water delivery tube, it all works well. Sadly rust had eventually broken through the horrid plastic coating on the drive shaft casing tube. Years go all seagulls had chrome tubes and they did rust, the black plastic coatings looked OK for longer, but the rust was there, just under the plastic and out of sight! Knowing this I had put aside a chrome drive shaft casing tube. Today I went to fit it, Opps, it was the wrong tube! I had squirreled it away for nothing! Fortunately in my stock of old and obsolete new parts I had the correct tube in a long shaft version, 2 minutes with the hacksaw and I was in business. 2 hours later the Seagull was fully serviced, gear oil OK and all parts greased and protected plug checked etc. I will run it up in the test tank when the ice and snow goes! Another job ticked off the list. John |
|||
|
|
|||
|
Sunday 10th February, 1830hrs. Just won an EBay auction, using our page of course! Now we have the backup auto pilot the crew were asking for. A later version of the old Navico and the great thing is it mounts on the same pivot and clips onto the same tiller pin as the old one! Another tick on the list! John |
|||
|
|
|||
|
Saturday 16th February. I should have stuck to my self made rules for using EBay. Never buy any used electrical or mechanical items. The seller had specified 'dry and salt free'. Well part of that was correct! On opening the parcel water droplets were found inside the inner layer of packing. I started to have misgivings. In some trepidation I readied it for connection to 12v. I removed the plug on the lead, to find the wires were not at all fastened, just laying in their terminals.. Plug fitted by numpty! I attached 12v to the auto pilot and turned it on. To my surprise, it worked. However when I stood it on end, push rod down, a couple of dozen drops of (fresh) water drained out. The seal had plainly gone, as there was far too much lateral play in it. OK at least it worked. The seller had a 'no returns' policy, which when you see that it should ring bells, but as it was described as 'dry', and working I was reasonably confident. After haggling with the seller and speaking to Mansbrite Marine I eventually, begrudgingly got £35.00 refunded, or at least the process of an e-cheque started. I ran it into Mansbrite yesterday, they will investigate and if nothing else amiss will replace the seals and grease it. Will cost me as much as it cost to buy again! (Still cheaper than a new one, but would that have been a better bet?) Hopefully I will have it as a spare on board. I have checked and the end fittings do fit my existing Navico fittings on the tiller etc... Whilst I was down the boat I offered up a folding mast step, one of a box full sent to me by Tim of 'Wedjit'. Now got to measure the spacing and fit them. Off to boat with Brandon now, so he can have a look about.. john |
|||
|
|
|||
|
Tuesday 19th February 2013. Have not heard about my Tiller Pilot as yet..... but I have used our EBay page again and bought a Dri-plug to fit it so I can connect it to the existing deck socket. I have been using Dri-plugs for 20 years and they are excellent. A little smear of silicone grease, (or Vaseline) and the terminal connections have stayed clean. I have finished servicing the 4 main lifejackets I carry, 2 are brand new, still had the labels on them, but have not been checked for 3 years and 2 are 20 years old and look like new. To service them it is so easy. Gives great peace of mind too!. Remove the CO2 bottle and check the weight, Chetan in the post office weighs them for me, 138grams, weight is stamped on metal bottle. The activating cartridge removed to check it is still intact. (The paper trigger has not got damp). Check the mechanism works, then replace the clip that secures the operating arm. The jacket is then inflated by mouth and left for at least an hour, I leave for 6 to 24 hours, they must not appreciably deflate. Mine were rock hard still after 6 hours and just slightly softer 24hours later! Then the straps are checked for abrasion and carefully re packed. All have harness attachments. Job done! I have figured out how fit the mast steps. I have to mix up a paste of Epoxy with Ali powder, as a gasket between the back of the step and the mast, to accommodate the curve of the mast. The Ali past will make the Epoxy UV proof and look just like the step and mast colour. I will gently clean the steps to ensure they will 'glue'. I have sorted some large monel rivets. Still got the large rivet gun I used to build the mast. I am still occasionally using the EBay page to search for the outstanding charts, twelve of them! However the local chandlers sells them for £15.50 new, so there is no way I am going to pay the extortionate prices asked by some, I have seen £25.00 regularly and even over £30?!! I am assuming that these sellers are working on the assumption that there are Numpties out there who believe anything on the Bay must be cheap. Buyer beware! The other trick I have found is the 'New and unused', but they do not give the date of publication.. when pressed they are virtually all out of date so far that no corrections available. Simple to check, in my case Imray charts, go to their site and you will get the latest corrections listed with the date of the chart. No corrections for older charts so they are worthless! The sun is out again today and the frost melting fast, so probably a trip to the boat again later! John
|
|||
|
|
|||
|
Friday 22nd February. The Dri-plug and socket have arrived, new, in a vintage cardboard packet, just as the seller indicated, some old stock. A bag full of 1/4 monel rivets to fix the mast steps also dropped through the letter box yesterday. These are far stronger than plain Ali and corrosion resistant.. All purchased using the EBay page. A nice surprise this week, Andrew, my local doctor, who is also a sailing friend, popped round and left a present for me, a Saltire! (Scottish flag of St. Andrew!) He and his wife are Scots and we have an invite to call them up as we leave the Crinan Canal and they will meet us and cruise with us through the Islands of the Clyde. Having sailed locally here for a few years they have now bought a large Moody and keep her in Scotland. He also presented me with a publication called 'Welcome anchorages', published by the Clyde Cruising club and as it hints at, has details of friendly mooring places, many free if you use the hotel or other amenities nearby. Nice touch. I have contacted the Editor and have a 2013 edition being sent! I am gently cleaning off the traces of varnish on the Ali mast steps and as soon as the snow stops and it warms up a bit, will be down to the boat to mark up the mast and calculate where they will fit. As I type the snow flakes have got to half crown size and the horizon has gone. So much for flurries! I have short listed the company to buy the new GPS plotter from, (sadly not on EBay, so cannot use our page) and will be saving pennies hard so I can get hold of it early and play with it before we set off. Setting off. The date is set for 19th May, a Sunday, the tide serves at 0700, so we will go down the day before to get all stowed and other crew will maybe come down for a meal with us in the Marina bar that Saturday night, and stow some bits aboard, sleeping bags and the like. We have worked out we can stow the few extra on board, laid under bunks. Awaiting just one crews measurements till I can get the new sweatshirts etc. made, but he is away on holiday at the moment. Enough for now, John P.S. 1800hrs, just found and bought another 10 charts, cheaper than full price and all latest publications, an EBay seller I have used before just put a batch on. So now I have all I need bar 2 and one of those is the Suffolk and Norfolk coast I will be needing on day 2, but is available locally cheap enough. The other is a west country chart. I have also got a couple of bonus charts, Poole harbour and south east coast of Ireland, just in case! John
|
|||
 Book from Andrew! |
Tuesday 26th February. Cold and grey outside but sunshine dropped into the letterbox in the form of a new up to date copy of the Scottish guide to moorings, 'Welcome anchorages'. I also have found another chart, the West Country one outstanding, a 2007 edition, but I have all the corrections for it and the 2012 one has few corrections as yet, that I will add.
|
||
 Spare Autopilot, now repaired!! |
I have also heard from Mansbrite Marine
engineers that they have opened up the Navico Tiller Pilot and discovered
someone had tried to seal it with silicone! So the guy lied through his
teeth! Good news is the electronics were unaffected and sealed in
plastic. The unit works fine, but both the push rod seal and the case
seal are shot and have to be replaced. Final cost in excess of £100,
unit cost, with discount from seller, £95.00. OK still cheaper
than the £350 of a new one, but would I go that route again, no.
Needless to say I have left negative feedback, these bods should not lie when
selling.
|
||
 Imray Chart |
Hope to get the last of the charts through the
letterbox shortly, have just 1 chart to acquire now and several tidal atlas's.
Will buy these in Maldon. They also sell Belfield's Tide CD for 2013
cheaper than anyone else.
I have decided to buy a new chart plotter program and charts from visit my harbour. At £30 it seems to be a very good deal, all the up to date charts of the whole of the UK and a copy of SeaClear plotting program. I have heard from John Stevens who has bought this that it works well on his laptop. Stopped to meet the postie, 9 of the charts have arrived already! All new and 20% off the full price with free post! Now off to download the latest updates to slip in each chart! More corrections to do. John
|
||
 Epirb |
Thursday 28th February 2013. I have decided to update the EPIRB I have with the addition of a modern one. Found that one of my local Chandlers in Maldon had a deal on these Fast Find GPS units, so have splashed out. This unit can clip on my lifejacket and when activated will automatically send out a signal to overhead satellites, alerting Falmouth Coastguard that the boat registered to the device is in trouble and giving precise location. It will then also transmit the same homing signal the other EPIRB sends out, enabling lifeboats and helicopters to find you. With the other one though you have to alert the authorities by other means first or they will not be looking. Belts and braces! Hope to never need them, but a reassurance to the crew, and me! |
||
 Auto lifejacket light, fitted to all 4 main jackets |
I have also decided to up rate the 2 lifejacket lights I have, with these, and have bought 4 to fit to the 4 main lifejackets. They are automatic and activated by immersion or switch. Batteries dated 2018! | ||
|
Another Imray chart arrived in the post today,
for the west country. I have already downloaded the corrections for it.
There is just one more in the post somewhere, for the Isle of Wight. For
some reason it has not arrived. The other 9 from the same seller arrived 2
days back. I have been enquiring everywhere about the last chart I have to buy, Imray C28, the Suffolk chart that I will be switching to on day 2! I had been unable to find a sensibly priced, in date chart for some time. Today a 2010 dated version came onto the EBay page. However a quick double check on Imray's corrections page tells me there is now a new edition, in January 2013, so all the older corrections for the 2010 charts have now been removed from the web. I asked the seller to reconsider the price as he was advertising it as the 'latest' edition and it was not. He still insists it is the latest, so I have again told him it is not and I would only offer half price, which is fair for an out of date chart. We will see if he replies. Suspect I will end up in the Maldon chandlers paying £0.50p more than he is asking, and buy the very latest. Will save me from doing the 2 pages of corrections I had downloaded and saved for the 2010 version, just before they removed them from the Imray site! Got to think ahead! I have also today ordered all the crews green sweatshirts etc. Got to have the crew looking smart! Jenny wants one with 'single and available' on the back! Am I going to have a problem with her on this trip!? John
|
|||
|
Program and charts for laptop as extra backup.
|
Thursday 7th March 2013. Still too cold and damp for real outside work so still gathering bits. The new lifejacket lights arrived, and today I picked up the new 'spare' Tiller Pilot from Mansbrite. They allowed the insides to dry thoroughly then fitted all new seals and greased it, now all fixed, but cost £114 to get it put right, overall cost £200 plus. Still cheaper than a new one, but of course no warranty! Fitted the new, 'old stock' DriPlug to it this evening. Bought another Admiralty Tidal Atlas from EBay, at a realistic price, still cannot find the last chart I need, Imray C28 for the Suffolk coast, so have resigned myself to buying that in Maldon. There is a brand new edition out and this will be the chart I will be switching to on the second day of the trip. Have continued to amend the charts I have, long job, but interesting to lay all the charts out and scan over them at the same time. Bought the complete chart plotter package for use on boat's laptop, charts for the whole UK and a copy of the chart plotter program 'SeaClear'. Actually the program was free. The lot for less than £32.00! One snag they have discovered, Avast!, the virus checker program, does not like SeaClear, so you have to go through a long procedure to exclude it from any virus checks. Pain but sure it will be OK.... www.visitmyharbour.co.uk if you are interested. Still cleaning ali mast steps prior to measuring and fitting.... Still lots to do... John |
||
 Tidal Atlas |
Saturday 16th March 2013. Whilst keeping out of the cold and trying to shake off this nasty little bug the postman delivered this. New Tidal Atlas for the Whole of the Irish Sea. EBay purchase, including delivery still just cheaper than local cut price Chandlery! |
||
 Tidal Atlas |
A day later another Atlas, from the EBay page,
this time not new, but exceedingly cheap, a well thumbed edition.
I can see from the pencil dates and times on the pages that it has been used
by someone who had the knowledge to interpret the pages... (Takes a bit
of a knack to use these correctly!)
|
||
|
Amazingly I still have not found a copy of the
Imray C28, this, being just a month into print, will have to come from the
Maldon chandlery and will still be half the price some sharks are asking for
older editions! If I feel better and the temperature goes up a tad, I will spend some time on the boat dry fitting the mast steps. As I intend to pace a small fillet of ali rich Epoxy under each step fitting, I need the temperature up to 10 degrees for the epoxy... but if all drilled and prepared will only take moments with the rivet gun after that. Had a hiccup with the McMurdo Fast find, the promised deal has not come off, the local chandlery is still trying to lay hands on one.. we will see. Have not chosen where to buy the last bit of kit from yet, the stand alone chart plotter to fit in the cockpit to cabin window. Know which one I am after, but now waiting on pennies. Then I will chose, it is between a firm in Cornwall or one on the Bay from Essex, though they are asking more... shame would be nice to bump up the EBay payment to the Webmaster.... All for now, off to throw logs on the fire! John |
|||
|
Epirb |
Thursday 21st March 2013.
After a lot of phone calls back and forth I have found that the local chandlery, 'One Stop', could not actually lay their hands on one of these 'Fast Find GPS' units. Ringing round today I found that unless I found a chandlery with one in stock the next batch were not due out till early or maybe mid June! not a lot of use to me! So having cancelled the local one I started ringing round. All said the same, 'yes it is advertised on their site, and no they have not got any!'. Until that is I called the 'Marinesuperstore' who not only had one they had three and one had my name on it! Bonus was the price was cheaper too! Will be in my hot sticky mit tomorrow! Then it has to be registered to the boat and me, so if ever activated, they will know what boat and who the owner is! Had a call from Devon today too, the pennies I loaned my daughter will be repaid shortly. Her house sale has come through... Thanks Eccles, so that is the Chart plotter almost accounted for! Yesterday had all the mast steps sorted and cleaned up. All in the van waiting to be taken to mast. As the weather is still so cold, cannot fit yet, need it above 10 degrees for the epoxy to set! Will be bringing that indoors to warm up shortly! Got to get warm soon... John |
||
|
Epirb |
Friday 22nd March. The EPIRB arrived today, tested OK and registration form filled in and ready to post. The weather has not been as clever, 3 above freezing and snow forecast... John |
||
|
Monday 25th March. 1 month to launch date and nothing done on board! The temperature outside is 0.1 degree C!! Snow laid all round, not much of it, we only got half an inch, but it is not melting and does not look like it will for the next few days! The only job I have been beavering away at is the correction of all the charts. Most of the 28 odd charts I have need correcting, most have 2 pages of A4 full of corrections and it takes me an hour some have 4 pages!!. The good thing is it also introduces me to the parts of the UK that I am not familiar with. I have amended all from The Blackwater north to Scotland, and west through the Scottish Islands.. some real scary bits there and I am now working my way down both sides (and the middle, Isle of Man.) of the Irish Sea. Some really interesting places to ponder over. I had no idea of the number of oil and gas fields all round us till I saw them all on the charts now they are also interspaced with Wind Farms, loads of them seemingly in the middle of no where! At least they are all lit! Surprising the number of small harbours having marinas built in them too. Passage planning on a grand scale! I wondered whilst I was doing the corrections, how many know how to do this? It would seem logical to work down the list of corrections from the top.. No, if you go that way you will end up adding work! To do it cleverly you start at the end and work backwards. Many times I have saved several amendments this way, buoys introduced and later removed etc.. I suppose I was lucky to learn all this at work... who tell skippers and navigators these wrinkles today? The nasty bug I got 2 weeks back is slowly letting go, but it is so cold outside I am loathe to risk it getting on my chest, so will carry on with the charts for now! Hope you are keeping warm too! John |
|||
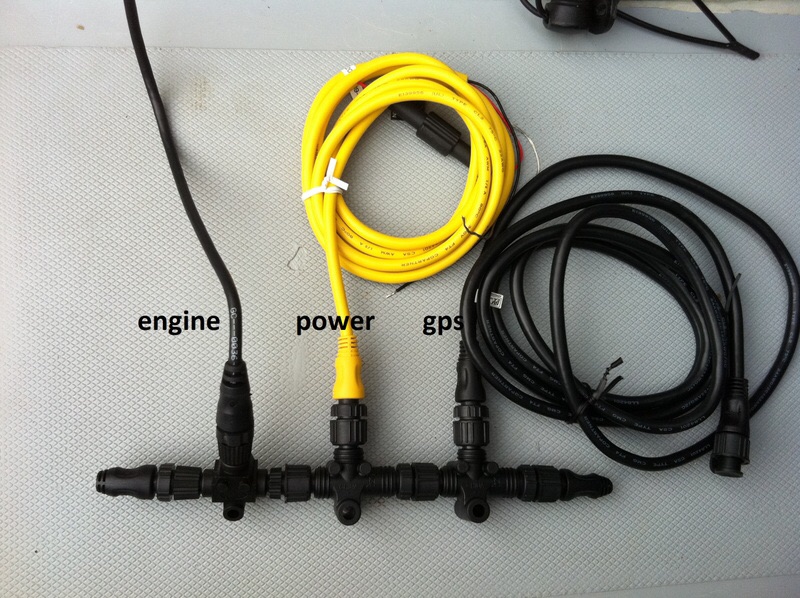
 Lowrance HDS7m chart plotter |
Thursday 28th March 2013. At last I have saved up the pennies to splash out on the last major bit of kit for the boat, the second, stand alone GPs plotter. This is to hoped to be mounted in the cabin window facing into the cockpit, the window slides open so I hope to be able to have the window open to work the controls and for the screen, to be seen from the helm. Better than popping up and down like a gofer to see the screen on the laptop in the quarter bunk! The Laptop will have another plotter program added soon, so there should be 2 programs to chose from on it and up to date charts too. These programs will have the AIS working on them. So I will still be using it if only for the AIS. Having corrected so many charts and now seeing how many navigational aids are being fitted with AIS it will now prove doubly useful. Speaking of charts, I have been working my way through the corrections and was 2/3rds there when I discovered that the supposedly indelible pen could rub off! Imray charts are coated with a waterproof layer and the pen does not appear to be permanent... Rats. so back to the pens I used to use Staedtler permanent ink pens. I have just ordered a set using our EBay page. (My old ones dried out years ago). With snow still on the ground here, and no let up in sight, fitting out time is telescoping fast! John |
||
 Clever camera mount
Video camera and mount |
Wednesday 3rd April 2013. Its so darn cold. The icy wind is giving a wind chill reading of minus 11C now! I have heard that it is due to warm up by the weekend, but still not into double figures! So I spent Easter, (coldest for how many years?), re correcting the charts, have just 4 left to correct now! Better in the warm than in the snow! Will be down boat refitting batteries and servicing the engine at the weekend I hope, have a workday Tuesday or Wednesday, hope to get the mast steps on and wash all down ready to varnish (Sikkens satin stain!). Then it is polishing the hull and the prop and antifouling! Today the new toy arrived, the chart plotter. Impressive! I now see I can add a radar to it too, if I had the pennies! Radar has moved on a lot since I played with them! Now the radome is safe, the radio output 1/1000th of a mobile phone! New technology! So clever. Talking of new technology, I have had an i-touch for 3 years and over Easter Michael helped me download an app and set it up so I can use 'Facetime' a free Apple tool like Skype. The magical part is the receiving Apple device does not even have to be turned on, it will still sound an alarm to let you know someone is trying to reach you. So live video from the boat! Also sorted another App and made my little i-touch into a kindle! Brilliant! Now reading 'Boat, People and Me' on it) Over the weekend Michael loaned a whizzy video camera for the trip. It is a tiny hand held device and waterproof to 3 metres. I have found a clamp on mount for it too! See pic left, should be able to set it up to record whilst we sail! Just bought a new memory card, (using our EBay page!) 64 GB, enough for 60 plus hours of filming! Good grief I will be able to bore the family with that! Oh its warmed up outside, just minus 9! (wind chill) John
|
||
|
Speedseal Life now fitted!
Beta spares showing the long hose, I am now just using the ends of this with copper replacing the middle section near the fan belt!
Bolt sheered off in exchanger... It is just visible, right in the centre
The other end with centre hole clear
|
Monday 8th April 2013. We have had the first days of real sunshine and I have been working on the boat! About time! Spent a few hours on board Saturday refitting fridge batteries, all fully charged and reading 13.7 volts on the Nasa meter. I fitted the Speed Seal life cover and a new impeller, the old one was OK but tossed into the bottom of the spares box. I have got 2 more new ones and 3 old ones that can be pressed into service, as well as the new Johnson replacement pump and spare impellor.. belts braces and lot of string! I found the old fan belt had rubbed the water hose, but whilst wondering how easy it would be to fit a bit of copper pipe instead I recalled that the motor came with a copper pipe and the replacement hose later fitted was only in one bit to save a pair of clips... I searched my store cupboard and there it was! So I removed the rubber pipe and cut the ends to suit the copper pipe, 2 new clips and problem solved! I have ordered another rubber pipe though, so I have 2 new spares. Also added a spare anode and other small parts. Whilst removing and checking the pipe stack in the head exchanger I had a disaster though, a bolt had sheared! See left... Had I not removed it to check would not have known till it fell off! Tube stack as it happened was as clean as new, as you can see from the pics, and the anode untouched. Shows how little use the motor had last year.... I had to bring it home and drill out the broken part and re-tap! Have just ordered new bolts, plus a few other bits as spares from Beta. Will refit next week with new 'O' rings and bolts, well greased!
|
||
 All plastic can crusher
Double hook safety line for £27.00!
Lifejacket spray hood for less than £10.00 |
I have taken delivery of a few more bits,
using our EBay page. I found a very solid all plastic can crusher!
This will cure the problem of the rubbish bags filling with empty cans! Great to store on the boat, unlike the steel ones normally sold, will not go rusty! Also found a safety harness line half price to fit to another of the lifejackets we have aboard, so all the 4 main ones have harnesses, lights and now, spray hoods! I found a firm selling Crewsaver hoods for £9.90 inc postage, that's less than half price... why, well Crewsaver miss-printed the pouches the hoods are packed in, with the word 'Junior'! I have tried one on and they fit! Keith, if you are reading this another one is on it's way to you for your jacket! Go to:- http://www.wetsuitoutlet.co.uk/index.php and look for Crewsaver then hoods. |
||
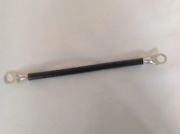
Cables for extra services battery, just sample shot, a lot longer than this! |
The list of kit I am finding seems never
ending, if nothing else we are going to be well geared up! Measured up for the extra battery leads, then phoned my local auto electrical shop. after I got off the floor I went on line and searched, again using our search page on EBay. 2 cables, one 79 inches, one 29 inches are winging their way to me, with the correct 10mm ends. £20.00! I cleared one blade of the prop yesterday, the prop has a deposit of mud on it, it scrapes off easily to leave it shiny underneath, so when I have done all three blades the polisher will come out to get that mirror finish back, go faster prop! I am working on the boat with Phil tomorrow, have to mark up and drill the mast steps, too cold to finally fit, but once in place dry should be easy enough to add the pad of epoxy and work the rivet gun!
With any luck we will also be able to wash of the cabin top (remove the owl pellets!), and give the handrails a quick coat of 'varnish', Sikkens! Off to collect kit for working on the boat tomorrow. Oh and of course its going to rain! John |
||
|
Wednesday 10th April 2013.
Spent a very productive day with Phil on the boat yesterday, we managed to measure mark and dry fit all the mast steps! I will wait till the weekend and the warmer temperatures to mix the epoxy up to pad them onto the mast. Rivets and gun all ready to go. In addition we cleaned of the dust and crud, and the owl pellets! Rubbed down all the handrails, toe rail, bowsprit and gun whales etc and touched up any bare patches. (where I rub the big teak post as I come in, if I get it wrong!) Also cleaned off the remaining 2 blades on the prop, so that just has to be polished now! 15 days to launch!!! John |
|||
 Sikkens for woodwork
|
Friday 12th April 2013. For the 4th consecutive day the temperature has been up and boat work has been possible, spent several hours with the varnish (Sikkens) brush this afternoon, all the handrails and half the toe rails and gunwhale done. Boat looks ready, nearly! The cream hull is gleaming and all we did was wipe it down with white spirit to get any dirt off, oil etc. The green is going to have to be 'T-Cut' though, before it gets the polish! I intend finishing all the Sikkens tomorrow and if the spares for the motor arrive get that all sorted too. Sunday the temperature will be up even more, so the mast steps can be epoxied in place. Sadly it is also pouring with rain, but that should not effect the Sikkens. Antifouling and hull polishing next John
|
||
 CO alarm
Sikkens for woodwork |
Sunday 14th April Bought another bit of kit for the boat yesterday, a CO alarm. I was actually buying one for the family as theirs had expired and thought, 'got one at home, why not on the boat too?' So I did. Is it worth risking it for £14.00? Spent all afternoon yesterday finishing off, almost, the varnishing, (Sikkens). I use the Teak colour... I just have the bowsprit to do and maybe some repair work on the toe rails at the bow. Reason? A southerly gale got up and blew rain, or rather spray from the gutters, onto the boat! I did manage to polish 1/6th of the prop though, (one side of one blade!) before the drills ran out of charge. Re charged and ready to go today. So I retreated and finished off an on going job, updating the charts.!! All done!! Still blowing today, but as yet no rain, so off to finish the varnish and hopefully fit the mast steps.... it is warm enough for the epoxy! Must get on, John |
||
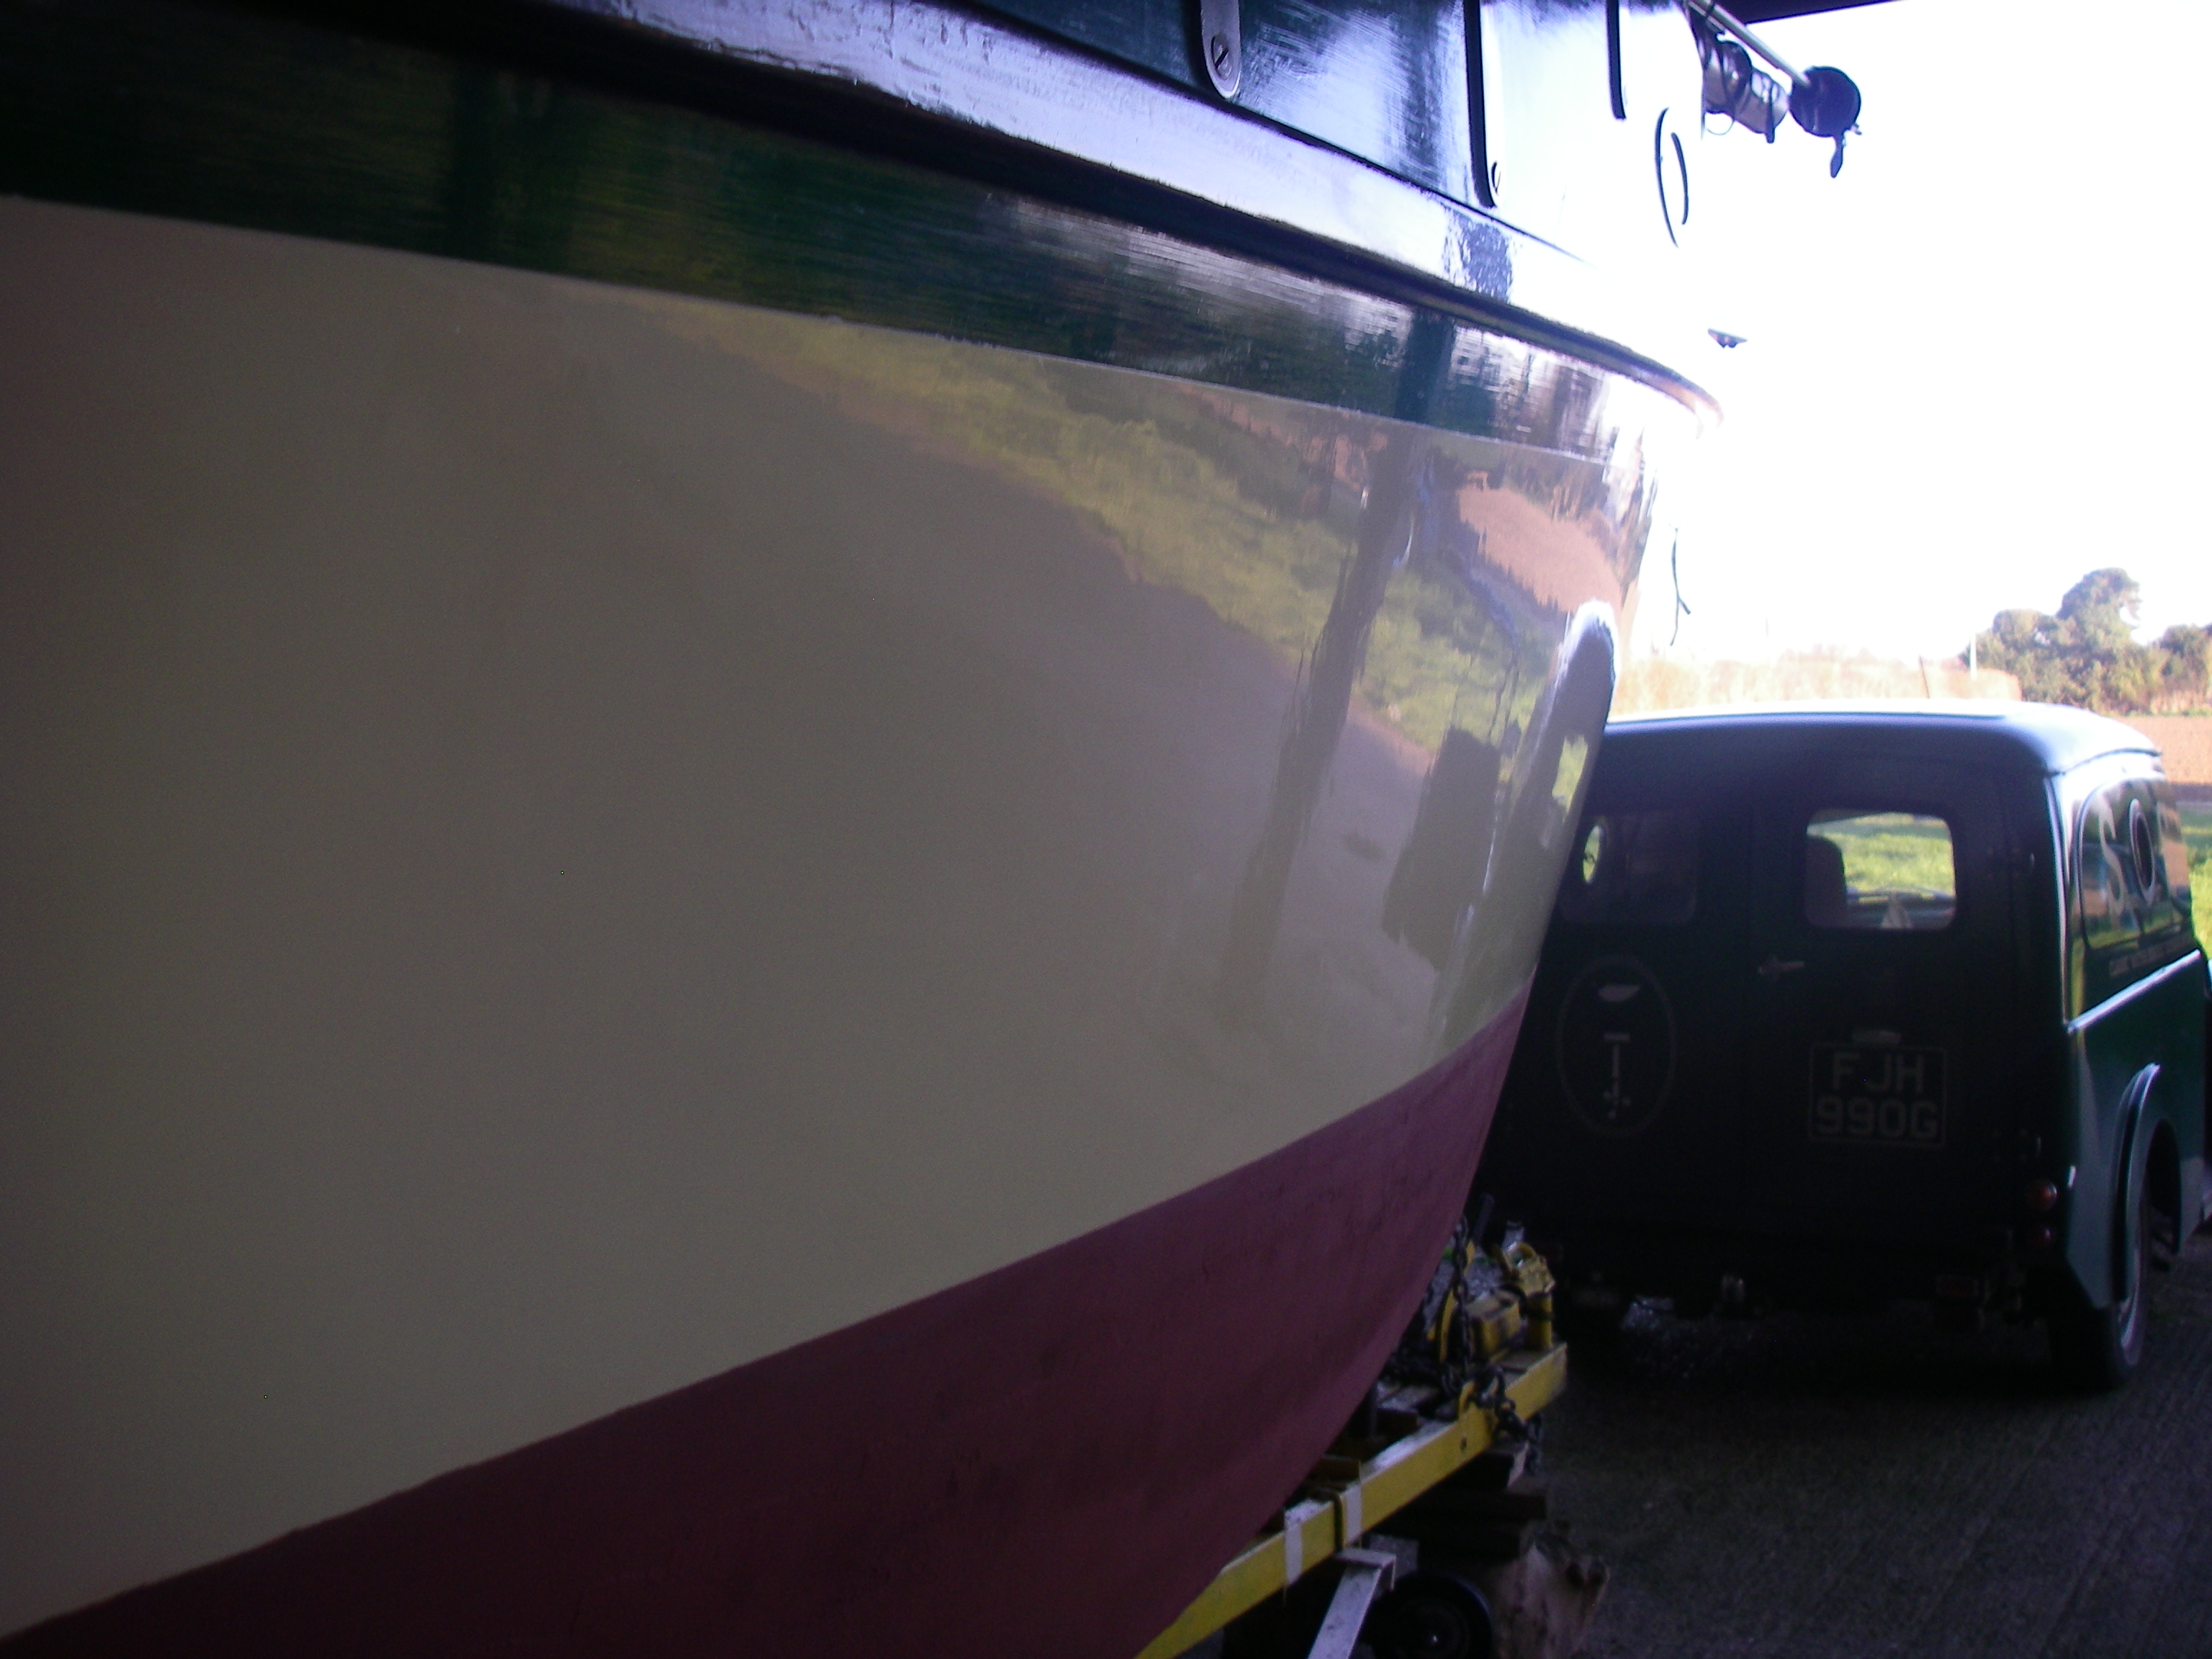
 hull polished!
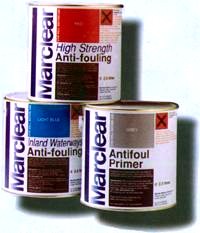
Marclear 'Workboat Red' antifouling.
Beta marine 17 inboard.
Lifejacket hoods fitted to 4 main jackets aboard.
Belfield tide tables on CD.. Has glitch.. ports are not in order!
Water filter |
Friday 19th April. Just 5 full days before launch, panic setting in! Have loads of jobs to do. However Phil turned out to help last Tuesday and as a result the hull topsides are all polished and gleaming, (we had to T-Cut the green where is had chalked slightly) The final coat of Mer wax polish went on and it was a transformation, again. There was even time to mask up the waterline, taking the antifouling up just half an inch.... to allow for all that extra kit! Then we got a coat all over and 3 coats round the waterline. I will be back later to add a second coat of Marclear to the rest. After the tape was removed we stood back and admired the job! Nothing like a clean, one colour bottom and bright shiny paintwork! This is her 23rd year and she still looks like a 2 year old! We also looked at the mast steps I had riveted on and filleted with epoxy. Only one did not work properly because a little of the epoxy fouled the mechanism, but in trying to clear it a lump fell out so I have to re epoxy just one fitting, the rest are fine. I will fit some foam pads to each step as otherwise I suspect they may rattle slightly, which could prove annoying! When I got home Tuesday, the Beta Marine parts had arrived, so this weekend I will be servicing the motor, running the engine up ashore and changing oils. I intend varnishing washboards and the crew back rests we use in the cockpit on the guard rails too. Then all paint and varnish will have a few days to harden. Through the post arrived the last pair of lifejacket hoods, Keith has got the one I sent him and it is fitted to his jacket already! I visited the chandlery down in Maldon, Marinestore, bought the Tides CD and a filter for the water system, plus new Aqua Tabs for the tanks.... I had to order that last Chart, the Imray C28 as it is so new they had not got a copy, I also ordered 4 Tidal atlas's I needed and had been unable to buy cheaply, Marine scenes prices are better than almost everyone for these! I will take a run over to Burnham's branch of Marinestore.co.uk Sunday, if I get time, as they have a good selection of Musto clothing there and I am interested in a thin thermal layer to wear under sweats etc. Talking of Sweat shirts.. I took delivery of a box full of crew clobber yesterday, new polo shirts, long sleeved rugby shirts and sweats, got to keep the crew warm, and smart! That's all for now off to do the antifouling and epoxy work! John P.S. just back from boat, freezing down there, too cold to paint or epoxy, so brought a few bits home to varnish... Where did spring go? |
||
 Note prop covered with plastic bag! Do not want paint on my shiny prop. I coat it in lanolin to protect it...
Morris Minor tow truck? No just showing off the paint! |
Monday 22nd April 2013 Fast running out of time, but over the weekend have managed to get a few jobs sorted. For starters it was warm enough to finish the antifouling! Also re epoxy one mast step fitting. Managed to get the start and auxiliary batteries fitted too. Sunday saw me putting the engine heat exchanger back together, with new seals and bolts and refilling with antifreeze. Got a slight weep from the back end, where of course it is the most difficult to check. I gentle tweak of the spanners and I stopped it, did not want to over tighten and break a bolt again! I managed to replace the primary fuel filter without lifting the cockpit floor, which saved breaking the watertight seal, fiddly but possible. However I now have to find one of those long flexible wands with a magnet on the end to retrieve the spanner I lost in the bilge, under the motor. It has to come out!. I bled the fuel system, easy now with the new fuel pump with manual primer. I rigged a 5 gallon jerry can on the stern, it has a water pipe fitting in the bottom and a hole cut in the side, hanging from the ladder on the stern it catches water from the exhaust and recycles it to the inlet fitting on the underside of the boat. Once filled with about 4 gallons of water I fired up the motor. After the motor had self bled the last drops of air, (it stops of course when air is found...), I managed to keep it running at 1500 revs for 20 minutes, so pretty sure it will be reliable when we are dropped in on Thursday and long enough to warm up the oils and check there were no further leaks. I then changed the engine oil and filter, then the worst job, crawling down the quarter berth head first with a long pipe, sucking the gearbox oil out, pipe full by pipe full, to change it. Came home with taste of ATF... but it was a good job well done. Went to Marina for dinner to celebrate and whilst there fitted the mooring ropes to our pontoon! Another job ticked off the list! Monday I spent another 3 hours on board, I cleaned of any excess epoxy from the mast steps and polished the ali spars. As it was getting dark I retreated inside and fitted the extra auxiliary battery and wiring and altered the monitor to read the now 200 Amp battery bank. I could then refit all the panels on the engine box. Looks a little tidier down below now. Tuesday I intend to finish polishing the prop, nearly mirror finish! Then fit all the halyards to the spars and lash all down for transport. With any luck Wednesday I will just have to tidy up. I cleaned off all the fenders over the weekend and also varnished the washboards and back supports we have on the guard rails. Gave them another coat today. The gear is starting to surface from winter store, all clean and washed at the end of last year, and stored in the dry, so all good. There will be 3 moggy van loads to go aboard! 2 days till launch! John |
||
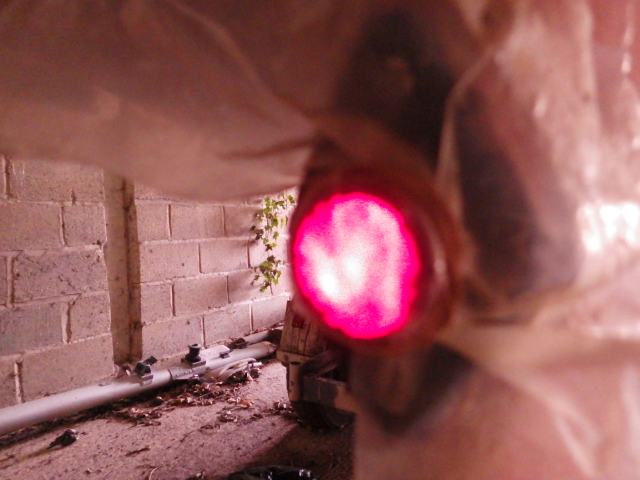
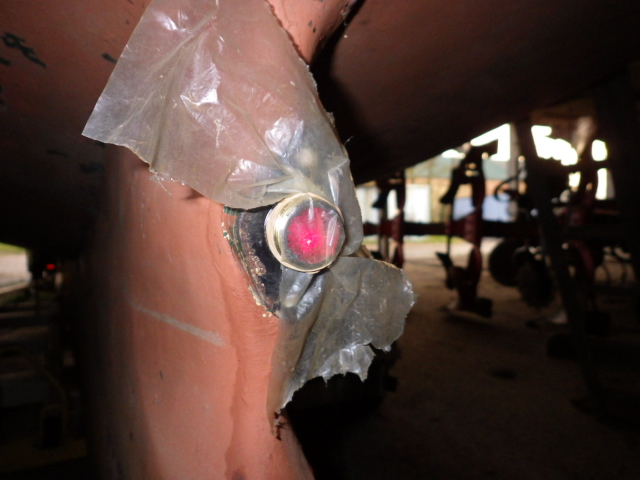
 If you look carefully you may just make out resident Little Owl!
Out into the daylight, now we see the bits I missed!
The short tow to the water
In the slings, antifoul touched up..
keel wet again, for another year |
Thursday April 25th.
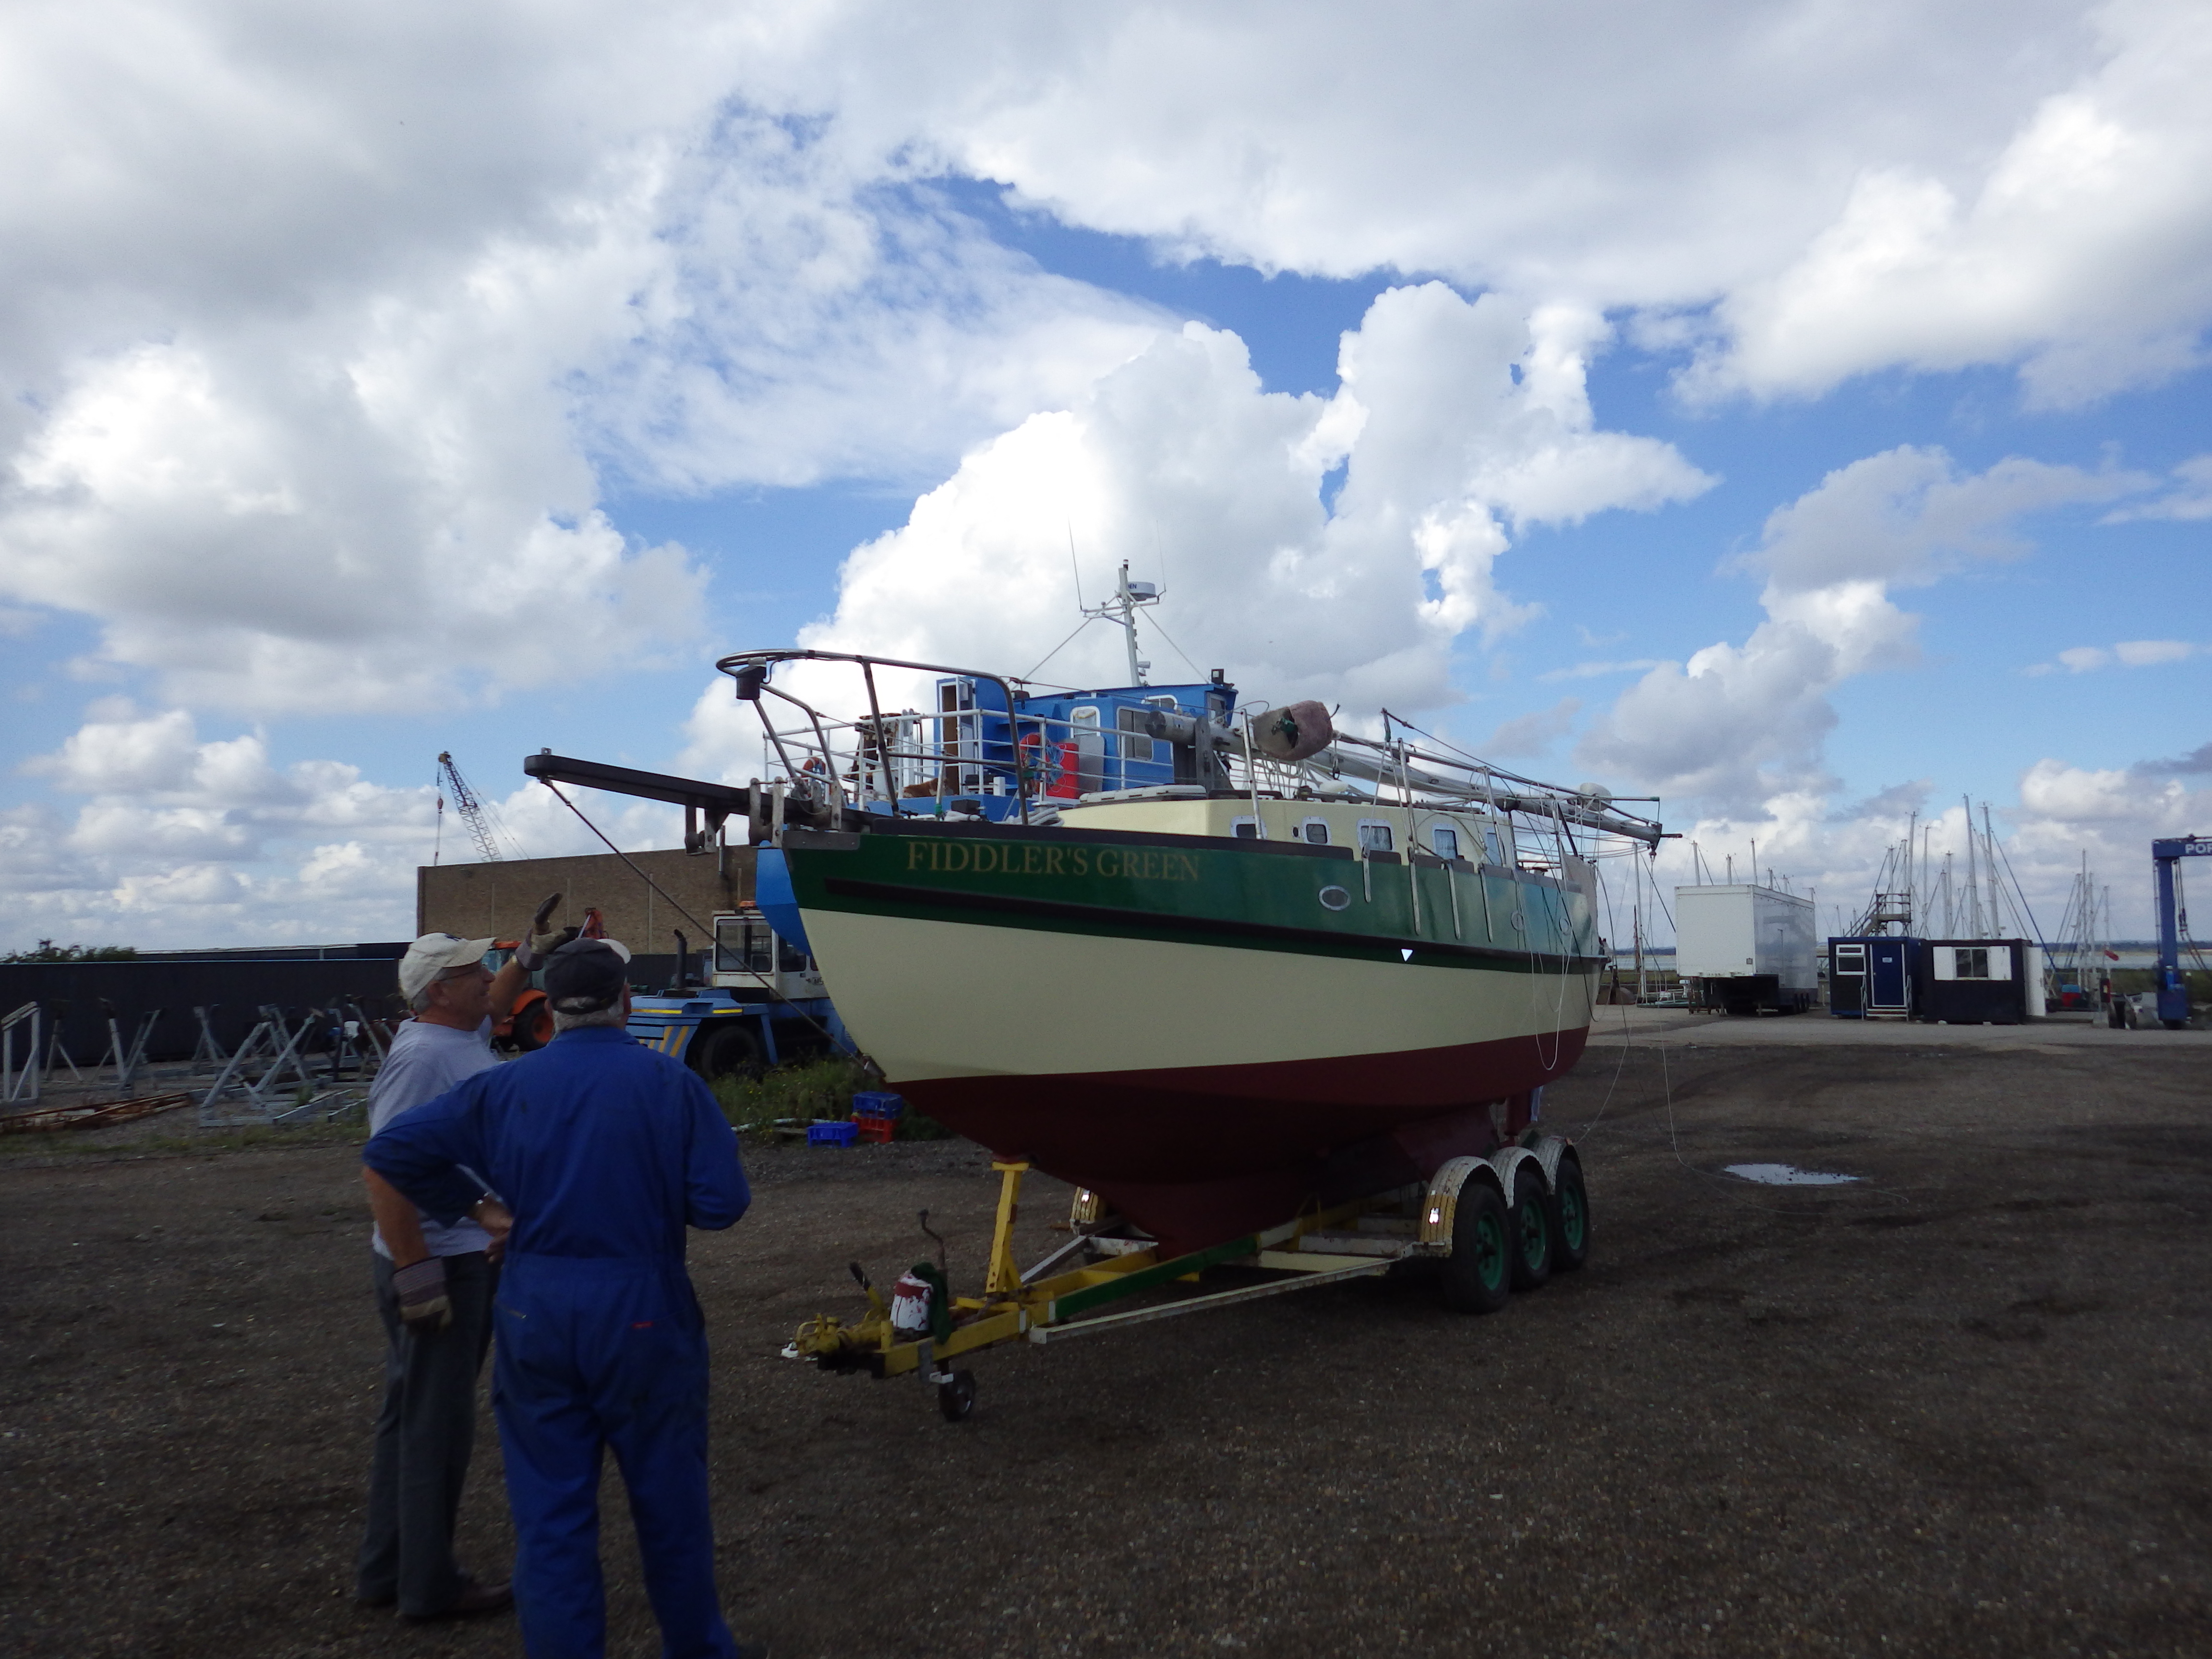
Should be doing today's in Red! We are afloat! Keith, Phil and myself were at the barn this morning by 10 and made her ready for the road, Phil swept up the barn and Keith and I attended to the trailer and lights, then a short trip down the lanes to Bradwell. Sadly the crane was out of action at Bradwell, so we set too to raise the mast with our normal gear. We had barely lifted it off the deck when the A frame bent, quickly lowered back and it was apparent we were not going to use it again without strengthening it, we dismantled it and plan B came into effect. The marina has a Bobcat fork lift, with legs and extending boom, we used that. Soon mast was up and tweaked to get upright and in the centre of the boat, lowers were tightened to keep the sail track straight and after a bit of a struggle, the back stays, which seemed to have shrunk over winter, were reconnected and the pre-bend I like to see put into the mast. The new mast steps got their first trial, as Ian's rope strop to hoist the mast got caught under the spreaders on one of the shroud clevis pins! You could not make that happen if you tried all day! So the rigging was all tightened to make the mast safe and Ian was up in a jiffy with the new steps and un-latched it! A quick sandwich break and then the marina lads were there to lift her off the trailer so I could get at the bits the antifouling roller had missed. (because the trailer get in the way). By 1500 she was back in her element and back on her berth! The crew stayed and assisted, so all the rigging could be double checked and tightened and the sails bent onto the mast and forestay. We fitted the new sail cover, the old one had done sterling job and had lasted 22 years. The new one had winch pockets and a little more room for the sail, a better fit! Keith even scrubbed the resident owl's poo off the stern deck! By 1800 all was ship shape all the tangles of running rigging sorted and all snugged down. I even got the solar panel on and in the evening sun could see it working. I will be back to her tomorrow to do a clean up down below and start adding gear. At the moment the antifouling is showing all round by at least 2 inches! By the time the rest of the kit comes aboard that will be down to half an inch! Good job done, now the fun begins! John
|
||
 coastal pack to top up flares box.
Water filter fitted. |
Thursday 2nd May
Just over 2 weeks till we set off and loads to do! We were down on board Tuesday, first chance we had got to get aboard as we have been rather busy moving house for one of the family, bad timing! We managed to clean and disinfect with Dettol wipes, throughout, including the insides of lockers etc. Then polish up the varnished bits with polish wipes, make a fair job of the clean up. bilges dried, (from the antifreeze mix drained from the motor), and all made tidy. Even managed to get the dodgers on, but by then the cold easterly was not something you wanted to be out in. We retreated to the bar. Wednesday I had planned to pick up the old dodgers that were being modified into fender and topsides protectors and a small extra dodger for the middle of the stern. Sadly the clutch control rod broke on my Morris Van and though I could limp home with out a clutch I baulked at driving to Burnham, instead I broke out the even older BSA Bantam for it's first run this year. By the time I got back with the dodgers I was frozen, a nasty Easterly... So I resorted to going through the flare box and ordering new! I also looked at the first Aid boxes again, loads of stuff woefully out of date, well the dates on the sealed packs had expired if that is anything to go by... to be honest a clean wrapped gauze bandage with an old date would be better than an old handkerchief! but I have found I can replace all at Tesco pharmacy, so in the next few days, I will be doing a canned food etc. shop and will add these bandages to the list. Add also anti midge cream, insect bite and aspirin and all the other pills and potions we normally carry. I also took the opportunity to scrub all the carpets. Yes we have carpet. Remember 'Flotex'.? The kitchen carpet you could spill food on and wipe up. Brilliant on the cabin sole. Even better as it was free! The off cuts from my sisters kitchen 20 odd years ago! The new flare pack arrives Friday as does the new rod for my Van's clutch! So Friday afternoon I hope to be on board and have all the rigging wired, taped up and secure. the curtains came down Tuesday, are washed and will go back up too, along with the new bit of dodger. I have one tiny bit of woodwork to clean up and varnish, where I removed the keel bolt and slightly damaged one of the poles supporting my cabin top, a bit of sanding and a lick of varnish will sort that. Then I start loading gear, and plugging in the electronics etc. I fitted the new water filter Tuesday and will be filling tanks etc next. (bought a supply of 'Aqua Tabs' to sterilise the tanks enroute too.) Hope it is warmer down there tomorrow! John |
||
|
Saturday 4th May 2013 Spent 4 hours yesterday afternoon/evening sorting the boat, having first fixed the van's clutch rod! For the first time this year the sun was really warm and that dreaded Easterly had dropped. Managed to mouse every shackle on deck and in the rig and tape all rigging screws and small reefing line blocks. These days I use small electrical ties to secure the pins in shackles, green ones of course! All the safety lines on the guard rails checked and the new stern dodger fitted. Carpets fitted, then I remembered I had to do the deck support pole, so lifted a couple of floor boards in the cabin and sanded and varnished the damaged area at the base. Will give that another coat today. Off to clean and polish the cabin top and load another 3 boxes of gear later today, will fill the water tanks too, at the moment the boat has a distinct list to starboard, as there is no gear or water or food on board the other side! Got the VHF and the GPS up and running. Spoke to Digital Yacht and discovered I can split the AIS output from the ANT200 to both plotters, clever! (Subsequently discovered this not the case, can only supply one or the other!). Have just ordered 6 small brass cranked bolts to secure the washboard, using the EBay page of course. At the moment it is raining gently, but hopefully that will have stopped before I get back down there. Busy weekend at the marina, not only are all the owners down for the holiday weekend, there is also a Triathlon, with a creek swim Sunday. We will have a putter out later in the week to test all the kit, when all have gone home! Off to load the boxes with more gear to take down! john
|
|||
|
John's SOS logo. Mail and spares service handed over to British Seagull, just whilst I am away.
Silk sleeping bag liners, by 2 get 1 free!
Navionics whole of UK plus Ireland and continent.
the last chart purchased, from Maldon's 'Marine store' cheaper than anywhere else!
have a pair of these surplus to requirements now, suit 30ft or larger boat, so you can fit them in! |
Wednesday 8th May 2013. Closed my Seagull business down today, for 3 months or so, just tying up the loose ends now. British Seagull are looking after it from now. We were down the boat over the Bank Holiday and loaded up with tin cans etc, loads of food. Put her down in the water a bit, what with that and filling the water tanks! Still got over an inch of antifouling showing and all I have to load on board now is my clothing and bedding. Crew Keith has acquired me a new warm sleeping bag and I have taken delivery of the silk linings! Idea from trekking daughter. We fitted and initialised the new Lowrance Plotter, very clever bit of kit, all self contained and mounted atop the cabin top is visible easily anywhere in the cockpit. The 'Navionics' card gives all of UK charts. Talking of charts, picked up the last chart yesterday, Imray C28, that we will need on day 2! Also picked up 4 more tidal atlases for Scotland and Ireland down to the Scillies. So that is a full house on charts and Atlas's. They will be packed in sealed plastic bags on board till wanted. Also bought a new white hand held flare as the one in the companionway is just out of date. Whilst on board I filled the Panic bag. Waterproof camera, EPIRB, hand held VHF, set of coastal flares, 3 survival suits, 4 bottles of water and two big bars of chocolate. I have a large box of just out of date flares as well, just in case. There are also three sets of mini flares, small enough to carry in an oilskin pocket and another EPIRB that will live in my pocket or strapped to my lifejacket. We loaded a half hundred weight of dry cell batteries on board too! The only major item I have not put on board yet is the dinghy, will wait till the tide is up to carry that aboard. It will live on deck part inflated... I have reached the decision that I cannot carry the 2 fold up bikes though, there is just not room. They are too bulky for stowing below, not that there is any room! And likewise bulky and weighty for deck storage. was a good idea. Anyone want 2, near new, clever fold up bikes with all mod cons, lights, carriers, suspension etc, in bags? I am trying to sort all the domestic matters now in preparation, you have to think of all sorts of things, paying car insurance, and making sure there are no letters or mails outstanding. Just paid for my SOS domain names! Last few SOS orders coming in to be sorted too. The EOG enrolment form will be dealt with by John Stevens and Chris in the Netherlands, but have no one to send out CD's and deal with general enquiries as yet. May divert some mail but may have to simply add an auto response. Peter the webmaster and I will be talking about this with John and Chris this next week. John.
|
||
 Belfield Tide plotter graph.
hidden harbours, interesting but most of no use to us!
Hefty tome full of good info and chartlets!
Another excellent pilot, lots of info and chartlets. |
Friday 10th May. Just off down to the boat, odd not to have to reply to 40 mails before lunch! The SOS switch over seems to have worked, or at least I am not getting the mails and calls. I contacted Keith Belfield of Belfield Tide Plotters today, I had as usual bought one of his UK tides CD's. I found the ports could not be viewed geographically, and were only listed in alphabetical order, not good. Keith showed me how you could click the chart symbol on the menu tab and get a graphical representation of where you are, with this you then can simply move to the next nearest place that tides have been calculated for. Also shows the tidal streams, now that is clever. Van loaded with dinghy and bedding to find a home for on board. Out of interest I also loaded one bike in it's bag, just to see where it may be stowed....? John P.S. Just back from boat, I have definitely given up on the bikes idea, they would be just too much clutter on deck and there is no where else to put them... Fitted the Logo to the sides of the cabin, courtesy of www.names4boats.com Took down a few more charts and pilot books, have to put them into plastic bags and stow them away below the bunks next. When I returned home the postie had delivered several more pilot books, more bedtime reading, just one to come. John |
||
|
Tuesday 14th May 2013. Just a few days to go now and I am tidying up the loose ends. Spent an hour on board yesterday searching for a set of waterproof pens we had mislaid. found them. Amazing how items get stowed away into corners. Whilst we were on board I gathered up my oilies and brought them off, washed them overnight and re-proofed them, along with a couple of light weight jackets. Had forgotten to do this earlier! The last pilot books and some more telephone contact numbers loaded into bag ready to go aboard. We have to split the charts into areas and include with each chart any contact numbers etc, then seal them in plastic bags and stow out of the way till needed. Storage space aboard is now at a premium and it did not help when Darian found a few more jars and tins of food. They were literally 'shoehorned' into lockers! We have booked a table for 7pm at the Marina bar Saturday night. Most of the participants and their other halves etc are coming along, Daughter Jenny is working, cycle ride twixt Paris and London I think.... Some of the crew will be leaving gear aboard, though not sure where it will stow! (Bulky items like sleeping bags.. though to be honest the modern sleeping bags compress down to very small packs, so they should stow in the toe of the quarter berth OK. Took some pics of the new logo fitted to the boat, courtesy of Mel at www.names4boats.com I will post them once I find the camera lead, which I must have stowed on the boat! The weather forecast for Sunday has changed twice in the last few days, from F3 NW, perfect! To Gale 8 NE, no way, and now F4 Northerly, not good... we will have to see how many more times it changes. After the wind and rain for the next few days, hopefully it will settle down! Off to get my quarterly hair cut now! John
Click here to go to the ship's log page ************************************************************************************
|
|||
|
The big plan for …. 2015? now 2016!!! and after medical problems, 2018!!!!!!! January 2014 and I have decided to update and continue this page, why, because I really want to finish the circumnavigation and I will be doing some modifications to 'Fiddler's green' as a result of our experiences, so will continue to log them.
|
|||
 Liferaft in for service.
The new cooker ordered.
New 105 Ahr fridge battery
Hi duty Hello plug
and plug with car sockets
Laptop support with cooling fan.
Laptop charge lead for 12v.
|
January 2014. I have run the life-raft into Dave of Mailspeed Marine who still lives in Burnham, he has agreed for me to stay in contact with him as I was a loyal customer! When Mailspeed was based in Burnham on Crouch I was more than a regular visitor and in fact I bought out all his remaining Seagull spares some years back. I go back as far as 1978/9 with Dave, when he ran a discount chandlery in Leytonstone/Chingford area. Lakedale Marine, remember that? Moved to Burnham Marina years later. In 1978 bought one of the first multi channel VHF radios! The Ocean Star 240. A breakthrough in its day. You could chose which 24 channels of the 55 available that you wanted and with a screwdriver program them in, by moving tiny screws about on an internal board, how quaint! Our old Eventide was the first cruiser in Tollesbury to sprout a VHF antenna! The life-raft is a 'Seago' and can only be serviced by 'Seago' authorised agents, sadly Premier Life-rafts of Burnham is not one. We wait to hear on that. 'Suffolk Sailing' have taken on the servicing contract locally, so my raft is with them. Rafts have to be serviced every 3 years, to check all over, test the CO2 bottle and to replace the flares in the raft. I have also asked Dave to source me a new cooker. I have gone for the Spinflo 'Nelson'. Not just for the name either! I have done quite a lot of research and though I could buy one at the same price, just, on EBay I could not get the gimbals I wanted.... It is an all stainless 2 burner, grill and oven cooker, with flame failure devices all over and a regulo on the oven. I have asked Dave to source me a new set of Plastimo Neptune gimbals for it though, as the ones Spinflo make will not fit in my galley. (As it happens they did fit and the spare set of new Plastimo ones were later passed on to a friend for a very small fee!) I have several other jobs lined up. Most resulting from experience on the trip. It was not possible to add 10 ft to the boat......, but I hoped I could make things on board safer and more comfortable. I needed a new battery for the fridge, there are two servicing it giving a total of 200Ahrs. The 110 Amp hr battery failed at the end of the year. It was 5 years old. I could not resurrect it with the special de-sulphating charger, so splashed out on 105Ahr one to match all the others, so total just under 200 Amp hr now. One item not on my list before was extra electrical charging socket up forward. To this end I realised I could buy a heavy duty plug to fit the matching socket and have a twin car accessory socket lead on it. Again using the EBay page managed to get one at a very low price! Now I can add a twin USB charge socket into one and that should take care on most of the phones, tablets etc that wanted to be charged. The new usb socket fittings fit any 12v accessory outlet. One of the problems I had on the trip was the laptop charger overheating and the laptop itself getting hot whilst charging. I had found a stand, or Darian did, that kept the laptop off the bunk cushions to aid air circulation, but I later found a fan vented stand, usb powered for a fiver that has sorted the latter problem. The 12v charger was trickier, I searched and could not find one, as it is an old model so dismissed the idea. Even thought of using the small inverter and the mains charger, but prompted by John Stevens, one day I searched again and, bingo! The real McCoy! A Panasonic 12v charger designed for my Toughbook.! £22 delivered. Result.
|
||
 Stripper bearings
Deep Sea Seal
Delrin plastic for bearing |
February
2014. I have had Lawrence survey F.G. and he has only turned up the 3 things I had in hand, so that is good. I also have a few things I want to do, mostly painting and cleaning though. Lawrence has been informed of the relocation of the fuel tank and the material it will be made of and approved it. I have now spent a day on board with the engineer Simon and as his helper torch holder and gofer we have removed the Deep Sea Seal, it was shot, removed and checked the Stripper rope cutters and extracted the worn stern bearing (Number 1 on the surveyors list), and extracted the shaft. Well worth employing him for the day, great leaps forward! There is a little wear on the prop shaft, as one would expect from 24 years of use. The shaft is going away to either be ground off and metal sprayed, then machined back to 1 inch, or if it is cheaper, replaced with a new shaft. (This turned out later to be a real disaster and the last time I ever got involved with Simon the engineer!!) Should be back in a couple of weeks. Just in time to align the motor again when the new rubber mounts have been fitted. The outboard bearing was a plain tuphnol one, and has survived 24 years, but is now worn out. There is no cutless bearing, no water flow grooves though the bearing holder, the shaft simply rotates on a plain bearing on a film of water, works for me. Today, tuphnol this size does not appear to be readily obtainable, it has been replaced in bearings by Delrin. I use our EBay page to buy a couple of suitable off cuts for £5.00. One to machine for a new bearing , one as a spare for the cupboard! ( For 20 years time!).... We checked over the engine coupling, a very flexible Vetus Centa-flex, that was as good as new and will go back. The engine is now clear, so the feet can be unbolted and replaced. I have a new set of rubber mounts from Beta Marine. 20 years is a long enough life for a set. As there is suddenly a lot of flex I am suspecting at least one mount rubber is breaking up. Whilst doing this I removed the rudder and inspected the worn heel bearing, (Number 2 on the surveyors list). I found it had badly worn, so it has been removed and a new one grabbed from my store cupboard! I have still yet another on the shelf for use in 10 years time! It is a Tuphnol tube and has to be machined out to fit the heel pin, which in turn has epoxied over it, a smooth hard plastic tube as a bearing surface. Both this one and the other spare taken to engineer to machine to size. Then we switch our attention to the deck and the Simpson Lawrence Anchorman winch. A simple manual winch operated with a standard winch handle. The winch had become wobbly, (No 3 on the surveyors list!). Stripping it down it is apparent there is a worn plastic bearing. I subsequently search the net and finds the man who has the spares and I have ordered a new bearing and the associated plastic washer, £20.00 Good days work.
|
||

Blackwater Plastics The tank makers.
New stainless deck filler.
2 metres of new filler pipe.
2 metres of new breather pipe.
Sender and gauge.
The Vetus connector kit, includes hold down straps! |
Sunday February 23rd 2014 I have spent some time aboard this week, culminating with 4 hours yesterday afternoon. I have reassembled the anchor winch with the new bearing, all working fine, but I noticed a small screw had snapped inside, so have sent away for a replacement, just got to remove the remains of the old one..... I set to and cleaned my bilges out, dirty messy job as the sterntube greaser had gone berserk and grease had spilt out onto the shaft and been thrown everywhere! With the assistance of lots of rags and a can of spray gunk I now have shiny clean bilges again! The bilges being now clean and dry I gently sprinkled half a litre of clear Cuprinol up into the stern locker to dribble down either side of the hog and crawled up into the chain locker to do the same with the other half a litre. I will have to open the boat up fully whenever I am down as the smell is a little powerful in an enclosed space! Hopefully it is going to soak in where ever it is needed! The main job on my list from the trip was to double the size of the fuel tank. I have just an 8 gallon stainless tank. Fine for the last 24 years of local coastal pottering and the odd North Sea crossing.. but.... I wondered if this was at all possible, but having lifted the cockpit floor I have found I have space for a 16 gallon, 72 litre tank, exactly doubling the 36 litres I have. It may work out slightly smaller or larger when I actually make the cardboard mock up and allow room for the connections, but it is a big tank! Low and flat and it will have baffles to prevent surge. It puts the weight in the right place too. Before the tank was higher up, just under the stern deck and off set to starboard and taking up much of a cockpit locker. How can I get such a tank under the cockpit? Remember 'Fiddler's Green' was built to the later Eventide drawings and has the extra height in the topsides to offset the extra ballast and the higher waterline, so the seats and the sole in the cockpit are higher, enabling a proper self draining cockpit. The cockpit sole is now a full 6 inches above the waterline. I removed loads of closed cell buoyancy foam shoved in there 25 years ago and I have shifted the wet exhaust and other pipe work to one side, to allow room. I have temporarily removed one of the cockpit sole supports to allow a tank to drop straight onto the main frames and floors. It will go back afterwards and hold down the tank. Some of the foam will go back in too. About a third of it. A local firm is making the simple rectangular tank, but it will be 2 inched deeper at the front end, because of the shape of the boat of course and this where the fuel pick up will be. To make construction of the tank easier and cheaper, I have ordered an aluminium, Vetus tank top plate, it has all the connectors in it, including the place for the sender for the fuel gauge, as from now on I will not be able to dip the tank. I have used our EBay page to buy a new gauge and sender, a new deck filler, (mine is plastic and the opening key built in, broke years ago, I have been using a bit of an old Seagull tiller as a key for years!), a length of new filler hose and a new air breather hose. I will be shifting my primary filter, a CAV, to a position where it can be more easily serviced, through a larger deck hatch that I hope to fit in the cockpit sole. I have to remove the old fuel tank next, so am off down later in the week with empty cans to empty the diesel out. (I always leave the tank full to stop any condensation inside and the resultant contamination... ) Had I given it more thought end of last season I might have left the tank empty! I just have to move the throttle and gear change cables slightly, easy enough, plenty of room, but as they pass through holes in bulkheads I have to remove them at one end to pull them through. Bet I drop a nut into the bilge! I have to make a couple of neat holes with a hole saw to route them. So far no horrors exposed, all hidden timber in great condition, so once I have finished sawing and shaping, I have just to sand, prime and touch up the Danboline bilge paint.. I will be fitting a bottom panel into the starboard cockpit locker that had the tank in it and maybe partitioning it off, so all the small bottles of oil etc carried before, wedged behind the fuel tank, will not run amok in the new open space! I love working out these little problems, it one of the joys of owning boats like our, you can tinker!
|
||
 New hatch purchased... |
Monday 24th February 2014. Spent several hours aboard this afternoon and drained all the diesel out of the tank. Then set to and removed all the fuel pipes and hoses and eventually lifted the tank out of the boat. As it was in the stbd aft cockpit locker I also had to remove the throttle and gear linkage as that was in the way inside the locker. I suppose there was a gallon or two still in the tank, this and the weight of the very heavily constructed stainless tank made it a struggle single handed to extract it, but I knew it went in so must come out. I now have an empty aft stbd locker and am amazed how big the 8 gallon tank was when I got it out, as, when in the boat you could only see a bit of it! I measured up the Vetus tank top fitting and I figured I need 4" above the tank, so it may be lower than I first thought, but I found I could extend the tank forward a few inches without impinging on anything so the size may still be 16 gallons! I shall be measuring again, very carefully when I have moved the exhaust pipe and the water trap. Need to saw a few inches off the first section of 2" hose between motor and trap. I will easily be able to relocate the control cables and look to do that in the next day or so. I have ordered a new deck filler so I removed the old one today, it has been in use for 24 years and the length of hose between it and the tank was still OK, just! Pleased to have a new length on order though! Whilst I was aboard I splashed the last drop of Cuprinol up into the transom locker as there were a couple of bits of suspect paint there. I will be sanding these off later and repainting. I have to take a cubby hole out of the starboard cockpit coamings next time I am down, it is screwed onto a bed of soft mastic so can easily be resealed. I had it out last season to put larger winches on the top of the coamings so should be be easy enough. Once out I will be able to get at the air vent for the fuel tank, hidden away onside the hollow coamings. I will inspect it to make sure it is fit to use again then I have 2 metres of 16mm air vent hose to route! More jobs for the hole saw! The old fuel pipes have all been destroyed, had to, to get them out, good to see they were in good order though. I will be using new seamless copper fuel pipe to the CAV filter and new braid covered flexible from there to the lift pump on the engine. The Bleed off pipe will be a single length of braid covered flexible from the engine to the top of the tank. Will buy these made to measure once I get the tank position and the connectors figured out. I measured up the cockpit floor area over the stern tube greaser and the CAV filter, and for ease of access to the CAV I have bought a larger rectangular watertight hatch. This turned out to be just as fragile as the earlier hatch and was subsequently replaced with an opening cabin top hatch, modified by the addition of a Treadmaster panel... this has stood the test... The new fuel gauge and sender arrived today. Now got to find somewhere for the dial to fit!
|
||

|
Thursday 27th February 2014 The new fuel filler pipe arrived today, very flexible as it was curled up in an 18 inch square, flat box. Yesterday the new stainless deck filler arrived, very impressed with the quality. I had ordered a tiny screw for the anchor winch, which arrived in the largest envelope today, ridiculously large! I have to get the old screw out yet.... soaking in WD40.. The new hatch arrived too. I have the cockpit floor/sole in the workshop and will tidy it up and jigsaw the new sized hole for it. Hope to pick up the re-machined rudder bearing soon and if it stays this warm, epoxy the plastic bearing surface onto the galvanised steel pin on the heel of the rudder. I am hoping to rub down the cabin top soon and Phil has volunteered to help not only sanding but with the painting too. If possible we will then do the the decks. We painted them 3 years ago but I used the wrong colour, just a shade too light! The hull's cream paint is still in perfect order, though the green really does need a repaint, it will polish up, I may well leave that for a year, concentrating on the cabin top. Will spend some more time carefully measuring the void for the new tank over the weekend and relocating the control cables. Then its off to the manufacturer with the drawings and template for the top fitting, just a simple circular hole. The prop shaft is with the engineer and I should hear if it is to be repaired or replaced soon. Look up to see my postie delivering, the air vent hose just arrived! I will whip the stbd cubby hole out to reveal the air vent fitting. I cannot recall if it had a hose tail of a compression end. As there is a 3/8 copper pipe disappearing onto the coamings so I have a feeling it will be a compression end, so may well have to replace that too.
|
||
 |
Saturday 1st March 2014. Spent 4 hours aboard today, moving the throttle and gear cables and removed the last of the old fuel pipes and return flexible braided pipe. I will be replacing all. Measured and measured again to get the tank sizes right, put together the Vetus tank top connector to get an accurate measurement of the space needed and moved the water lock on the exhaust 2 inches forward to allow more room. Carefully noted all the sizes. When I got back to base I calculated the cubic capacity in inches, 4400 and converted it to litres. I had hoped to get a tank about twice the size of the old 36 litre one. How big? Exactly 72 litres!! Could not have planned it better! Whilst aboard I also removed the last part of the air vent I fitted 25 years back. It had 10mm or 3/8 copper pipe plumbed up to it and had to saw off the copper pipe. I had forgotten that I had soldered it to the fitting all those years ago. It came out reluctantly and I have just bought a replacement, using our EBay page of course, £11.25. The old one owed me nothing! I have to make a couple of holes through the area a little larger to easier pass the pipes and cables, and the new 16mm air vent hose. Hope to be down during the week and lift the motor to replace all the engine feet. Certainly all is clear to get at everything... then await the refurbished prop shaft and bearings. I have brought the CAV filter housing off and will be moving it to a new position to make it easier to service, but will cheat and replace the filter before I take it back to relocate! Got to replace a couple of the pipe connections on it too. I will be measuring up for a couple of lengths of stainless braid covered 8mm fuel pipes... Heard from Dave at Mailspeed today, cooker and fiddle rails on the way apparently. Also ordered a pair of new hose tails for the CAV filter, for the new hose! (Our EBay page came up trumps!). I have been advised to go to all flexible braided hose with s/s braid covering.....
|
||
 |
Monday 3rd March 2014.
I was hoping to drop in at the fuel tank maker today, to discuss the making of the tank, where the inspection plate can fit and where the baffles can go and still allow the fuel tank sender to work..... but it was not to be, next couple of days. In stead I have sorted the last hose tail connection problem I had. The bleed off from the motor. The pipe is a 5mm one and at the moment I have an compression fitting adapter on it to fit a 8mm copper pipe. I realise I can simply fit the new braided 8mm pipe to this short length of copper pipe, but Beta do a flexi pipe with a 5mm hose one side and an 8mm hose the side of a brass adapter. So got choice of two. However having looked at it it seems overly complex... I think I may go back to my solid compression fitting, as has been on there for 20 years and attach the bleed back hose to the 8mm pipe, simpler. Have to measure the 3 lengths of stainless covered braided hose I need next. I have part assembled the Vetus fitting, shown left, to get an idea of the space needed on top of the tank for all the connections. Still slightly concerned about the straight 8mm bleed off fitting and the 16mm vent hose fitting, not till I offer the pipe up and see what radius I can get will I know. Do not want the hose, even if it is protected with a stainless braid, to rub on the underside of the cockpit sole. I will be much happier if I can find 90 degree fittings to enter the tank connection plate. Have booked to work on the engine with the engineer later this week, to replace the engine mounts and remove the broken screw in the winch. My shaft is going away tomorrow. When it is back, the Engineer and I will refit all, shaft, bearing, seals flexi connector and rope cutters, then align motor... (As it happens there was a cock up with the shaft... all is revealed later!) Then it will be just down to me to fit and secure the new tank and connect all the pipe work, sounds straightforward enough!!!
|
||
 CAV 296 filter with built in priming pump!
Spare 296 filters
3/8 BSP fitting to take the bleed back hose tail.
5/8 hose tail on a 1/2 BSP thread, for the air vent!
|
Tuesday 4th March 2014 One of the alterations my engineer friend recommended I make to the fuel system, was the inclusion of an in line fuel primer. I thought it may be a good idea as now the tank was not gravity feed, so priming if I ever ran out again, may be more difficult. However the only bulb primers were the sort used on outboard tanks and no one could tell me how robust they were for permanent plumbing in to a diesel system. Having thought about it for a while I recalled the fuel filter in one of my recent cars. A diesel. It had a pump built into the filter housing, very robust and if my one was anything to go by, would last at least 12 years! A quick search on the net, then to our EBay page. bought a new 'CAV 296' filter with pump! Result! As I was on a roll, I then bought a pair of spare filters! Dirt cheap! Looking further I realised I could probably find the 90 degree elbows I needed for the air vent hose and the bleed back fitting if I altered the search slightly.. Bingo. After a few false leads, I found exactly what I need for just a few pounds. Now I feel much happier that the braided hoses will not be subject to sharp bends and risk of chafe. What braided hoses? That is the only part I have not bought as yet. I will measure up and order these this week. Off to tank maker today!
|
||
 Bradley replacement bracket
CAV filter with pump
Jabsco filter
Sikaflex sealant
My liferaft |
Wednesday 12th March 2014 I have had one step forward and another back. Such is fitting out! Epoxied the replacement hard plastic tube onto the rudder heel and inserted the new tuphnol bearing into the skeg fitting with loads of Sikaflex. Will refit rudder when prop shaft back in... I have placed the order for the fuel tank and wait on that now. I have just about all the bits needed to fit it, baring the fuel pipes, which are to be modern stainless covered braided flexible ones. I have just to organise the bleed off pipe end fitting, at present the pipe on the motor is 5mm, I have to make it 8mm to suit the hoses... Looking for options I was about to re fit the Jockey hitch and thought I would paint it first, however on cleaning off the Bradley bracket I found it was cracked! Ouch, heavy cast iron.... Just bought a new one using our EBay page, £10.00. The new CAV filter with pump arrived and I am about to fit it, also fitting the new hatch in cockpit sole. Now the filter can be easily serviced through the hatch. The new cooker arrived and has been checked over. I have found that I can use the fiddle rail and gimbals supplied with it. The Plastimo cooker removed and is coming home, the cooker already sold, complete with its gimbals and anti 'jump out' brackets! Gently cleaning off the cockpit sole board before that is ready to refit. Got to clean off the frames that it sits on. messy job. Got to get that done before tank goes in! Arranging for engine feet to be replaced next week, spent an hour unscrewing the 8 long s/s bolts that fit into the large trunnions in the engine beds! Spent 2 days nursing shoulder muscles afterwards! Popped into chandlers and picked up a new Jabsco water filter cartridge, and another tube of Sikaflex for the cockpit hatch. Waiting for stainless shaft to come back, or the new one that will probably be made to replace it...... 4ft of stainless 1" shaft, approx £240.! Waiting in today for the return of my life-raft, serviced and ready to store, hopefully unused for another 3 years! Getting there slowly, good news is the weather is warming up!
|
||
 Very expensive paint
but I get to have the right colour... |
Monday 17th March,
St Patrick's Day and the sun is out again. Sadly I have been grounded by a perished fuel filler pipe on my Moggy Van, so working at base only, the antifouling scrapping will have to wait. Heard the shaft is being remade, cost of £240! New fuel tank is being made, cost of £225! Loads of jobs out standing and beyond my control at the moment. When I have my wheels back I will get down and refit the new strengthened Jockey wheel bracket and scrape off some more of the old antifouling, rotten job. I have 3 or 4 small areas where the epoxy has been damaged on the chines, will repair these now, they have been sanded down and drying out for a few months. I have made a few enquiries re green paint, but once again it is only the Awlgrip 'Kelly Green' that matches, so guess it will have to be, £200 for a quart! Ouch! Tried to contact International Paints, but got no response. They used to make a 'Cape Green' in South Africa, 2 pot. Managed to get a litre once before.... shame I like their paint. Gone 1800 and just getting dark, at least the evenings are getting lighter! Clocks change when? You can see the summer fast approaching.. That Wednesday in May, and so much to do... John
|
||
 The new Nelson cooker. Slightly larger inside, deeper front to back, lockable gimbals. |
Tuesday 18th March. After an amazingly quick postal delivery of the new fuel filler pipe rubber tube, the van was back on the road and I was off to the boat. I spent an hour fighting the jockey wheel and it's bracket. After putting the blessed thing on upside down, and finding I could not turn the locking lever. I got it right the second time. I hope it is now a lot stronger than it was and will stand up to the job! Hope to spend some time removing the thicker bits of antifouling over the next couple of days, then I will take the bull by the horns and start rubbing down the cabintop paintwork! Going to be a fiddly job. Sorted out the can of paint today, 'Fighting Lady Yellow'! International perfection 2 pot. Whilst I was down the boat this week I fitted the cooker gimbal supports. They are through bolted now not screwed. Got a new copper ferrule for the gas pipe and with any luck, if I got the measurements right, it will just slot in. Cannot do a thing with the engine mounts, deep sea seal or rope cutters until the prop shaft back, neither can I do much with the fuel tank, till I get it either. May be able to route the air vent hose, needs a hole drilled with the hole saw to pass it through from the inside of the cockpit locker to the underside of the cockpit sole... Have yet to sort out an 8mm spill union on the Kubuto and if I cannot figure out a neat way I will just have to buy the Beta Marine adapter, has a 5mm hose tail one side and 8mm the other, a short length of 5mm flexi and several clips. Just seems to be a couple of joins too many. Better to come off in an 8mm hose tail to suit the new 8mm flexible stainless covered hose I have planned for. With the weather staying warm for a couple of days I will be sorting the little patches of epoxy on the chines too. Soon.
|
||

The Blackwater Plastics sticker on the new tank.
Comparing the old stainless tank to the new plastic one, yes the new one is twice the size.
When I saw it on it's own I was not sure!
Cut out for Vetus connector plate
Connector plate fitted
The outlet to the motor is the steel pipe, the suction end curves in the tank towards the middle of the front, the lowest part, but is 10mm off the tank bottom. The smaller brass one the bleed back.
The larger brass hose tail is for the air bleed and the circular plate is the sender unit. the Senders float is at the 2 o'clock position and 'just' clears the tank sides and baffle!
My magic paint scraper
Strong and sturdy with good grip, the scraper not me!
Removable and sharpen-able shaped blade |
Saturday 29th March 2014. I picked up the new fuel tank yesterday, it is strong! Colin the fabricator, recons you could drive a car over it!! I believe it! Made of 10mm thick special plastic all welded construction with a pair of baffle plates welded inside, it is really robust. I spent a couple of hours yesterday afternoon fitting the Vetus tank top connection plate. Very complex. My fault as I wanted to change the straight out pipe connectors to 90 degree connectors so the hoses would all go horizontally on top of the tank, there will not be a lot of room under the cockpit floor for them to go straight up! Had to get spanners into odd positions to tighten them all up. Fitted the suction pipe so that is went to within 10mm of the bottom of the front part of the tank, the deepest part of the tank and then had to alter the new sender unit so that the float would rise and fall without fouling anything. Fitted in, just. Hopefully today I will take the tank to the boat and offer it up. Then I have got to figure out the best way of restraining it. Supplied with the Vetus tank connector are a couple of lengths of webbing strap, but though I may well use them, I think it will need more that this, so I am looking at screwing wooden blocks around it to restrain it too. Spoke to Simon re the prop shaft yesterday, will be another couple of weeks. That will allow me time to clean out the dust in the bilges, sand and touch up any paint and then fit the tank etc. I am hoping to repair the locker drains in the cockpit and maybe sand down the cabin top ready to paint... After my rechargeable drill failed last week I bought a replacement charger on EBay, it came with a new drill and case, great, but the charger was not the correct one, not the same as the one in the auction, actually broken!!, no idea what happened there but the seller has promised to send the correct one, makes me wonder why he sent a duff charger.. did he think I was bidding on just part of the deal I wonder... If I do not get a new working charger from him, the lot will go back. Annoying. Again, fallen foul of not sticking to my rules. 'With mechanical or electrical items, only buy new!' When ordering up another load of Marclear for my customers I was offered a stray can of the old Workboat red! Now should have enough to paint her bottom for the next couple of years in the 'right' colour, it matches the sails!! Spent a day searching for my patent antifouling scraper last week, turned out the workshop, garage and boat shed... could not find it. Very annoying as I always put tools away properly for next time. At 0200 that night I woke and realised where it was... straight out in the morning and sure enough I had dropped it under the dinghy in the boat shed. I had used it to clear off some paint last summer and recalled dropping it. Sadly the tool was covered in dried paint and Nitromors and the blade rusted. A 15 minute job to wire brush clean and then sharpen the blade so now I am in business again. I will photograph the scraper as I have never ever seen another like it. The blade is clever, looks like a 3 finned rocket. Lay it flat on an oil stone and 1 blade becomes a 'handle' of sorts allowing you to sharpen it, rotate 1/3 of a turn and do the next and the next. The blade is then held in by two small thumbscrews. Solid, neat and it works! Believe it may be Swedish. Bought from a boat builder with a crate of surplus gear 30 years ago, precious! Will be using it, bit by bit, to remove any thick antifouling... Whilst I was on board I also fitted the modified bleed back diesel fitting. I simply had the 5mm to 1/4 inch compression fitting machined out to 8mm, 8mm pipe fitted with new ferrule and 8mm nut, job done! The new 8mm braid covered hose, (yet to measure and buy!) will now fit! I was made an offer I could not refuse recently. An near unused, the perfect colour, Green and Cream Cruising chute. Slightly too long in the luff, needs shortening 4 ft but perfect otherwise. To be stored till I can afford to have it altered. I will have a large ' fiddle' stitched across the central yellow panel too! Already had words with Ian the sailmaker, not a problem apparently! Bonus is that I already have a buyer for my little used cruising blue and white chute! I will also be getting a new snuffer made up for the new one! Temperature rising to 12 degrees outside, and it is only 0920 so hopefully going to be a warm one. time to get down the boat. Epoxy time! John |
||
|
Thursday 3rd April 2014, time flies! Spent some time on board and the tank slotted straight into the space! I have figured out how to restrain it too, a combination or wooden wedges screwed in place and hold down straps. Had great difficulty getting it out once tried in place though, there is nothing to grab hold of except the pipe fittings, not going to chance that. Have spoken to son in law who is oil boiler man and we are going to remove the pipe fittings and refit with his special oil tight sealant! I had thought about it and realised that if it leaked after I had refitted the cockpit floor it would be a nightmare to get at. Think ahead! That is what seamanship is all about! I sorted out a beautiful thick plank of Afromosia from my store yesterday, just a short length, but I have been able to cut a 5.5inch diameter circle from it to raise the filler cap to over 2" off the deck. That will help it I have water on deck again when trying desperately to re fuel! Was off to the boat again yesterday but the van had other ideas. The battery duff suddenly, a cell failed. Ordered new battery, using the EBay page and replacement should be here tomorrow. So in the meantime shaping cockpit lid supports and drains and the Afromosia filler plinth. While I was on board and the tank in place I measured for the stainless braided fuel hoses. These are now ordered, (yes, using our EBay page). Friend Doug popped round during the week and left me with a near full can of my antifouling, the right colour. Could have enough for 3 years now! He also brought some ends of rope round, green! What a nice man. He will be coming sailing with me this season! I have to break out the generator and make sure it is OK, then when van back on the road off to boat with generator and vacuum to clean those bilges. Whilst at the boat I scrapped off loads of the old thick antifouling and hope to continue to do this, small amounts at a time, till I have all the many years accumulation off. Also spread epoxy on the small damaged areas on the chines. I think this must have been caused by the lifting strops in Scotland, they were narrower than the ones used at Bradwell and the places the damage occurred is exactly where they were. Not a problem. The iroko hardwood was sanded and left to dry for 5 months before applying the epoxy. I will sand and apply another coat at least before I am happy. Have a slight repair to do on my trim tabs, where the over enthusiastic surveyor tapped one with his 'sounding' hammer. Again not a big deal! Now the temperatures are up, it's a 2 minute job. Off to the post office with my seagull parcels now, will work in the workshop later and finish off all the timber bits so I can fit the tank, the locker drains and the deck filler.... when the Moggy van is sorted John
|
|||
|
Saturday 26th April 2014. If you have read the Stoppress page you will know. Not much work will be or has been done on the boat. There is the real threat of a gypsy encampment in the field behind our garden so I have been loath to leave the property. All sorts of odd types have been seen here. OK because of my alertness and warning the 'authorities', we managed to get a 'Stop notice' on the land at the moment, but that expires in 3 weeks or less and after that if nothing new is done and our suspicions are right, travellers could move in anytime and will be a blighter to shift. So I have taken the decision to leave the boat securely locked in her barn for the year and swallow the loss of the mooring money just paid. Maybe they can let my berth. At least I should be able to ensure she is 100% fit and ready for 2015! Provided I can leave the house unattended to go and work on her. I have the new prop shaft and bearing back now, and I have polished the prop, back to mirror finish. Do not know what it is with people but the guy who did my shaft took it upon himself to bead blast my prop!, took me hours to polish it to mirror finish again!!! I always polish the prop, it stays un barnacled, I feel it is wrong to paint props.... the easy way out, at the beginning of the season it is OK, but a spinning prop will wear even hard antifoul away, so by the end of the year it may become a blob of barnacles and weed, seen it so many times. (Mine comes out clean!). All is prepared for the new cooker to go back in, just needs manpower to lift it aboard! The motor is waiting for the engineer to find time in his work load calendar, to change the mounts. Re align the motor and refit seals and stripper... There will be no screaming hurry now! I have the tank ready to fit back in, the bilges vacuumed and cleaned, repainted too. The cockpit floor is just needing a coat of epoxy on the edges of the grain again, after I cleaned it off, then that is ready to go back, but all waiting on the engine feet and alignment, then servicing, when all the fuel pipes etc. reconnected. Looks as if I will be able to repaint the cabin top, the decks, the cockpit and the green strip too. Really would have liked to be sailing, but not going to go away and leave here if there is a chance of an invasion. So living by the minute here at the moment. All on hold. John
23rd October 2014. I have been working on the boat little by little for a month or so now. We think we have sorted any problem with the land next to us and now have a barrister on call 24 hours a day who will get a court injunction within 10 minutes. 365 days a year! This locally is now common knowledge and as a result we have seen nothing of the new land owners for weeks, (last time they were her August the 8th!) There is a possibility that after having their planning appeal refused it may well be back on the market shortly.
|
|||
 helper covered, almost, in sticky sikaflex!
Vetus Uniflex/Centaflex shaft coupling.
fuel gauge and fittings.
New Deep Sea Seal fitted
stripper bearings renewed
Stripper rope cutter.
Hi Calorie food rations
|
So what have I been up to! The fuel tank is now in and the wooden hold downs are made and dry fitted and at the moment being painted prior to final fitting. The engine has been lifted off its mounts and new mounts fitted to the bearers and the motor, but nothing tightened up as yet. One of the old mounts had failed. After 20 years not bad, suggest in future check every 7 maybe! We have jiggled the motor about a bit and offered the new prop shaft up and it slides neatly into the Centa-flex housing, a near perfect alignment. I have fitted the new outboard prop shaft bearing and the shaft seal, a new Deep Sea Seal is fixed to the sterntube internally, but not fully tightened as yet, waiting for the Sikaflex to go off. Next time I go down I will work on the shaft coupling and the mounts and tighten up the seal clips. I have reassembled the 'Stripper' rope cutter on the shaft, but not tightened it as yet, fitted with new bearings, though the old ones were hardly worn out, just seemed too good an opportunity to miss, cost £9.00!! I have measured out the cockpit floor filler timbers, iroko again, to raise the floor and will be cutting these shortly, then they are to be epoxied in place, raising the cockpit floor just enough so none of the new fuel pipes will chafe on top of the new tank. I have rebuilt the anchor winch on the foredeck, replacing the worn bearings and nylon washer. That is now as new! I have shaped, or should I say my friend Doug has shaped, a length of iroko and I have cut it into lengths and fine tuned it to replace the locker lid drains under the starboard aft cockpit locker lid, where the old fuel tank came out from. I now have a new cavernous locker space! I will be putting a partition in here and a floor to prevent items stowed here disappearing into the centre section under the aft end of the cockpit floor. That area will be refilled with the foam buoyancy I removed. Today I dry fitted, then epoxied and screwed the drain channels in place, finishing off with a painted coat of epoxy over the lot. They will get another couple of coats before they are painted. 15 degrees outside today epoxy had gone off by the time I left. Also sanded the damaged areas on the chines where the lifting strop in Scotland had chaffed the paint and epoxy off! I have already given it 2 coats, this was the 3rd. I hope I have it all filled and faired now and a quick sand off when it has set and then it awaits antifouling. Antifouling, every time I go down I scrape off a bit more, hopefully by next spring all the loose and flaky stuff will have been removed and anything left will be smoothed off with an orbital sander with a vacuum attached! Dust is nasty! The surveyor picked out 3 items for my attention in the spring, the worn outer prop bearing, replaced, and the shaft as well for good measure, the worn anchor winch bearings, replaced, and the rudder heel bearing, that too has been replaced. So all up to survey standard.. I will be replacing the empty auto fire extinguisher in the engine box, with a 2 kilo dry powder one, but not yet, as they are date stamped, so no point till next spring! Though it seems to have taken forever, because of the reluctance to be away from base for too long, the work is now progressing well. I am hoping to get the rest of the tank restraints fitted in the next week, they are in the workshop being painted at the moment. Then the motor itself will be aligned and bolted down. The ancillaries re fitted to the inboard, the fuel lines coupled up and before too much longer I hope to be running the motor up. I have fitted the new fuel gauge, that just needs wiring in. Then I have the new deck filler to refit, on its hardwood base, which will raise it up so it will be 2" above the deck level, in case I have water on deck again whilst fuelling! Looks like we are on track for F.G. to go back in next year totally refurbished! To add to that I visited the sail maker last week and dropped in my new Green and Cream cruising chute, was made for the 30ft Dougaljo and never really used, the sail makers, Lonton and Grays of Burnham, made it 20 years or so back for Doug, and are going to shorten the luff slightly to allow it to fit F.G. going to get a new snuffer to hoist it in as well as the old one I had may well be slightly too small now. Looking forward to sailing along the Irish coast next summer with that flying! I emptied the panic bag in the garage last week, forgot it has bottles of water and a bonus, a huge bar of chocolate! I have bought some SOLAS emergency food rations for that panic bag as well! I have enough energy bars etc to stand 30 day siege here! Forgot to say, I have found a local paint maker who has made me a litre of my Kelly Green paint for £50!, a third of the price of Awlgrip which is now no longer available! So not only am I poised to repaint the cabin top, (first time in 25 years), but to repaint the deck and cockpit, that were done a shade too light a couple of years back and then repaint our green raised topsides. Will get the camera out next time, as my hands will not be sticky with epoxy... John
|
||
|
|
October 30th 2014. Just spent another afternoon sanding the epoxy I applied to the damaged areas of the chines with my new toy, a hand held battery sander! Great tool. Bosch 18v device. I have also sanded by hand the new cockpit locker drains glued in a few days back. Tomorrow hope to apply another layer of epoxy to these. The temperature was 19C today so all the epoxy rock hard! I have installed a temporary, small, 4 amp hr battery on board to power the lights, (LCD) and it lasts a surprisingly long time. The 5, yes 5 main 12v batteries are all on trickle charge in the workshop. (200 amps in 2 for the services, 200amps in 2 for the fridge and 1 at 90 for the start battery.) I offered up the first of the wooden securing pieces made to hold the fuel tank, but found to my cost the red bilge paint had not hardened, so have left it in place to set. Went home and put another coat of primer on the other bit instead!
Went on line and ordered a spare battery for the sander, via the EOG EBay page! I will be using this a lot more soon and do not want to have to stop because the battery runs out. Already ordered a load of sanding papers. run out of the few sheets it came with!
Gradually sorting out all the boat gear stored in my garage, want to be able to get the van in soon. Amazing amount of gear! John.
|
||
|
31st October, Spent a few hours on the boat today, put another coat of epoxy on all the repairs and the new cockpit locker drains, temperature outside 18 plus! Epoxy went off before I left!
Sanded all the epoxy work I did yesterday before I put a last coat on.
Then set to and scrapped off loads of old antifouling. This is only the second time I have taken it all off in 25 years. Horrible job. Removed all the easy bit today, round the waterline and down to the chine. I have already done some of the bottom, but its more difficult so putting off the evil day, little and often is the trick, a few square feet every time... The battery on the sander went flat today for the first time, before it does, lights flash and it gives a little shudder to tell you its time! On charge now. New sander sheets I ordered arrived today, took 1 day! Arrived just in time to be able to take them with me to use. With a new battery that will give me at least a couple of hours sanding time. (Deck and cabin top next!). Home for a shower to get the dust out of my hair! John
|
|||
|
November 10th Spent some time sorting out engine alignment today, or at least I started to, was doing OK till I wanted to shift the prop shaft back to check. Could not move it! I went to the tail end of the shaft and tried to turn it and pull it back there, stuck fast! It would appear the 'Delrin' outer shaft bearing may have seized to the shaft, being a plastic material, albeit as hard as nails and slippery with it, but having been pressed into the bronze bearing holder, has it slowly, as plastics do, moved! ?? Now I have to remove the securing screws and unscrew the other bearing, removing it and the shaft so it can go back to the engineer to re machine, this time with more clearance. I am told I should have 0.006 inch on an 1" shaft bearing, bet the engineer has to take that and a bit more off! Whilst the bearing holder is off I am now considering adding (brazing) a pair of water scoops and drilling the housing to allow water to enter. Then the bearing will be altered to include a longitudinal groove in the lower part, so any debris that gets in can find a way out. I have seen other Delrin bearing like this. Bear in mind though that I removed and replaced a plain Tuphnol bush, no grooves, no water flow, nothing, and it has been good for 24 years..... so do I need to change something that appears to have stood the test of time?? What I have found difficult is sourcing a replacement outer bearing holder, you would have thought these may have been available at all sorts of marine engineering stores, but no. Seems today you are expected to purchase a completer tube and fittings plus shaft. I am still looking as it may turn out the easiest way to deal with this would be to fit a 'cutless' bearing in a suitable housing, if I could find one! Good news is the epoxy work has all set nicely and apart from a slight sanding to make a key for the paint it is job done. John
|
|||
 |
After much searching and researching and
referring to detailed photos etc. I have decided to try to slightly modify the
outer bearing housing I have, as there are no others available that suit. I have opted for removing the bearing holder and shaft to have the bearing re machined and at the same time drill a water injection hole into the side of the bearing holder, opposite the rope cutter. There looks as if there is plenty of room to drill a 8mm hole and that will inject water into the bearing housing. The bearing itself will be modified as per others I have seen with a 5mm groove in the inside of the bearing from front to back and at the lower side, so any debris in the housing can be flushed out, not trapped in between the bearing and the new shaft. I may even fit a small scoop to the intake hole. I have noted too many cutless bearing holders have tiny 2.5 mm or less inlet holes, useless, they instantly get clogged with antifouling. I have details of other prop shaft bearing material like this, sadly tuphnol no longer available. If this is successful it should last years, the plain tuphnol one did, (24!), but if it wears rapidly I can simply remove the worn Delrin bearing and replace it with what has become the industry standard now, a cutless bearing. Available anywhere. John
|
||
 The flange feet that I had to cut a slot in the keelson so it could revolve!
With thread covered in Sikaflex ready for the Deep Sea Seal. The hole is for the greaser.
Looking down the bearing holder, you can see the dark tuphnol bearing! ( the thread would normally be used for the stuffing gland, but was never used, a Deep Sea Seal was used form the day of launch!)
|
29th November. 2014. All the best laid plans go awry don't they. Spent some time aboard today, was hoping to remove outer bearing and shaft because I thought the shaft bearing has swollen. Turned out it was nothing of the sort, the shaft had simply jammed on the inboard end where it enters the 'centre flex' coupling. The coupling was so wonky as it had not been tightened to the gearbox! Engineer had supposedly done that?? So I examine the outer bearing holder and find there is no room to add a water intake hole and scoop, unless I drill into the bearing as well. Hmm. Then I realise the inboard bearing is a rattle fit, we had not noticed that before, we only looked at the shaft itself and noticed there was a very slight wear mark, but no wear on the shaft! So I resolve to remove the inboard bearing holder to replace its bearing..... One screw in the foot comes out easily, the other will not budge. Soddes Law! Back home for impact screwdriver and mini club hammer. Good job it is only 5 minutes away. No room to swing hammer, so remove centre flex from rear of gearbox. Nuts only finger tight... Find it has the wrong nuts on it, so just as well I find out now... They were plain and should be nylocks. Nylocks found and put with flexi coupling! That engineer again! A few clouts finds the screw is loose enough to turn out with conventional screwdriver.. Try to rotate the inboard bearing on the end of the tube to remove it, and heck, I cannot turn it fully as the flanges foul the keelson! Figure that the stern tube must have been fitted from inboard with the bearing holder attached! Been OK for 25 years! Out with chisels. 20 minutes later I am sat in the sun outside the barn peering at the greasy inner bearing holder and bearing. To my amazement it is tuphnol, exactly as the outboard bearing had been! I was expecting a white metal bearing, as there is a greaser. Now what to do! My first thought is to replace with a modern equivalent, a Delrin plastic bearing. However my engineer friend says no, the strain on the hull with a flexibly mounted motor and rigid bearings will be immense.
Hang about!!! I argue that is has taken 25 years to wear out the bearings, so the system seems to work well enough. He seems to think removing the inboard bearing altogether and allowing the shaft to move laterally with the vibrations would be better, sadly the clearance between shaft and tube is far less than normal, a couple of mm at most, so any flex would mean shaft rubbing on tube, not to be recommended. His first thought then is to solidly mount the motor, then align motor exactly to shaft.... No not going down that route! Beginning to seriously doubt this guy! The Centa-flex coupling is designed to be mounted inboard of a rigid bearing prop shaft and take the flex. However I can see another solution he has, as possible option. Water inject the sterntube, that will lubricate the Deep Sea Seal and the shaft bearing, then replace the bearing on the inboard end with a Cutless bearing. the cutless, being rubber will give more to vibration. The only snag to that is the size of the housing and the limited room for a bearing. I cannot see a Cutless bearing being found that would actually fit. In a way it would be a good idea to lose the greaser and the associated mess, if the water is enough to lubricate an inboard cutless.... but I do not think a cutless will be found of a small enough outer diameter. We will look, but if I do not find one I intend fitting a plain Delrin bearing to replace the plain tuphnol one, drilled for a greaser again and with the Deep Sea Seal having also water injection. I will get that ready to be fitted to the inboard bearing housing, just in case the cutless idea does not pan out! What is it with boats, that one job, a seemingly simple one, leads to another 4 complex and expensive ones! I have to now find the spare Delrin bearing I had machined, must be aboard. Spent an hour searching the boat stores cupboards in the shed. Find all sorts of other treasures, but not the Delrin... Got to be aboard in the spares box, just in case on my travels... I am considering a longitudinal groove cut in it to allow water to move through it. At the same time I will attack the outboard bearing with a fine file to make a similar groove in that, so no debris can accumulate. Trouble with that idea is it will also allow the grease to move away down the shaft and as there is not a scoop and water injection to force water in, just a trickle from the anti siphon. In theory this water should be free of weed and debris as it has been filtered. All ideas to mull over during the next week or two! John
|
||
|
The Acetal rod. I have used half of it so far. Another spare section for the stores!
Machined bearing, this is a second as a spare to be carried aboard, just in case!
The inner bearing holder with Acetal bearing fitted. Have yet to drill through for the greaser.
The inboard end of the inboard bearing holder, you can see how thin the Acetal is.
The thread that fits to the sterntube. Grease injected into the bearing will travel down the whole tube and eventually exit via the outboard bearing. |
Sunday 30th November.
Well having looked up all sorts of sources, I have come down on the side of replacing with the well tried and tested, lets face it it has worked for the last 25 years! So I have just ordered a length of Delrin or Acetal rod to have machined into a replacement bearing. Tuphnol is no longer available and Delrin has replaced it. Harder, more slippery and stable. I am not cutting grooves in either bearings, they never had them before and so will replace as they were. I will probably not even inject water into the Deep Sea Seal, as it is happy to run on the slight grease that escapes into it from the inboard greaser. If at any point I feel water is needed, I can replace the blanking plug with the water injection fitting and divert the anti siphon water through it. (As it happens this is what I do and it works wonderfully!) I have to sand the recess I have made in timber of the keelson, just 1/4 inch deep, but now the inner bearing holder can be got on and off at will! Will be getting the paint brush out again, priming and then a coat of Danboline! Superb bilge paint, I am noting that it is still in good condition 25 year use on! Can you still buy it? Good to be moving forward again. John
5th December.
Picked up the machined Acetal, (Delrin). I have one bearing fitted and ready to install and a spare for the onboard stores. (Got another onboard for the outer bearing holder too). The shaft turns nicely through both bearings I have just to drill through for the grease hole and clean the hole gently. Then all is to be refitted. Just need a new tube of Sikaflex as the last one expired, cannot get any more out of it. You know it goes hard in the nozzle, no matter how hard you try to keep it dry and it sets far into the tube! Plan B works, once, jab hole in side of tube and squash enough out for the next job, trying hard not to get it all over yourself! Now new tube needed! Not only do I have to put a bead round the sterntube itself, but then fit the Deep Sea Seal again, on a bead of Sikaflex round the inner end of the inner bearing. However with the temperature as low as it is at the moment I will wait a week! I will be getting warm though as I have to smooth and sand the keelson where I have chiselled out a groove for the inner bearing to rotate. Has to be painted too...
John
|
||
|
New Nelson now aboard. |
1st January 2015. Sneak away with the lad, I need his muscle, to lift the new cooker aboard! As I prepare the entry area, put the engine box lid on and the step back in place he arrives behind me with it tucked under his arm, well almost! He had no problem lifting it aboard. We gently manoeuvre it through the cabin and drop it onto the waiting gimbal brackets. It is half a mm too wide. Call for large lever! A few moments later it falls neatly into place and the securing pins are inserted. I have yet to attach the hose, but it is in place and fits, swings OK and the fixing brackets that it gimbals on can also lock it in place, so no more will it tip when the over door is opened! I hope. There is a place to fasten a long barrel bolt to lock it in the upright position, if the gimbal lock is not strong enough... as it later turns out it was not man enough, but I come up with a very simple and practical solution! Now I have room in my garage and can get my van in for the colder months! John
|
||
 This was one nights deposits! Cleaned up yet again and the area again covered with protective cloths! |
March 2015. After a long damp and cold spell the weather has warmed enough for me to consider a trip to the barn! As a result I have sanded off the small patch under the inner sterntube bearing on the hog and it has had some primer. Will put more on tomorrow. I have also connected up the gas and tested the top burners and the grill, (oven full of metal trays etc so left that for now) all works wonderfully, but a knob fell off! Seems someone forgot to fit the little metal clip in the back of the knob at the factory. No problem I think I will just ask for a replacement........ Well after a day of silly mails back and forth I find that in the year since I purchased it they have changed the design of the knobs and the new ones have no red dot. Instantly they stop using the red dot ones the knob is listed as obsolete! Does not bode well! I am told I can replace it with the later one without the red dot, but they only have one in stock. this is ridiculous! So If I replace it it will be odd. I just want the metal clip to make the knob work, 'Oh we don't sell that'!! OK back to the drawing board. I'm a fix-it, so a quick rummage and I find a few 7mm wide metal strips, the best one on an old electrical plug and its copper, so will not rust. 20 seconds later fitted to knob. Off to boat to refit. Spiniflo? Not impressed! I get the knob to fit with out replacing the metal part, I swap the control knob to another tap. Odd that this works, but it does. I have found a small selection of barrel bolts in my store of boat bits and will take these down to the boat next time to try and fasten to the cooker, the lock on the gimbals is not man enough to stop the cooker tipping when the oven shelf is pulled out with the Sunday roast on it! I have bought a tube of Sikaflex and have all the parts of the stern gear in the back of the van ready to take down and refit, even the highly polished prop, but will not leave that in the boat, even though she is not locked away, the farmer has the doors open sometimes and a magpie might see it! Visited local chandlery yesterday and bought some new paint pads! getting ready for the warmer weather and painting. However first I have to wash the boat off, as I share the barn with Oly, the Barn owl and he has taken to s itting (Deliberate space there!) on my mast and depositing on the stern deck. The owl pellets are OK, but the poo! I have the deck covered but he seems to take exception to that, as it is always moved to one side when I come back! Bought 3 spare 33g CO2 bottles for shops stores today, spares for lifejackets... Maldon Chandlery special offer! Tried to get my years tide tables on CD, but they did not have it in stock anymore, so will have to contact Keith Belfield direct. Looking forward to warmer weather at the weekend and getting all the paint work done before fitting the new shaft bearings and seals... then lining up the engine... full steam ahead! John
|
||
|
Thursday 5th March. Spent a few hours aboard. The cooker now refitted, knob problem cured! Then I noticed the cooker looked skewed, tape measure out! I had fitted one gimbal fitting 1/2 inch too far back, cooker disconnected, lifted off gimbals and mount removed and refitted, cooker refitted. Well that wasted an hour! Refitted s/s rail in front of cooker and pondered how to lock the cooker and stop it swinging... When in port it is better locked, or heavy dishes on the oven shelf when the shelf is pulled out, can tip the cooker dangerously, spilling hot food on cooks feet! I offered up several sorts of barrel bolt and brass fittings, none will work. I will try a small hook and eye maybe... Work in progress. Out in the cockpit I applied another coat of primer to the hog near the inner part of the stern tube. With any luck I will get the bilge paint on tomorrow and can refit the inner bearing and then shaft and prop, the engine flexi and the Deep Sea seal. Doors of barn thrown open to let the sun stream in! It was actually warm! I had a result yesterday evening, I contacted Keith or Belfield plotters and yes, contrary to rumour, they still do the CD. When I bought the plotter on line the night before I ended up with a 'download it here' mail... I like to carry the tide table CD on board for the laptop, just in case! All very well being able to download it again if you lose it, but often internet connection can be very intermittent or non existent. So Keith has posted me a CD. John
|
|||
|
Friday 6th March 2015. I only spent a short time aboard today, enough to put the coat of Danboline bilge paint over all the primer I had applied, and for me to realise how to get the cooker to lock in the upright position easily. I would fashion 2 timber pieces to pivot at the sides of the cooker space, under the cooker, when pivoted up they would stop the cooker tipping forward and when laid down they would be out of the way. Easy to make and fit. And I could even have a small locking pin to keep them upright. Sketch made and measurements taken. Job to do in workshop. Also have some strips of Iroko to saw up, lengthwise, to fit under the cockpit floor to raise it 12mm, will do those at the same time. Photos of both to follow. Went home and the new set of tide tables had arrived. So fire up laptop. As I have changed all passwords and wireless stuff in the last couple of years spent half an hour reconfiguring the WiFi on the laptop to match the house, then re doing all the passwords etc for the e-mail and the internet connections. Got my mail going again, will not give it out yet as it is only accessed via the laptop when I am aboard.! New tidal plotter up and running. I have now to update the Sea-clear charts as they are 2 years out, so will buy a new edition. Realise I have to also update the Navionics card in the Lowrance plotter. Will leave both till nearer the day! All the charts will need updating, so I will start collecting the chart corrections from Imray. that's something to keep me quiet for a few days! It's great to be back aboard every day now and being able to tick off the jobs! My work book makes good bedtime reading. I have workbooks going back 25 years and I can refer to them for measurements and details of all kit aboard. I make lists of jobs and tick them off as they get done, hopefully that way nothing gets forgotten and I do not wake up in a cold sweat off the Scillies wondering if I re-fixed that vital screw! The first Bumble Bee today, spring has sprung! John
|
|||
|
Sunday 8th March 2015 I am spitting bullets! Having spent days, months... sorting the bearings and the engine mounts etc, buying new parts and getting all sealed in Sikaflex and refitted, guess what??!?! The man who made the shaft for me did not measure the old one I gave him to copy, I wanted inch shaft as before, and today realised he made it the wrong diameter!!! Today I found he had supplied a 25mm one instead of a 1 inch shaft, that I specified. OK similar, not a problem with the bearings as I had these machined to fit the shaft beautifully, great. But the inboard end of my shaft fits into a 1" Centa-flex joint, with a special shaft clamp. A 25mm will not fit! Too small and on the outboard end I also have a 'Stripper' rope cutter, and it was that cutter that told me something was wrong, it would not lock onto the shaft!!!! Too big for a 25mm shaft. Rattled around. Clamps only on inch!!! I rushed off back to base, picked up the vernier and back to measure it, yes the shaft was the wrong size. So I ripped out the bearings and shaft, today, removed the DeepSea Seal and the lot are back in the van. The 'engineer' seems to think it is my fault, after him insisting I gave him the old shaft and my prop to make sure all was correct. (I am still annoyed that the twerp who made the shaft took the liberty of sanding my beautifully polished prop and destroying the finish, it has taken me weeks and weeks to polish it back!). I will be visiting the engineer who organised this early next week to get a new shaft made. He seemed to suggest a metal spray where the bearings go would cure it, he has not fully realised the problem at all. The bearings are a great fit, its the ends where it fits to motor and the rope cutter fit there is a problem! I an having grave doubts about this man's competence and at the moment he is being difficult. If he refuses to get the shaft remade to the correct size you will be sure I will never be dealing with him again! What a waste of months of planning and all the bearing materials, the machining... Real cross.! Grr John.
|
|||
 Our 20 year old, 1000hours logged Beta 17. Runs like a sewing machine and pushed F.G. at 6 knots. Sips diesel at 1 litre an hour at a gentle 4 knots, 2 litres an hour at 5 knots, 3 litres an hour flat out at 6.
The Vetus Centa-Flex. A large diameter Ali and Steel device with huge rubber internal bushes. The socket takes a 1 inch shaft and the ring of 6 bolts and then tightened to ensure a very good grip on shaft.
Block of white nylon turned down to 1 inch
Drilled on lathe to take laser pen
pen fits into nylon snugly into nylon.
Collection of new cats toys for next Christmas!
patented Laser switch
Target acquisition tools!
Cheap Chinese spanner, butchered
Close up of modified end!
The rear of motor with Centa-flex with laser holder and laser inserted. Patent laser switch can just be seen!
On and working.
Red dot visible
And more visible, easy to see and thus adjust motor.
Outer end of tube. A cross was later made with an indelible pen.
Laser not hitting end cover, but bouncing off interior.
Laser now visible, dot can be seen just off centre, nearly there!
Deep Sea Seal of the sort that I have new again, ready to fit on shaft. In 25 years since launch this is my fourth new one, they seem to last about 7 years. I keep one of the less worn old ones on board, as a spare. Reading the info they say to check annually and if cracks appear replace, normally 5 to 6 years. so far none of mine have shown any cracks, but the wearing surfaces have gently worn. |
March 24th I have just spent an hour or so working with a tool I dreamt up and had made! Had the help of a friend with a lathe and a length of nylon rod purchased on our EBay page. I have been thinking of a foolproof way to align my motor with the prop shaft. My Beta Marine 17hp has a Vetus Centa-flex mounted on the tail of the gearbox. This flexible coupling was expensive, over £200, but offers far more than the simple R & D couplings so often used. Makes for an almost vibration and noise free engine set up. It allows the motor to be up to 5 degrees out of alignment in any direction! So the motor can leap about on its flexible mounts and the Centa-flex will take the angular distortion and still transmit the drive perfectly to a rigidly mounted traditional propshaft running in bearings, without overloading the inboard bearing. This year I have for the first time replaced the propshaft bearings, (and the shaft when I get it back!!!). The shaft and bearings have been in use in F.G. for nearly 25 years since launch in August 1990. For 3 years we had a rigidly mounted Stuart Turner 10hp, but after a long and tedious beat back from the Netherlands we replaced the Stuart with an economical Beta 17 that saw first use just over 20 years ago in 1994. Now clocked over 1000hrs. The Beta was fitted with the Centa-flex from new and has performed perfectly. This year as I was doing the major overhaul of tank and fuel system, new engine mounts etc and for good measure I replaced the Centa-flex as well, (and have the original kept as a spare on board!). Now with new bearings and shaft, and new engine mounts the whole lot had to be realigned. When I did it in 1994 I still had the old flange on the prop shaft from the Stuart and aligned it the old fashioned way with feller gauges between the flanges. When perfect, the prop shaft flange was removed and put with the old Stuart to sell on. (Funnily enough I heard from the man I sold that Stuart motor to the other day, as he came to me for Seagull parts. Apparently the motor went into a traditional launch on the inland waterways and served perfectly for 20 years, to the delight of the owner, until someone recently stole the boat and motor and wrecked it!). I digress. So now I had a 1 inch socket on the back of the engine's Centa-flex and a prop shaft with nothing on the end?? I paid that engineer to assist me change the mounts etc and align the motor; he failed, dismally, spent a day fiddling about and could not do it. He offered to return, for another fee and try again, I declined his kind offer and sought a better answer. I went and looked at the methods used by the big ship boys. They align prop shaft bearings and shaft with the use of hugely expensive laser tools, which got me thinking. If I could mount a laser into the 1 inch socket on the Centa-flex I could shine it down the sterntube hole.... It did not take me long to come up with plan 'A' and a plan 'B'. I soon found the laser levels used by carpenters and builders, no, not quite what I needed, then I thought, what about those pointers used as cat toys, (tormentors really). A quick search and I found they were as cheap as chips, approx 10mm diameter too, so all I would need was a collar round it, to fit it into the inch hole... A length of nylon rod, strong yet able to be machined. Machined to 1 inch outside and bored to fit the laser pen, it might work, if the pens were accurate... So I bought a laser, £3.00 delivered. Not so clever, the laser was 3 inches out across the width of the kitchen, about 10 ft. You can soon tell, roll the pen on the worktop and see the effect on the beam, it described a circle on the wall opposite. Thinks, wonder if all the pens are the same? Back to EBay and buy 3 more. No's 2 and 3 were the same or worse, but No 4 was nigh on spot on! less than a 1/4 circle over 10ft.! Now I could work with that! I also have now an advanced stock of Christmas presents for friends with cats! Nylon bought and friendly engineer with lathe knocked it up for the price of a few drinks. Off to the boat!. I slid the nylon into the Centa-flex. It fitted snugly. The laser was inserted, a clothes peg positioned and tensioned and the light came on! I used a simple clothes peg to hold the little button switch on, as they only had a 'hold and press for on' switch. I thought I needed a target. So I took down some cloudy polythene sheet and some elastic bands!! Fortunately the post man leaves me dozens! You can mark a cross on it. I fitted the polythene over both the inboard and outboard ends of the tube. (There were no bearings fitted as I had to remove them to be refashioned for the awaited new, 1 inch shaft. (they had been fitted and sealed on with Sikaflex with earlier new bearings in them, made for the earlier shaft which turned out to be 25mm not inch... Grrr....) Hey presto, the laser shone on the inboard poly cover. Then by rotating the Centa-flex I checked to see if the laser was centralised. It described a tiny circle on the inboard target. By gently rotating and wriggling the nylon and the laser I took out the error. Then when the Centa-flex was rotated the laser turned with it and no error was visible, a steady red dot. Brilliant. So how straight was the engine mounted? You could easily see by eye it was way off centre. Nipping down the ladder I looked at the outboard end. (Now a note of caution here, these may only be cats toys, but they are lasers and you must never look into them!!!). So do not look up the shaft, look at the target on the poly sheet! It was apparent that the laser did not reach the outer poly sheet. It was lost to one side of the tube. So back up the ladder! I got fit doing this, or knackered, so an assistant, aware of the dangers of the laser, would be useful. I had slacked off the engine feet retaining bolts and with a large lever gently tried to move the engine sideways, it went over, and when I relaxed, it came back, flexible mounts of course. So I then got out the copper headed hammer and a drift, (actually a large hammer and old screwdriver!). I had already slacked the flexi engine mount bases, so tapped them gently sideways. The motor gently moved over and the laser obligingly pointed more towards the centre of the target. With gentle taps and then simple winding up on the engine mounts, the spot moved towards the centre, till almost exact. A note here. To get to the nuts under the engine mounts that raise or lower the motor and which the weight is taken on, you need a very thin open ended spanner.. or that is what the engineer who failed to align my motor used. I thought there had to be a better way. Having ascertained the nuts were 24mm, I went on line, our EBay page again, and bought a cheap, £5.00, combination ring and open ended 24mm spanner. I then set to with the angle grinder and butchered it! I attacked the ring end and cut a 12mm slot in it. That way I could get it round the stud between the flexi mount base and the nut under the bracket, slide it up and grip the nut to adjust it. Simple. The other end would fit the top nut to loosen that too so only needed one spanner in the hand, when on belly in bilge! To finally tighten the mounts it would need a second spanner, the modified ring below and a 24mm spanner above of course! Back to playing with the laser, sorry work.... At this stage I returned to the outside, that ladder again, and observed the dot that had now appeared on the outer target! Off to one side and high! Back up the ladder and move rear feet sideways, as well as front feet and raise motor evenly with nuts under engine mount brackets. Inner target spot on again. Down ladder to see result. Good but not quite. Rotate Centa-flex to ensure all true still! Dozen more trips up and down and there it was, spot on, inside and out and all engine support nuts hard up under engine brackets. To finish the job the Flexi mount top nuts need to be tightened down onto the engine brackets and all the engine feet bolts tightened into their trunnion nuts. But that can wait till shaft fitted.... A word of explanation....A 'trunnion' nut is a circular section of rod, mine fashioned from 2 inch lengths of old 1 inch stainless prop shaft, drilled and tapped across the diameter for the 10mm hold down bolts. The trunnion nuts are inserted into 1 & 1/4 inch holes bored across the Iroko engine beds about 4 to 6 inches down. Obviously the deeper they can be fitted the better. These have a degree of movement in them for adjustment and spread the load nicely on the timber engine beds. It is by far the safest way of attaching engine feet. I have seen some horrors, even pairs of brass wood screws! With the motor weighing in at about 90 kilos and after being thrown about in some real nasty seas, I am pleased I could rely on those trunnions to keep it all in place! I am now awaiting the return of the 1 inch shaft. This will then fit into the 1 inch Centa-flex and the Stripper rope cutter will fit snugly on the out board end.! I have yet to hear when the shaft will be back remade, been 3 weeks now... you would have though all the stops might have been pulled out to return the new shaft to me ASAP seeing as it had been such a monster cock up... but we wait. Another reliable engineer is remaking the Delrin bearings in the inner and outer holders and I will refit the bearing holders with Sikaflex, again! The inner bearing has a greaser and the shaft is sealed with a 'Deep Sea Seal'. I have used these to good effect for 25 years I am hoping that when I push the new 1 inch shaft up the stern tube it will just slide effortlessly into the Centa-flex. Well it certainly cannot be far out! Then, as the Centa-flex will take up to 5 degrees misalignment.... should be a good result. Some may be wondering what plan 'B' was.... Those that know me know I am a keen air gunner and use a compressed air, silent and powerful rifle. The rats here do not get a second chance! On my rifle, as well as the telescopic sight, and the night lamp, there is provision for a laser! Rifle lasers all mount in a ........ wait for it...... .....1 inch holder! So I could have simply popped the rifle laser into the Centa-flex and it even has an 'x & y' axis adjustment! (you need that to set it for different ranges on the rifle.) However I reasoned that to slide my beautifully matt black laser onto the jaws of the Centa-flex, would at best leave marks.... Pleased to say plan 'A' worked beautifully. John
|
||
 Auto Dry powder extinguisher, 2Kg capacity for engine compartment. |
Easter weekend, April 3rd to 6th 2015 At last it has warmed up a tad and I have been working on the boat and boat bits again. Managed to clean up the side deck where I removed the deck fitting and make a ply pad to fit underneath and plug for hole. Not warm enough in barn for glue as yet though. Dry fit only. Back at base Sunday was spent cleaning the cockpit floor up, wire brushing the Treadmaster and laboriously picking the bits of old mastic from the edges, then sanding and applying a protective coat of epoxy. However Sunday evening it had not gone off, so left with heater overnight. As we had a frost and Monday the clouds have rolled in again suspect another coat today will take a while to set again. Anyhow I have managed to fit the support timber I had to cut out from under the cockpit floor, to the underside of the ply flooring as a bracing timber and I am hoping that will prevent any flex. The ply is 3/4 inch thick so does not tend to flex as it is only 24 inches wide and supported with 4 cross beams and 2 lengthways at the sides.... Back on the P.C. in the office I have bought the replacement auto fire extinguisher. You may recall the small auto Halon was out of date and when I checked, it was empty and useless! It had gently leaked! I have hung on till now to buy the replacement, as they are dated, with a 5 year warranty. I suspect it will be fitted under the cockpit floor end of the motor, as it is a lot larger then the one I had squeezed in the front of the engine box before. Specifically designed for engine boxes and will fire if temperature exceeds 80 degrees C.! Off to put more epoxy on. John
|
||
|
Monday April 6th 2015. Bit of a red letter day as I have chosen the date for the start of the trip! Sunday 21st June 2015. Mid summers day! (I have a back stop 2 weeks later, but want to get to Scotland and home her by August B.H. so that would be pushing it!) Aim is to meet up with crew and friends the night before, load last minute gear aboard then repair to bar for meal... and then 0700 Sunday set off to the Swin Spitway at LW and then take the flood to Southend area, crossing the Tideway to the Kent coast and then taking the ebb out and past North Foreland heading for Ramsgate or Dover. The trip is approx 800 miles and I am trying to split it into 4 x two week slots, changing crew every 2 weeks, but if a crew can stay longer great! Room for 3 , just! Got to be flexible as it was last time. I will be putting the itinerary out today to the 4 or 5 possible crew. Loads to do as yet, but as the Easter weekend has passed off, (so far) without any nasty visitors onto the land behind us, so I am breathing easier.! John
|
|||
|
Wednesday 8th April 2015 Already had a request from one of my potential crew to sail the first leg, Brian our Fund Manager. I know he wants to put in at Brighton, as his son and daughter in law and family live there now! The weekend was not a warm as it could have been and I had to wait till yesterday to glue the cockpit floor raising battens down, with epoxy. Applied the glue and then realised I needed G cramps so a whiz back home and return, as it was so cool, the glue had fortunately not set and I had time to move all the battens about and get the clamps on. The hole in the side deck was tackled and a large backing piece glued to the roughened underside of the side deck and the hole in the deck filled with a ply shape. Epoxied in place then a layer of glass cloth added and more epoxy. When this hardens it will be sanded back and another layer of epoxy and glass cloth added to make all smooth and fair. (And strong!) I have several off cuts of Treadmaster sorted and will try and find the one the nearest shade of green to fit on top. Will be a fiddly job to match the shape and the diamonds! Back at base here I have been sorting the 3/4 inch thick ply panel for the floor, all the Treadmaster is now clean and the ply edges sanded and have had several coats of epoxy. I turned it over today and when it has hardened off I will sand the underside where it will seal to make it smooth, maybe adding a coat of epoxy. Whilst I was at it I used some spray contact adhesive and glued a lead and foam fireproof sound proofing pad to the underside of the new hatch in the floor. Ordered up a 3/4 wide strip of neoprene 1/4 inch thick to shape as the seal it will screw down on. Went on line and downloaded all the corrections for all the charts I carry and whilst I was at it bought a new Thames Estuary Pilot and a new Cruising Almanac. I also down-loaded all the corrections for my East coast pilot. Whilst at it I went to www.visitmyharbour.co.uk and bought a DVD with all the UK and Irish charts for my laptop plotter. I carry a full set of paper charts, plus the laptop has a full set of digital ones and the Plotter on deck will have the updated Navionics card too, nearer the day. Belts, braces and bits of string me! I have been reading my old copy of South Coast Pilot and realise it is woefully out of date, so will be looking for a new South Coast pilot book. I have the Irish Sea pilot and the Scottish one and Mark Fishwick's West Country one, but all are just 2 years old now and I cannot source updates... maybe they have new Editions. However the Cruising Almanac will be on order and that really covers all and will be up to date. For many of these items I have managed to use the EOG EBay page to source them, but others were cheaper elsewhere. I was searching the stores here and the boat for a missing gooseneck fitting, cannot say I have seen it since the boat came out of the water end of 2013, I always stow it in the same place, but it was not there?? It is a vertical pin that the boom hinges on and has a welded in shackle for the tack of the mainsail, and a pair of bent steel hooks for the reefing. One mod I was going to make, was to have 2 stainless steel safety hooks welded onto the existing hooks so the reefing cringles did not fall out when reefing. I still cannot find it, but I have spoken to Sailspar today and they think they still have some of that old design knocking about. I did buy it back in 1988/89!! Part of a 'kit' they sold to make your own masts... Hopefully I might be still be able to find the old one, got a few places to look, but useful to have a backstop.... Postman delivered the new auto fire extinguisher yesterday, seems enormous! As it has to be mounted upside down or at worst on it's side I will have to look carefully at where to site it, not just over the exhaust manifold either! With warmer weather forecast for the next couple of days it looks as if the epoxy will get to go off and I am back on track. Just got to get that propshaft and prop back..... renewed! John
|
|||
 Neoprene foam sealing tape.
Thames estuary pilot book. |
April 11th 2015. The past week has been busy, because the temperature has really lifted enough to go back every day and get epoxy to set and be hard enough to sand and apply further coats. As a result the deck repair where the vent was removed is very nearly done, just needs sanding again and maybe a last fill before the Treadmaster is glued in place. I have found the pot of 25 year old graphite powder I used before with the epoxy as well. A place for every thing and everything in its place! The black powder is mixed with the cotton fibres and filler powder to make the epoxy dark grey, and UV proof, the Treadmaster on F.G.'s deck has been firmly glued in place for over 25 years and no sign of any breakdowns in the bond! I have managed to sand off and smooth the new iroko beams that raise the cockpit floor, epoxy over and fill any dents and voids, glue the new hardwood corner batten in place and back at base sand the underside of the floor after the last applications of epoxy and apply a last smoothing coat. And today a large reel of self adhesive Neoprene sealing tape arrived. Still making my mind up where to stick it, underside of floor or top of supports.... coming down on the side of the cockpit floor at the moment, thinking that if it is on there and I have to lift the floor, the foam rubber seal will be lifted away and should not get damaged by my feet as I tiptoe over the tank and beams to work on whatever, beneath it. Through the post arrived another pilot book, 'Crossing the Thames Estuary' amazed at how much can change out there in a year or two, makes interesting reading. Whilst on board I at last found that errant gooseneck fitting. It had been moved I suspect whilst I had been crawling about round the engine. Anyway that is off to an engineer to have a pair of stainless snap hooks welded to it. John
|
||
|
April 14th 2015 Managed to get another coat of epoxy filler on the deck after sanding and it looks very close to perfect. Got some more epoxy on the cockpit floor supports and now they too look good, just need sanding and painting. Managed to scrape a bit more of the old thick antifouling off too, hard and dirty work. Back at base sanded off the cockpit floor all finished and fitted the Neoprene tape to the underside. John
|
|||

Starbd bow. most old antifouling scraped off
Port side underneath, loo outlet and to the right the log and echo sounder. Removing the antifouling reveals the green 2 pot paint I applied 27 years ago....
The new air vent fitting. found the rubber 'o' ring seal had snapped, so out with box of replacement seals I have and find a meatier one to replace it.
The clean and repainted area just behind the engine. Fresh coat of Danboline applied. The prop shaft bearing and greaser to go in here. |
April 18th 2015 With the temperatures over the critical 10 degrees for much of the day work can carry on a pace. Today managed to sand off the deck and fill the last few imperfections where the vent was removed. Also sand off the epoxy on the cockpit floor supports so they are really level and smooth, painted all with primer, so ready for Danboline bilge paint tomorrow. Got a coat of undercoat on the new under deck re enforcement pad under deck repair, top coat on that tomorrow. Found the water turned off in the barn so have to call farmer to see if I can get it on for Tuesday as I hope to start washing off the mast and the cabin top and deck. Can transport from home but easier if on tap! Got underneath and took off another square yard of the flaking thick antifouling, determined to get all of the thicker stuff off and any of the other stuff that is at all loose, so far all the waterline done and 1 ft down the hull and all off the starboard bow to the bilge plate, dirty messy job. Only the second time in 25 years I have removed all as it does gently erode with use. When I antifouled last time in 2013, (laid up for 2014), I scraped off a load of the loose but left a few thick patches, thinking they would be OK, but as you try to apply the new stuff it tends to tear off bits of the old, leaving flakes and lumps on the finish, mess! So determined to remove all the thicker stuff, 4 layers and more, that may flake later. I have sorted out the teak back rests we have in the cockpit and the tiller and they are sanded awaiting varnish in the garage/boatshed at home! May get the first coat on these bits today, also the 2 new cooker supports I made. These have had a trial fit and they work so varnish next. On deck today I sanded and glued the new Afromosia fuel tank filler pad, that raises the diesel filler off the deck more. Should be dry and set today so can sand of and apply the first coat of Sikkens. Have routed the large diameter filler hose and that is ready to secure as soon as the deck pad coated with Sikkens. Have new stainless filler... Fitted the air breather hose to the tank, double clipped it, hose routed through to the cockpit coamings and after the coamings are painted the new air vent will be fitted. Have to remember wire the fuel gauge sender to the gauge... I have lined the back end of the engine compartment, under the cockpit floor with fireproof lead lined sound insulation too. Yet to figure out where the auto fire extinguisher will go. Hopefully tomorrow I can get Danboline on the bearers so they are finished, white topcoat on the deck repair so that is done and smooth off the top of the deck finally and be ready to paint that, but will also fit the Treadmaster repair. Actually feel I am getting there! John
|
||
|
Sunday 19th April
Spent 4 hours aboard. Only just warm enough for painting and gluing, even with the doors flung open to catch the sun. Cold north Easterly today, 10 degrees at home and 8 with wind chill. Checked the fuel filler pad I put in yesterday and sanded off the excess epoxy. Dry fit of hose then 2 coats of Sikkens. I will give it at least another coat before fixing new stainless filler. Painted white topcoat on pad under side deck, doubt if anyone will ever see it, but I know its done! Painted all the cockpit supports with Danboline, all done. On deck sanded of the last coat of filler and have the deck as smooth as silk, no one could ever know, once it's painted. mixed up a small pot of epoxy and microfibres, added graphite dust to make it black. Glued the shaped bit of Treadmaster in place. I cannot hide the join so have accentuated it with the black epoxy line. Then spent a couple of hour on my back scraping another 2 square yards of old thick antifouling off, terrible job! Sanded off the bare hull till sander ran out of battery. Home for shower and recharge my batteries as well as the sanders! John
|
|||
 The space behind the tank. This plus the size of the tank was fitted with foam 25 years ago, see no reason not to put some bback!
The area behind, (aft of) the fuel tank filling with foam buoyancy and sound absorbing foam.
totally full, ready for cockpit floor.
Floor down and fixed for the first time and teak cockpit grating fitted. Slots in precisely. Standing on it I should be able to see over the spray hood instead of standing on tip toe!
The new s/s filler sat on raised plinth! Connected with earth wire to tank!
Fill side of main keel where epoxy has flaked.
Strangely exactly the same repair needed the other side... |
Tuesday April 21st,
The Queens birthday and the first Cuckoo here. I was beavering away in the barn when I heard it, must have been sat just outside the doors, it was so loud! My friend and regular crew Phil, an old work colleague from my days on the London Tideway, came along to give me a day of his time, and him not 4 months out of hospital having had a new knee. Together we washed off 18 months worth of owl poo and pellets, dust, straw and leaves that had blown into the barn and accumulated since we hauled out at the end of 2013. We transformed the boat from a grey brown sticky mess to a shiny cream one, then promptly set to and sanded off all the cabin top and decks to matt them down, removed bowsprit and all the deck and cabin top ventilators and all the self adhesive names and the 'Fiddling Around' logos. I have arranged with Mel of 'Names for boats' to have all new made. Even peeled off the SSR number that has been on her since we launched in 1990. SSR 00086, yes applied for and obtained on the first day of registrations in 1983, when I started building! New one on order! Today I dropped the cockpit floor into place for the first time, and reconnected the gear and throttle lever. The fuel filler hose was secured in place, double clipped at the lower end on top of the tank, just in case. New deck filler not only is smart it is strong and easy to undo! I also took delivery of a pack of 10 special fuel hose clips made in s/s, so next time I am down, the fuel delivery and bleed back hoses can be fitted and pinned securely out of harms way. Sanding all round the cockpit and stern deck yet to do. Then generator and the vacuum to take as much dust away as I can. I brought all the stainless Tannoy deck vents home and have cleaned them up, look sparkling clean now, not bad for 25 years use! The repair I have done to the deck where the old fridge vent was removed looks good, you can see it has been repaired but only by the scarfed and sculpted join in the new bit of Treadmaster. I have arranged for the son in law to come over for a couple of days to remove the rest of the thick and flaky antifouling and he can have the job of helping me repaint as well very rewarding after doing all the dirty work. I have also heard that my propshaft has been made, almost, just awaiting the thread being cut on the end. It was found to be a BSF thread, not sure about that.... and he claims he has not the cutter to make it? Not sure what he used to make the thread on the other shaft he made, the mistakenly made 25mm one, as my prop nut fitted perfectly.... so suspect I am being spun a yarn here... going to suggest the guy measures the thread again! (he does not appear to be good on measuring....) I have also had a call from another more reliable engineer chap who has done some stainless welding for me, he has modified my gooseneck fitting, welding on a pair of large snap hooks to hold the reefs in place! Going to pick it up tomorrow! I am hoping to get a couple of coats of the bright cream 2 pot paint on the cabin top and deck in the next week or so. Rang Marinestore in Maldon today as the Almanac had not arrived 2 weeks on, they had lost the paperwork, good job I rang, promised it will have the attention of the supervisor now! Taking a day off heavy work tomorrow, arms need to recover! John
|
||

using old hair dryer, heat up and remove the names from the bow.
And from the transom, now ready to sand....
That teak grating in place.
Gooseneck pin modified with the addition of two snap hooks, so the reefing cringles stay in there! |
Friday 24th April 2015. Spent a few hours down at the boat today, cleared the 4 self adhesive markers for the boat lifting strops from the topsides today, I forgot them the other day. Then fitted the new stainless covered flexible diesel fuel pipes from tank to filter and filter to motor lift pump, started to do the same with the bleed off pipe but as I tried to fit the 8mm copper pipe to the bleed off to tiny 5mm pipe snapped off the motor. Drat! Had to take all the bleed off fittings off, 3 joined with rigid pipes and connected both to the pump and the take off where it broke. Not a Beta marine part but a Kubota part. Sadly the local Kubota dealer closed so looking around. Have you noticed that you always have this sort of problem at 5pm on a Friday when all the companies are closed till Monday? Despondent I tried to fit one of the items I purchased 18 months back, a rather nice Teak grating so I could stand at the rear of the cockpit on it and see more clearly over the raised spray hood. My measuring and cutting worked perfectly, fitted snugly! I will photograph it. I picked up my gooseneck fitting yesterday, the Engineer has done a great job on it. Another job ticked off the list. Today Sleeping bag was sorted out and Darian insisted on 'freshening it up', as it had been in store for 18 months. I did wash it before storing of course, but have to admit it did smell better for another wash. Sadly nothing heard from the chap who is supposed to be organising my prop shaft. I have now taken some advice on this and if nothing arrives back to me shortly will have to seek a legal remedy and purchase a new shaft and prop! I have already located a supplier who can make me shaft and sell prop in double quick time... I am exceedingly annoyed at the inconvenience and the total lack of response from the man organising this. Very unprofessional. Pressing ahead with all the other jobs so fitting that shaft will be the last one shortly. John
|
||
 Tank fitted and all pipes connected.
new length of flexible leak off pipe with adapter to join to armoured hose.
The silver painted pipe is the new leak off pipe, with new bit of hose to adapter and secured with tie to stop vibration damage.
Leak off pipe secured, the air filter will fit on the open pipe.
Fresh owl poo on my cleaned off deck, this was just one nights droppings! |
2nd May 2015. I heard yesterday that my shaft is done, (again!!) and that next Tuesday it will be with the engineer who is making the bearings for it, (again!!). Taken 10 weeks to correct his error. Customer service stars, Nil. Really great news. The engine is waiting to have the shaft slotted back in and fixed, and all the bolts will then need tightening. I have just to refit the water filter, exhaust elbow and mixer, the exhaust pipe and water trap, the alternator and belt and I am there, ready for running her up.... Oh I forgot, there is no fuel aboard! So another little job.. I have all the diesel in cans ready to load aboard.... And another job, wire the new fuel gauge up! Then I will be able to figure out how much is aboard! 16 gallons or approx 72 litres! I will be mightily relieved when it is all back and installed on the boat! Spend several days aboard recently, I have applied the couple of brush loads of Danboline to the bilge where I missed bits. I have undercoated the inside of the quarter berth where, over the years the paint had deteriorated. just a splash of top coat to do. (That's the last of the conventional painting jobs on the list!) I have received from Beta the leak off pipe work and all new hose and adapters to connect the bleed of back to the new armoured hose. I now have reconnected all the fuel hoses, inlet to tank, outlet to engine and bleed back and the air vent, though the fitting on the side of the coamings is not fitted as yet, awaits a coat of 2 pot poly. Feel quite pleased with myself as the jobs are getting ticked off the list. Set to and remove the staysail sheet guides and jammer from the side deck and cockpit coamings, that will make the painting easier. Also remove spray hood pivot bases and a couple of plastic shock cord hooks for the cover. I clean up the sealant form under the fittings and also more owl poo, but managed to step in a soft bit and walk it round the cockpit first! Maybe a small tarp..... toss shoe overbaord! Enough for today back tomorrow to clean off the cabin top ready for first coat of undercoat! I really feel I am getting there! Smiling John!
|
||
 Cut out 2 ft length of corner moulding that I find has gone soft. not durable hardwood and water got into it. Rot only goes as far as epoxy glue line though!
New length of hardwood beading cut.
Repairs to the chine finished, 4 coats of epoxy and micro balloons all sanded smooth.
Think the damage was done when she was lifted out with narrow strops in Scotland.. |
Sunday 3rd May 2015 Managed to get the last coat of topcoat, white, on the inside of the quarter berth! Have to be a contortionist! Now all the conventional painting inside the boat done, bilges sparkling red again and all good. Amazing how little any paint has deteriorated inside, but I did and still do use International topcoats. She looks amazing for a boat launched 25 years ago this year. Just the cabin top, decks and cockpit to sort now... A the rest of the day spent sanding down, the cockpit aft deck, and all over the cabin top and main deck again. I will have another day at this using a small sanding block and getting into the last corners, then I am ready to paint. Sadly whilst sanding the edge of the cockpit coamings I found a 2 ft length of beading was suspect, the epoxy coating had cracked and the wood soft, so all removed, I scraped back to a sound epoxy line under the beading and tomorrow will epoxy in a hardwood strip to repair it... good it is just an edge bead, nothing structural. Removed a clam cleat from the side of the coamings, as we never use it. After the next session of sanding I will be cleaning off the dust ready for paint! I used that magic battery sander all over the boat and for good measure from the waterline down to the chine where I have chipped off the anti fouling and also repaired the chines with epoxy, all as smooth as the proverbial. Wire brushed up a damaged area of epoxy on the ballast keel addition, the steel box above the cast iron keel and recoated it in epoxy filler. Found a few little spots under the waterline to fill, will sand those tomorrow. Sander out of battery by the time I left. On charge now. Have some varnishing to do back at base as well. Must remember to take the trolley jack and blocks down to the boat, have tyres needing replacing... they only do 5 miles a year, but it is the sunshine that rots the sidewalls during summer storage. We cover the wheels, but the UV still gets them. I replace with part worn tyres, Don't need much tread... do not exactly wear tread out with our annual mileage! Launching seems near now! John
|
||
 2 of the 6 wheels removed. New tyres to be fitted to 3 of the wheels, as they crack on the sidewalls with the UV.
2 new tyres fitted. 1 to go. |
Monday 4th May. Spent the afternoon on the boat, or rather mostly under it! Removed wheels for tyre replacement, they were well cracked when you looked closely, not safe! 3 out of the 6 to be done. Cut a section of hardwood quarter round and fitted it to the cockpit coamings with epoxy, bit of filler and sanding and I bet you will never be able to tell... once its painted... Sanded some of the epoxy filler I applied to the cast iron keel yesterday and filled one section with another layer of epoxy to make it smoother. Spent a couple of hours underneath altogether and cleared all the antifouling, from the bow on the port side, back to the bilge keels. Have a strong helper coming to attack under the centre of the hull and beyond. I will have all the old antifouling removed before we repaint, only the second time in 25 years, last time about 12 years back. Rain tipping it down now and catching up on jobs here. Have a load of varnishing to do... Time to relax, oh those sore arms! Oh to be 20 years younger! John
|
||
 hardwood batten cut to size and ready for epoxy
batten fitted and fairing off with filler
more filler
sanded off and ready for next coat of filler! |
Wednesday 6th May. Spend the afternoon on board. But not till I go to see the Engineer. I am told gruffly that my shaft is with the other chap, who I asked to make the bearings. Walk over and he has made them! Now he is going to drill for the split pin. However the bronze castellated nut is now worn and a bad fit on the shaft threads, that I am assured are 5/8 BSF. I suspect the nut was damaged when the other engineer forced it onto the metric shaft, new one needed and later purchased from Lake Engineering in Poole. £12.00 As soon as it arrives I will rush it to him and then the shaft and bearings will be ready to refit. Spent 3 hours crawling over every inch of the deck, cabin top and the cockpit, sanding every corner. All clean and ready! There is a gale blowing so I throw open the barn doors and tie them back, the wind lifts the dust and you can see it being blown away! I am covered! By the time I am done the boat is matt cream and apart from a little epoxy repair and filling, ready to paint. I will epoxy the parts I sanded back tomorrow, need 3 coats to seal them, then sanding and smoothing before a drop of undercoat. At the same time there are a few nicks in the paint that I can fill to get the best chance of a smooth finish later. Will mean anther day sanding, but got to be worth it. Repair to coamings nearly perfect, a little filler and I doubt it will ever be seen! A good days work. Shaft back and can see that going back in, so home for a Grolsch to lay the dust! John
|
||
 Paul using battery powered scraper on main keel area
Exposing weak or blistered epoxy so I can repair it.
Covered in flakes of dust.
The mask is needed.
Shaft sliding smoothly into greased outer bearing.
Inner bearing holder and greaser point refitted, again!
Prop back on, all shone up and with rope cutter and everything else refastened! |
Monday 11th May Real red letter day. The propshaft is back in! Had help today, son in law Paul came along to lend muscle and he has helped, removing the anti fouling from 3/4 of the bilge plates, most of the keel one side and more of the hull. Another 3 days like that should see it all off. Just a problem him finding time to help. Whilst he was doing this I sanded the parts cleaned off with the power sander. I also worked on the cabin top adding a coat of epoxy to the previous coat rubbed down on the hatch and the coaming repair. Nearly there, one last sand and coat and that should do it. Went over all the deck and cabin top sanding all the little repairs I did a couple of days back, dust everywhere.. The last job was to refit the new outer and inner shaft bearings, with sealant, and fasten them in place, then gently grease and push the shaft into the bearings, a good fit. Then the Deep Sea Seal was fastened to the inner bearing housing, again sealed with Sikaflex, and tightened up, the other part slid onto the shaft, but not fixed as yet. Have to wait till all else fixed to put the tension into that part and actually seal the stern gland... Oh and add the auto greaser.... The final part was to see if my laser idea worked. Well not at first, I could not get the shaft into the fitting on the back of the engine at all. I was getting exasperated when it dawned on me that the engineer had tried so hard to tighten the clamping bolts on the wrong, smaller shaft that maybe the inner cone was pinched up and too small now.... I stripped it and yes, totally closed up! A tap or two with a screwdriver to open the slots and the 1 inch prop shaft slid into it easily. Reassembled and placed back on the motor, the moment of truth, Paul gently pushed the shaft and it slid in smoothly, hardly touching the sides, perfect! My method paid off. I tightened the ring of clamp bolts round the Centa-flex and adjusted the rope cutter on the shaft, all secure. I have now to tighten all the engine mounts and them put all the ancillaries and pipe work back on the motor. This has set me back a lot and I am now in a dizzy rush to get sorted and afloat, but with time consuming jobs still outstanding... painting the cabin top and deck, the green and removing that darned old antifouling! John, tired but happier!
|
||
 Heat exchanger caps, old and new. New one is at leas round and has an extra zinc anode to further prevent corrosion! |
Monday 18th May 2015. Over the last 3 days I have managed to tighten up all the engine mountings, and refit many of the engine parts, but hit a snag or two, again! I went to remove the heat exchanger cooling pipes stack and found it was stuck. It eventually relented after some levering and 'persuasion'... Seems when it was fitted last the 'O' ring seal was not properly seated and there was a build up of corrosion around the pipes, I had to spend an hour cleaning out the heat exchanger and removing all the corrosion. On inspection the rear cap had a distinct flat in the seat rim, heaven only knows how that could have happened, looks like it has been dropped from a height, it is solid bronze.. Anyhow new one ordered today from Beta Marine, along with a few sealing washers. I have also ordered a new length of 5mm water pipe for the anti-siphon so I can lead it to the Deep Sea Seal. And some longer securing screws for the new water injection fitting, as its base or foot is thicker than the last one... (this is the 3rd I have fitted in 20 years. To be fair the first one was stainless and though it looked good, did not last long at all and was replaced at a discount.) The Ali replacement must have been on for 16 or 17 years and when removed and cleaned up it prove to be perfectly serviceable, though slightly pitted inside. But I thought I would fit the near identical replacement ali one and keep the cleaned up one in the spares bin. Did not foresee the bolts being 5mm too short. New ones will be here in a day or two. I finally finished filling and sanding all the repairs and imperfections in the paint and hosed the whole lot off today, rivers of dust in the scuppers! I will give it a day to dry off before a wipe with thinners and the first coat of undercoat. I am getting well aware that time is rapidly running out on me, so have to consider the alternatives, a 2 week delay or worse calling it all off for a year. Do not want to do this, but the sensible side of me is saying it is the right move. We will see. still loads of old antifoul to come off! I will spend time varnishing bits tomorrow. Tiller, washboards and seat backs, and of course the 2 new cooker blocks. always find varnishing therapeutic.. will also allow a few bruises and aches to subside! Crawling into quarter berth head first, to work on back of motor, should be avoided! John
|
||
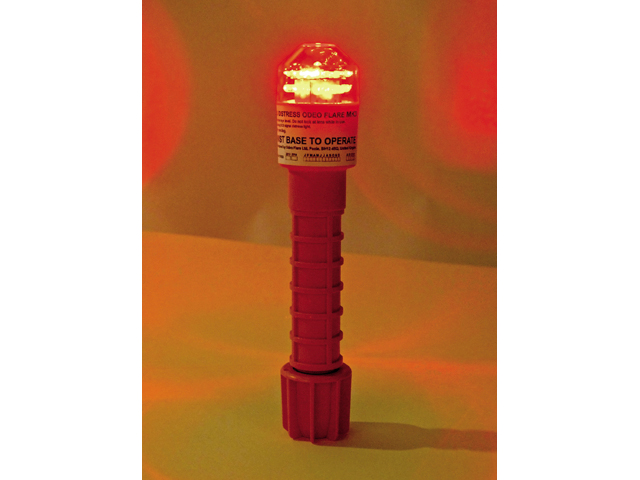 New type flare. Battery powered, will not set the boat on fire nor burn your hands and will last 5 hours, then change the batteries. Got to to be the way forward.
The new 2015 Almanac arrives. Note a few items have been brought up to date! |
22nd May 2014. Managed to get a coat of undercoat on all the cabin top and cabin sides to cover the dark patches. spent a little while with a tack rag and thinners first, but still managed to get a few specks of dust in it! I will have to return after the weekend, (which I am taking off from boat work as my daughter and hubby are staying for a couple of days....), will return with buckets and wet and dry paper to get rid of the specks of dust and a few dribble marks I saw later. 2 Pot paint is strange stuff, you only get 30 seconds to use the brush, then it sets and you will damage it if you try to brush it more. You work quickly! New Almanac arrived today, along with the new LED flare! These are a new invention, bright as a burning flare but last for 5 hours, then you can change the batteries! It is going to be the way forward. The new longer bolts for the new exhaust arrived so they can be fitted, and the new water bleed off pipe arrived too, I will be leading this from the anti siphon to the Deep Sea Seal, then back to dribble into a cockpit drain a before, but for £5.00 may just as well have a nice new bit of tubing! More varnishing in the garage at home too, companionway boards sanded off and awaiting varnish. all for now. John
|
||
 repairs to main hatch, Sikkens removed and timber epoxied and filled ready for 2 pot undercoat. |
Wednesday 27th May 2015. Made the decision last night. I am deferring the 'Fiddling Around' for a year. I realised there were too many jobs to do and too little time to sort all the servicing and setting up. I had hoped to be ready to launch by today. I wanted to be able to launch 3 weeks before the setting off date, 21st, to allow time to get all the alterations, have proper sea trials and then load all the kit aboard. I am so nearly there but the delays with the propshaft and the associated problems have scuppered me. All takes three times as long as it should! I will be pressing on with the painting and in between finishing off the engine refitting, alternator, and the exhaust pipe yet to sort. (Just reassembled, all there.). Have to wire a new fuel gauge too... I hope to have her in the water in June and make use of her locally this year. This will allow me to test out the new fuel system, the new cooker installation, the new fuel tank and pipe-work etc. I have to rig the new lazy jacks and test new sails, so that should be enough to play with for this year. The crew who were to join me have been informed and to be honest I had already hinted at a possible delay or postponement last time I spoke to them. The intention is to get the crew together, on the boat and in the marina bar, with wives and discuss what they would like to alter or add, change or otherwise. I have already had suggestions from two of them, better weather and warmer! ..... I'm told the Azores is nice and warm..... So now off out to put another coat of varnish on the tiller and backrests etc.. Does anyone else varnish their tiller or spars as I do I wonder... I have the tiller hanging up in the garage, then I roughly apply varnish, then, using clean hands, wipe the varnish all over the tiller by hand, you can feel the dry spots and any excess and move it about... and the finish achieved is as good if not better than with a sponge or brush.. warm hands makes it flow! Slight down side is the sticky hands, even after wiping with the turpentine cloth! But then I get sticky hands and paint in my beard even if I use a brush! John
|
||

|
June 6th 2015 I have been making progress on several fronts, more varnishing and on the boat managed to paint the cabintop took 4 hours, over 2 .5 hours masking up! The finish was never going to be as good as the first time 27 years ago, when the cabin top had nothing on it save some marks where Treadmaster and fittings were to go, but it has come up OK. Hope to be back down and paint the cabin sides, (round all the windows), and the deck, soon. Problem is the wind, as I need the doors open for the light I need a calm day and we have just not have any with wind under F4 for about 2 weeks! Consolation is that is is not sailing weather either! There have only been a few days in the last month when sails have been seen on the Blackwater! John
|
||
|
new extinguisher fitted in engine bay |
10th June 2015.
Got the heat exchanger refitted today, and the alternator, but dropped a washer from the last alternator fixing in the bilge, never to be seen again and did not have a spare on board. Home and sorted out a few washers as spares! Will be back tomorrow to finish that off and refit water pipe to anti siphon, plus the electrical earthing strap to the new prop shaft, for the Anodes. With any luck the exhaust injection elbow too, now I have the right bolts and washers for that in the van! Then the rubber exhaust can all be reconnected, sealed with Sikaflex. That will conclude work under the cockpit floor. Watching the weather and the wind appears to be abating over the weekend, so Sunday planning PAINTING DAY! In the meantime back in garage for last coats of varnish. I will be lifting the cockpit sole and removing lids from all lockers round the cockpit to enable me to paint round things easier... but all takes time. Fitted the pair of newly varnished timber supports under the front of the new cooker, they are just for use when in harbour to lock it so when oven door is open it does not tip the contents on cooks legs! Works brilliantly! Last job will be the antifouling, still hoping for a young enthusiastic helper, but in vain, will be on my back under the keels manually scraping the last of the old stuff off I guess! Back soon with more positive updates! John
|
||
|
Saturday June 13th
Spent a couple of hours aboard and got a lot of jobs sorted. I managed to fit the missing nut and washer to the alternator and adjust the new fan belt. I checked the Heat exchanger bolts for tightness, having allowed the new 'O' ring seals to bed in. I fitted the new exhaust casting with the water mixer. Then fitted the new water pipe to it from the new end cap on the heat exchanger. I removed the cockpit floor in preparation for painting around the edges, simpler than masking it up! Then, whilst the floor was up, I turned my attention to the rest of the exhaust system and refitted the water trap and the connecting heavy exhaust hose, all sealed with a smear of Sikaflex and new Jubilee clips! I have just to refit the earthing strap a s/s flat springy metal strap that connects the Anode wiring to the prop shaft. All in place and prepared for tomorrow, just got a bit late to finish it. For tomorrow I have also planned to finish of the cabin top painting, masking round the windows will be the longest job! I am also planning to remove all the cockpit locker lids and clean the mastic off, so they can be laid out to be painted more easily, again, less masking up! The cockpit does get a lot of traffic and it has been repainted several times over the last 25 years, unlike the cabin top... Feel I am getting there! John
|
|||
 New sender unit.. |
Tuesday 16th June 2015. A real red letter day. I went down to paint the deck, but first simply wire up the new fuel gauge. 2 and a half hours later I eventually finished off the fuel gauge! When I wired it as in the instructions the needle went straight to 'Full'. But the tank is empty... Reading the sender instructions it tell me I must have got the sender float back to front, but checking... yes, removing it from the tank... it was correct. However when I read the pigeon English translation of the Italian for the gauge, I realised the thing worked in reverse to the way the sender expected, so I had to remove the float and refit all backwards... well according the the wiring and assembly instructions for the sender it was backwards! However it took a lot of fiddling about to get the float so it did not foul anything in the tank, suction pipes and baffles etc. Eventually I have it refitted, and with a bit of string attached to the float through the filler hose hole temporarily, I could test it, the gauge now worked. Then disassemble to remove string tied to float and finally reseal all, what a performance! When I next go down I will start filling the tank. As it is 16 gallons now, or 72 litres, I will just half fill it and check the needle is on the 1/2 full! As there is no means of dipping the tank, the gauge must work! Watching the weather now and looks like it will be hot tomorrow, so OK for fuelling, but too hot for painting deck, Friday and Saturday look perfect. Also got to finish off the varnishing in the garage, job for tomorrow. Ticking jobs off the list daily now. John
|
||
 |
Thursday 18th June 2015. Managed to mask up and paint 90% of the deck today, fiddly job round the fittings, even with masking up. Left a section between the genoa track and the toe rail for today as I had just enough paint in the pot to get that far and I needed to add more masking tape! Hope by then weekend all deck and cabin top done! Found something I had been looking for for months on our EBay page, butyl mastic in a roll protected by greased paper. I had some 30 year old stuff called Arbo-seal, but they no longer make it under that name, investigations revealed it is a butyl rubber and available a caravan outlets for sealing panels. Ideal, so a reel arrived today. Now going to remove all the locker hinges and latches in the cockpit to reseal later with this stuff. I will then be able to properly clean off the lids and cockpit sides without metal bits in the way and it will make it that much easier to paint. Getting there! Last job before I leave her today, apply the new SSR lettering, now it looks like I'm winning! Came home and applied another coat of varnish to the washboards and back rests in the garage... satisfying work! John
|
||
|
Friday 19th June 2015 Today finished of the deck painting, just the cockpit to go now then on to the green stripe. Certainly looks a great colour, shame about the dribbles and runs, but I have a plan for those! Special tool for taking runs out of car paint jobs using 2 Pot. I will test it out on bits that do not matter first! Off to the boat tomorrow to remove masking tape.. John
|
|||
|
July 1st 2015 Was hoping to be further ahead but as always other events get in the way. However I have started to replace deck fittings with new sealant and all the cockpit area is cleaned off, just waiting for the ultra high, for us, temperatures to cool. 28 degrees today and tomorrow hotter. Brought a few deck fittings home to scrub and clean up, took 30 minutes in the sink to have them like new! John
|
|||
|
3rd July 2015 Down the boat early today, 0930 dragged her out of the barn and into a field so the slurry blaster, Gary could set to and remove all the old remaining antifouling. Took him and his partner 2 hours and left a clean surface almost but not quite, ready to paint. A few bits of antifoul in odd corners to sand or chip off and a few places where the blaster was a little too aggressive, so I have to epoxy these again when dry, and at 30 degrees plus will not take long to dry. All the paint and antifouling removed from the bilge keels, back to clean galvanising! After 25 years they look like new! I will roll a few coats of epoxy onto them, too. Have to chip of a few bits of flaky epoxy on the ballast keel and re epoxy that in patches too. If I do it well I should not have to do it again for a while. Say 20 years! The new sander will be pressed into use to make all ready for epoxy and painting. The slurry blasting cost £425, but was so worth it to see all the rest come off in 2 hours... I had already taken months chipping away at it in patches. Next week the temperatures back to 20 and the cockpit paint can be applied, just leaves the green stripe then, preparation starts on that the moment the last yellow has gone off. Only down side of today was the jockey wheel. With so much weight up forward inside there was a lot of weight on it and it semi collapsed the beam on the trailer it is attached to. I am hoping we can hitch up and tow her to the marina OK but after that the trailer is going to have to be beefed up and repaired there. John
|
|||
|
July 15th 2015. Have spent the afternoon in sweltering heat, refitting all the deck and cabin top fittings, vents, fairleads, winches. jammers, cockpit cubby hole locker, spray hood fittings and all the cockpit locker lids, all nicely painted up and looking good. By the time I left tonight I had all back except the 4 lid clasps that we secure the lids down with at sea.... The new white soft butyl rubber mastic is wonderful stuff. It is slowly oozing out from behind the fittings and given a day or two I will be able to gently clean round everything with a specially made Perspex chisel like tool, which cleans off the excess without damaging the paint... Hope to refit cockpit floor next and seal it down. Then refit gear lever and throttle control, a simple task. When all done in the cockpit I will take the diesel down and start filling the tank, just a 5 litre can at a time, to calibrate the new fuel gauge! Having a day working on her Friday, with Phil, hope to have all the green topsides sanded and ready to mask up and paint! that will be a big step forward, all the 2 pot painting done! Bought a 6 kilo pack of West Resin yesterday, arrived today. That will be used to coat the bilge keels again, 3 coats, patching the bottom first, where it was over enthusiastically slurry blasted! I will fill a few of the slight imperfections in the hull where screw heads were not quite filled enough 27 years back, may make me go faster! Have a bit of ballast keel to wire brush and roll epoxy on too, will give that a couple of coats, then filler and fair off, before a final coat of epoxy all over. Should be good for years. The bilge keels have cleaned up to look like new! The epoxy over the galvanising well worth the effort. I hope to get a coat of Sikkens on the toe rails, hand rails and gunwales etc Friday, so quick to do. Target for launching end of the month! John
|
|||
|
17th July 2015. Spent a day with crew Phil working on the boat. We rubbed down and epoxy filled and rubbed down again, all the green painted stripe and the transom. We were about to break open the paint when the wind increased and dust started to fly, then the farmer arrived and decided to cut a strip of dry grass just outside the barn doors and it all blew in! No, not ideal painting weather. So we rubbed down the gunwales and toe trails, ready to re 'varnish' them with Sikkens, after the green stripe is painted. The cockpit floor was carefully lowered onto a cleaned surface and the rubber seal tightened down with approx 20 Silicone bronze screws. That should be watertight! Then we turned our attention to the bottom of the hull. It needed just a few remaining specs of antifouling to be removed from odd corners and then sanding, we worked till the batteries went flat and decided it was enough! Masked up the anodes and skin fittings.... Mixed up West Epoxy mix without any additives and using long handled radiator rollers and fabric rollers especially for epoxy, we attacked the underside. We gave it one coat from just below the waterline to the bottom of the keel and both bilge plates. Even the rudder got a coat... only took half an hour or so.... Tomorrow when I come back to put another coat on, I will be wearing a snazzy shower cap! took me forever to get the epoxy out of my hair. I will be aiming at 3 coats and sanding to smooth, then primer and Marclear. This will be the first time in 25 years I have recoated the bottom and apart from the few places where the slurry blaster was over enthusiastic, the epoxy coating is intact and good, this extra layer will add strength and durability for many years to come. The boat looks well with the shiny epoxy finish on her and the cream decks and cockpit gleam, just the green stripe to do... Really on the home straight now! Whilst clearing up we removed the jockey wheel again and decided that the steel box section had not actually rusted as badly as I had feared and all it needs is a 6mm thick steel plate and it should be safe and strong.. so off to source a bit of steel plate. Started to refit the engine control and realised the operating handle looked rough. I had covered the ali with liquid plastic some years back, to replace the plastic coating that had flaked off. Now the rubbery coating I had applied was lifting, so took it home to clean up and will strip all the flaky coat, sand and prime then re-spray black. Another job! Must take down the new teak holders for the handheld VHF and the winch handle... and fit them. Gear is beginning to come out of storage and got ready to refit! At last.. John
|
|||

The above 3 pics of main keel show the extent of the filling and fairing to be done after the slurry blasting loosened any dodgy epoxy coating.
same area after sanding and the last coat! impressive.
port bow showing masking tape to waterline.
rudder sanded ready for silver coloured last coat.
stand back and admire that finish! |
Sunday August 2nd.
Last week did not go quite to plan. I had it all planned out.. and by now the boat would have been 100 percent painted running rigging in and ready to roll..... but then a leaf spring on the back of my Moggy Van broke and that was it, grounded. Van booked in and all new springs and parts obtained and ready to fit, hope to have my wheels back by Wednesday... However was able to borrow the boss's car and a few late evenings and working all day over the weekend, has resulted in another 2 coats of epoxy. with filler and sanding and fairing in between. The result, a smooth clean and finished epoxy coated hull. The last coat with Aluminium oxide in it to give a silver UV proof hard finish. Looks like an Airfix kit of yesteryear, all silver! I have also recoated all the handrails and deck fittings with Sikkens, and just for good measure put the first few gallons of diesel into the fuel tank. Pleased to say the first 5 litres, (gallon) put the needle on the red danger mark from the Empty and 3 more gallons took it perfectly to the 1/4 mark. By the time it is afloat I may fill it to the top, 16 gallons, just to make sure it reads correctly throughout the scale. See no reason why it should not. With any luck I will be changing the engine mounted fuel filter this week and pumping the fuel system full of diesel for the first time, with the new hand pump mounted on the new CAV filter. Then will be rigging the water tank on the transom, but not before I have tackled the last big job, painting the green stripe! The raised topsides and a band just beneath the rubbing strake are going to be, hopefully, the right, bright 'Kelly green' again! Looking for a still and not too warm a day, later next week looks good. I have had specially made, a litre of the 'Kelly Green' I have been trying so hard to find for years, Awlgrip made it at a price (£150 a litre!!), but it is not available in the UK now.. and before that I got it from Wilkinsons paints of Barking Creek, but they went 25 years or more back. International helped me once, with their 'Cape Green', but it is a special colour for South Africa and not available here normally, I was just lucky one year. Last time we repainted the green stripe we had a firm in Harlow make it, disaster, they thought we were going to spray it and even later when they tried different hardeners, it still went off in 10 seconds! That is, it lost its wet edge, so if you tried to over paint after 10 seconds the paint brush stuck to the hull, terrific! International Perfection, that I have used all over the cabin top and deck is good for 30 seconds, just about right. wonder what the new locally made paint will be like?? at £40 a litre better be good! I will be getting the batteries back on board as soon as the van springs can take them! They, (all 5 of them!) have been on float charge for 18 months! Needs a strong back to help lift them aboard! have a young helper later in the week.... Soon will be clearing out tools etc. from inside and getting some semblance of her normal self aboard! Already beginning to break open some of the storage boxes in my garage/sail loft! Some items have not seen the light of day since autumn 2013! A few items to overhaul, life jackets etc... Enough for now, going to recharge my batteries after this long weekend! John
|
||
 New Seago GX4 Liferaft
The only visible difference on the outside is the colour of the valise, the other one is yellow! But there have been small improvements.. |
Monday 3rd August 2015 Puttered down to the boat in the old Bantam as the van off the road having new rear springs fitted. Think I over did it with the 50 year old van suspension... maybe it was the iron ballast pigs in the back, or the rutted tracks to the farm.. either way she is off the road for a bit. However I did win an EBay auction today, for a 2 year old Seago Liferaft, same as the one I have that has only a year left on the 12 year warranty and would need servicing half way through next years leg of the 'Fiddling Around! Bit inconvenient. Though you can get them re-serviced for years, after the 12 years, it would be out of warranty and any repairs down to me. So the old one is advertised for sale (£150) and the new one is to come aboard! Whilst I was down at the boat today I managed to put another coat of Sikkens on the toe rails and coat the bits I had missed round the stern deck area. Put another coat on a new bit of Afromosia attached to the cabintop the other day, a small mod we thought was needed during the first leg. A wooden bar to prevent small items falling off the back of the cabintop onto the cockpit floor. Surprising how few modifications were considered to be needed.! I have the main gunwhale to do, after the new green paint is on and set, will only take a few minutes. I dragged the bowsprit out and sanded it down with wet and dry and white spirits, got a coat on the underside. Going back later in the week and will do the other side them.! Beginning to tidy up now and several boxes of kit, all the epoxy and fillers etc. had been removed to store. Getting there. John
|
||
|
Thursday August 6th 2015 This page should be in green ink really. Phil came along for a day and together we finished off the exterior paint, the raised topsides and the last bits of Sikkens stain. The boat is back to her original "Kelly Green". Very bright! Excellent shine that will get better, smoother, with polishing. Paint had a wet edge time of 10 to 15 seconds. For some reason no one can get a paint right, like International can. The creamy yellow paint on FG is International Perfection and great, drying time 30 seconds, so that just gives you the right amount of time to whack it on and then gently spread it out. I can do that single handed, just, better with someone applying and me following frantically fast with the green paint and a 10 second window. It really is that fast. If you try after that 10 to 15 seconds to move the pad over the surface again, the pad just sticks to the paint, and when you get it off it leaves a nasty mark. You than have to let it dry and sand it, or try to get a second coat on within 15 minutes. Phil and myself got 2 frantic coats on in about an hour. Though not perfect, it was a lot better than it was and will do.
Friday August 7th, Had a helper, the grandson, Brandon, so he and myself battled with the 5ft long name decals and managed to get the boat named! Saturday August 8th, Brandon was with me again to lift the 5 batteries aboard and put a coat of Sikkens on the bowsprit. Together we lifted the rudder back on, into its new bearing at the heel, then fitted the tiller, now she looks better! We sanded the epoxy coat on the hull and rudder in preparation for the first coat of antifouling primer tomorrow.! John
|
|||
|
Tuesday 18th August 2015 Pouring with rain, where did the warm weather go. Have been away for a week, I never got that primer on, maybe tomorrow! Have batteries and wiring to connect and stow safely and tools etc to stow then re rig all the running rigging, always fun... and then the last coat of antifouling! Launching next week I hope! John
|
|||
|
Saturday 22nd August 2015. The antifouling is on! 2 coats of Marclear round the waterline and rudder one good coat elsewhere, used 2.5 litres. Smooth finish over the primer with no craters and lumps of older antifouling. All that effort cleaning back to the bare epoxy coating proved worth while. Try to fit the metal plate to re enforce the jockey wheel, second attempt! Back to base to grind some more off. Sunday 23rd August 2015. Heat in barn is enormous, anti foul hardening nicely! Try that metal plate again, still does not fit! back to base for lunch and a quick grind! Paint plate and fit! However the jockey wheel cannot be refitted without jacking the front of the trailer up 2 " as the trailer is a fag paper too low to re insert it! All takes time. Turn my attention to the batteries and re connect all 5! The only one to not show up the correct voltage is the start battery?? It has been on a maintaining trickle charge for 18 months, as per all the rest, but voltage down 10.5?? Decide to leave it in and attend to the other jobs first. Replace the fuel filter on the engine, then pump the fuel up for the first time to fill the system, new CAV filter under cockpit floor has an easy accessible pump on the top, very handy. Soon fill filter and then bleed it and the pump connection. Top up the header tank with antifreeze and rig my water recycling set up. A 5 gallon container that hangs on the transom ladder so the water from the exhaust enters the hole cut in the side and the water in it is lead back by a hose to the inlet seacock. (normal hose with a small layer of self amalgamating tape to effect a good seal, barely a drip). All set. Try the starter but start battery dead... switch on the battery parallel switch and bring in the aux batteries, instant start ! The charger cuts in and tries to recharge the start battery. Run the system for 20 minutes, with the cold water hose from tap gently topping up the tank, you get a lot of splashed out water loss. Feel very pleased with myself, all runs like clockwork and oils warmed up. However start battery now reads 2 volts! What!! It has died, well it is 6 years old, remove it to replace it. Change engine oil and filter. Crawl down quarter berth to suck the 1/3rd litre of ATF oil out of the gearbox, horrible job, always get the taste in my mouth... Refill with oil and clean up. Start to put tools away and prepare to finish off, late now getting dark outside. Then to my horror notice large puddle with greenish tint in the bilge! Go to heat exchanger, empty! Seems the 'o' ring seals on the front and back of the heat exchanger are no longer man enough to seal as there is some inevitable corrosion around the end caps. Sleep on it and realise I may have the answer. RTV! I use this for my seagulls, heat proof silicone mastic. I will try to seal them Monday. I have ordered a new 88Amp hour battery using our EBay page. Hope to be able to dress the mast Monday too. John
|
|||
|
Monday 24th August 2015 All the best laid plans and all that. I visit the marina only to find there is a large commemoration to the 121 who lost their lives at Bradwell Bay airfield 70 years ago. The launching off. Then I go to boat and find the problem with the heat exchanger is more serious than I thought. Seems when the end cap was dropped some time back... that engineer again?? An edge was damaged, it allowed the 'O' ring to kink and fail and that has caused corrosion of the Ali casing. I clean the corrosion off and think about it for a bit.. John
|
|||
|
Tuesday 25th August 2015. I have a plan. Build up the ali with 'JB metal', the epoxy based filler. The surface simply has to be able to seat the 'O' ring seal on. I also find out one of the 'O' ring seals is half a mm smaller and of course, that is the one that was leaking! Bin it. I scour out the corrosion and fill it. John
|
|||
|
Wednesday 26th August 2015. The battery arrives. Fit battery and sand JB metal filler, needs another coat. Mix up and apply. John
|
|||
|
Thursday 27th August 2015. Filler has gone off so take nearly an hour to sand all smooth, then when I am happy the tube stack can slide in freely fit it and apply a smear of RTV, fit 'O' rings and more RTV and then end caps! I am pleased with myself till I look at my hands. the tube of RTV split and in the dark I did not notice, what a mess! Off home and spend another hour trying to get as much off as I can.. the rest will have to wear off. Hopefully over the next 3 days I will get all finished aboard and have her ready to launch next week, when, hopefully my driver and crew will be available. Go to Marina to take part in commemorations and OK the later launching with Ian the yard manager. So back to the boat later as I have to see if I have sealed it successfully...... John Friday 28th August. Post script, no I failed.... but I realised why eventually, the blessed end cap had slipped between me locating it and reaching for the spanner. I tried again and added silicone and then antifreeze and left it to see if it leaked again. First had to sponge out the bilge again.... John
|
|||
|
Saturday 29th August 2015.
Should be a red letter day because as I walked into the Bradwell marina clubhouse to meet fellow members the phone rang and I was suddenly a granddad! Rafferty John Robert Watts had been born. I had been a bit delayed getting to the club as I had been down to check the boat and the engine heat exchanger. To my surprise, after so many failures, it had sealed! Ran the motor up and checked it all and came away smiling!. John
|
|||
|
Sunday 30th August 2015
Down to the boat in the morning and run the motor again, check the water flow and the fluid levels. All good, a result. Bilge bone dry! I pack up the engine running kit, the 5 gallon container with the hole in the side for the exhaust to fit and the pipe off the bottom to the engine seacock. Will not be needing that till next spring! I then set too and chain the boat back to the trailer, she has 5 sets of chains and galvanised rigging screws, 2 on each bilge keel and one from the bob stay fitting to the trailer. She becomes one with the trailer. Fix the wooden chocks that stop the main keel moving sideways. Strapped in with electrical ties! Home for lunch. In the afternoon I rig all the halyards and lines to the mast and secure it for towing. I put a final polish on the prop and then coat it with lanolin... Feeling pretty good now, launch booked for Wednesday. John
|
|||
|
Monday 31st of August 2015, the bank
holiday. Tipping it down virtually all weekend!! I go down to the barn and tidy up some more bits, fit the dodgers and the backrests, put all away tidily down below. Stand back and admire! She looks great. It has taken 20 months since I returned from our trip, to get her to this stage, most of last year wasted with the concerns over the traveller site, that now seems to be under control with no one seen on site for a year since it was made known we had a barrister that could get the all important injunction. I have had trials and tribulations with the engineer and what with the bad workmanship, but at the end of the day we have overcome all and done a cracking good job as well. I now have as many as 6 coats of epoxy on the underwater hull, and all freshly filled and sealed and primed and antifouled. It has been great to have helpers, Phil several times, son in law Paul and grandson Brandon too. Darian has been a brick, she knows how much it means to me and has helped on all sorts of levels.. All the cream cabin top, decks and cockpit have been repainted, some for the first time since before we first launched her, 26 years ago, (over 27 years). We have done the jobs the surveyor recommended, (that were already on my list) and more, the anchor winch, the rudder bearing, the prop shaft bearings.. We have fitted new engine mounts, first time in 20 years and doubled the tank capacity and fitted all new fuel system, from filler to the engine. And added a fuel gauge! The cooker has been updated and all inside cleaned and polished. Extra storage boxes added in the cockpit and a small edge added to the aft cabin top to keep gear safe there. She looks nearly as good as the day we launched 26 years back, but in addition she is improved. I can afford to take a day off tomorrow! John
|
|||
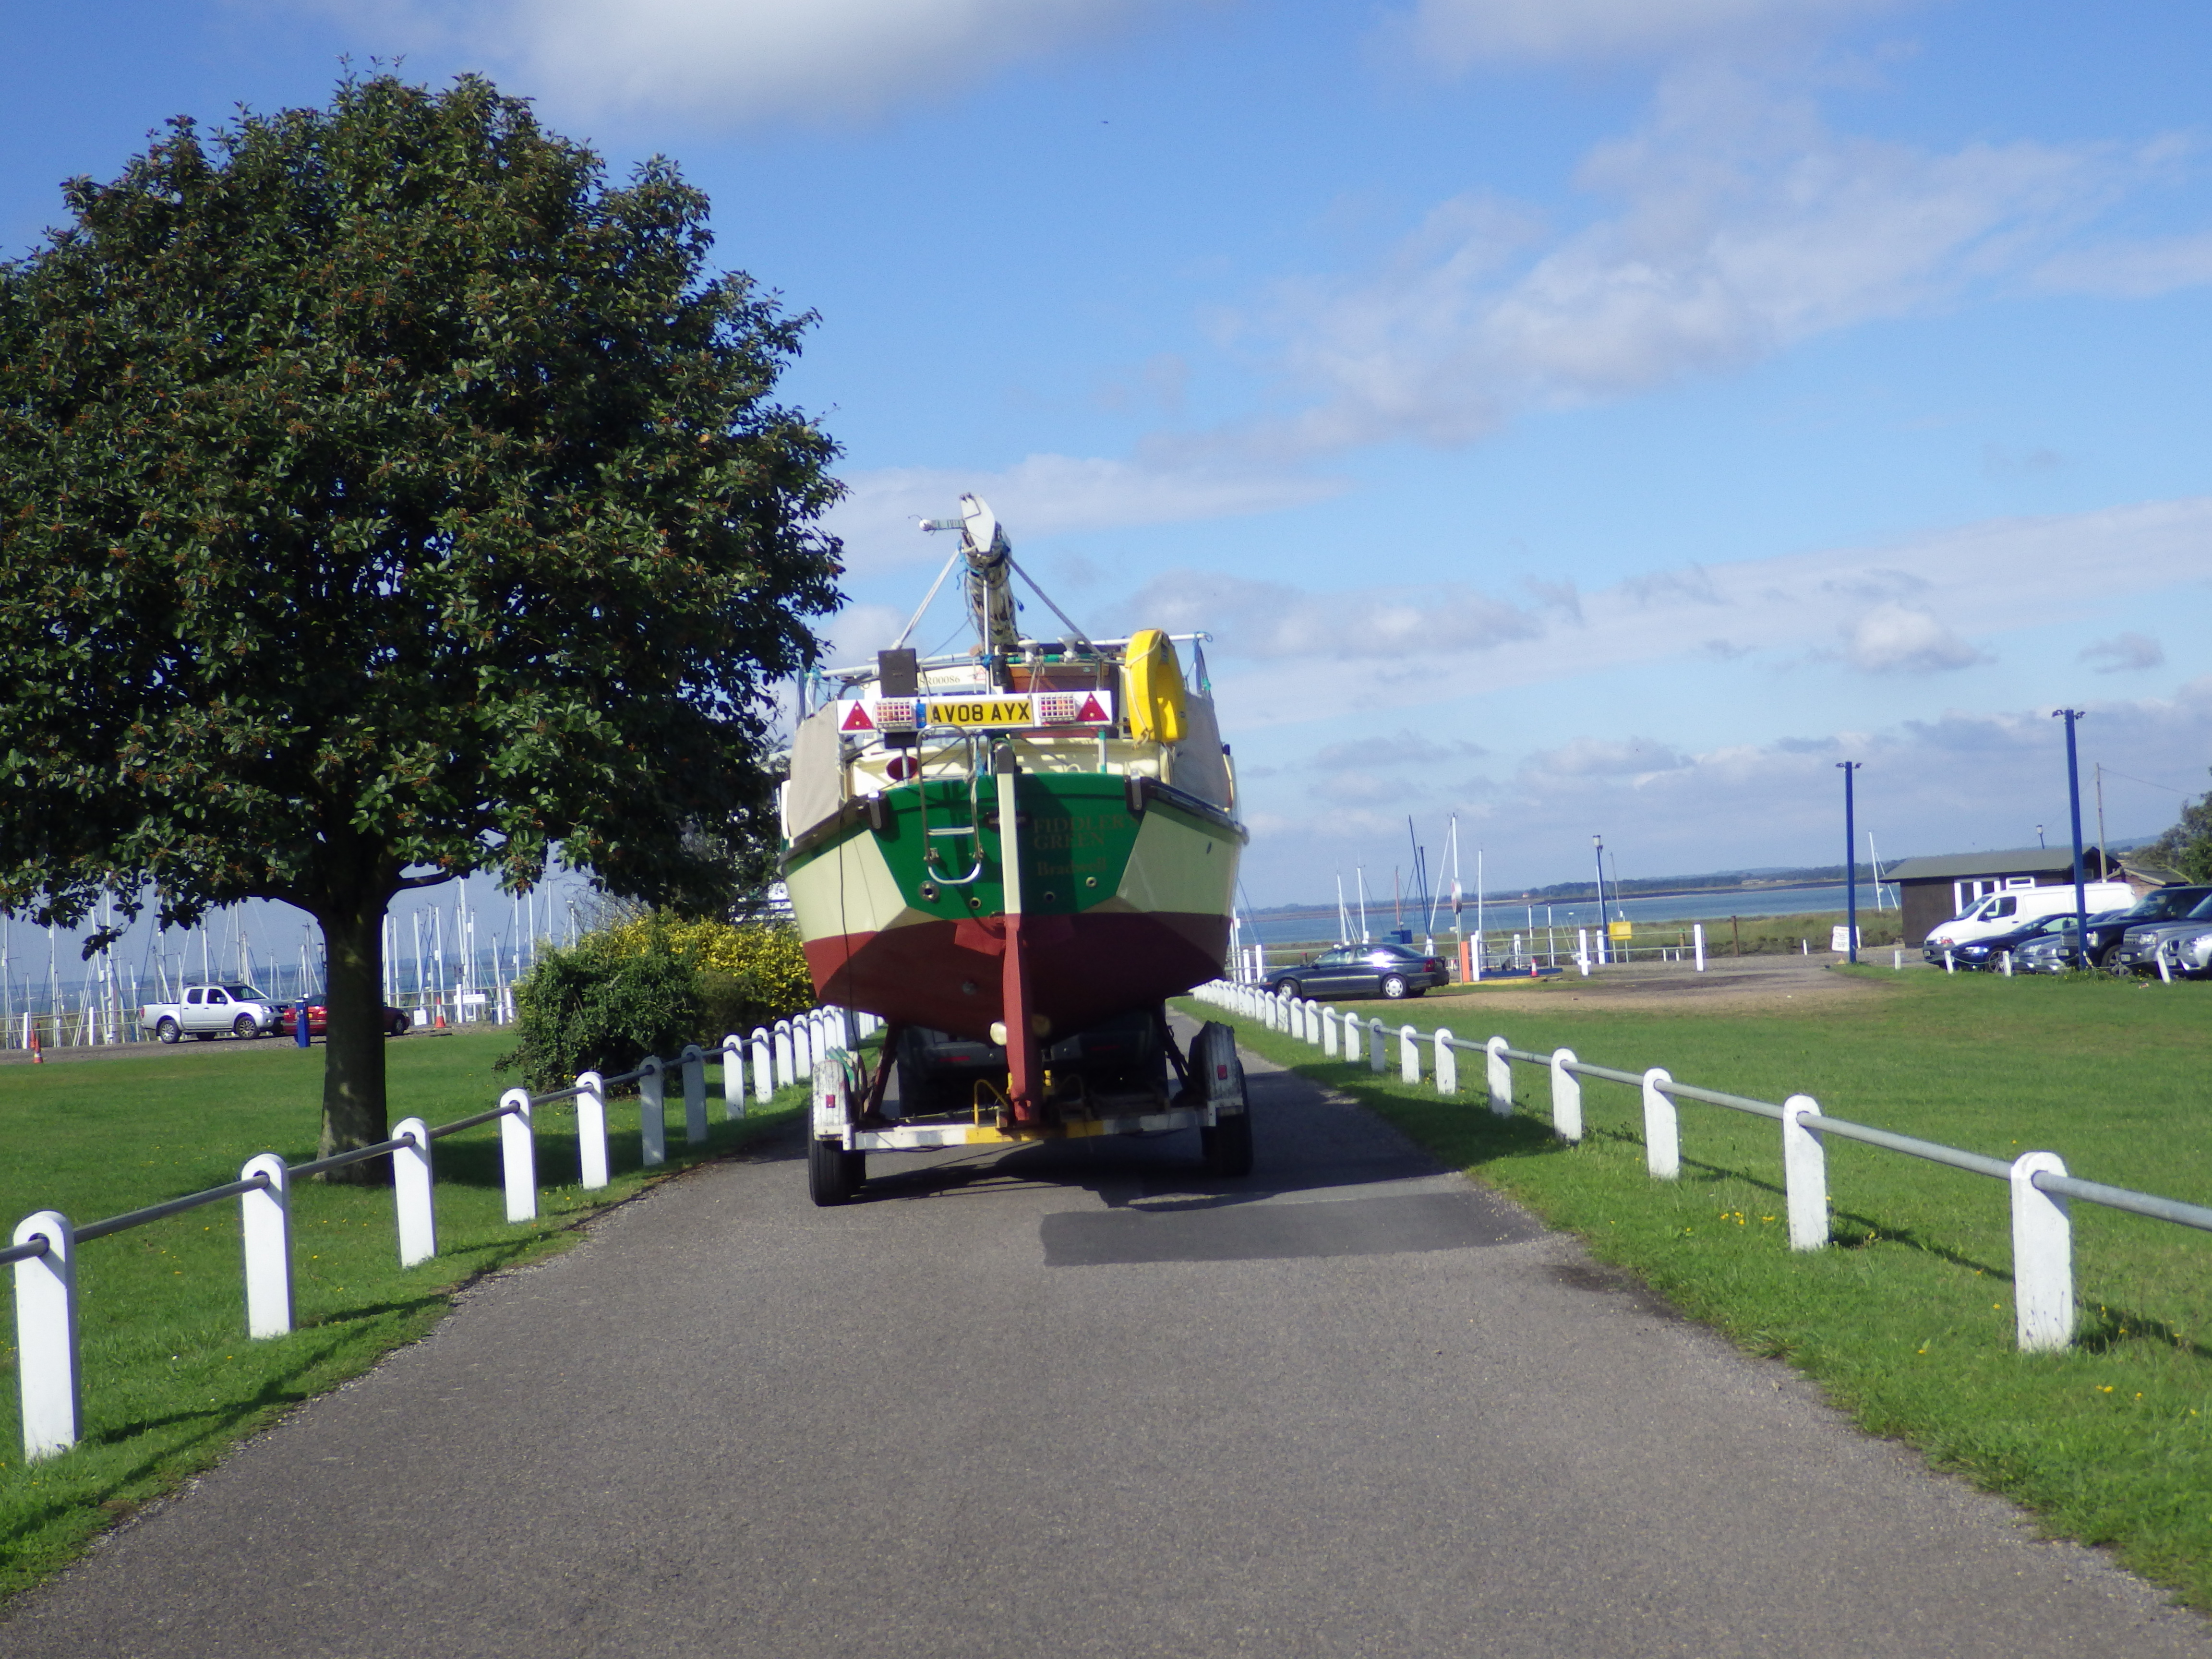 Arriving at Bradwell September 2015
Crew discussing paint job!
A lot of work, but she now is repainted from stem to stern!
Phil and Keith, brilliant crew!
Mast heel in tabernacle and rigging attached, 15ft of mast over the stern, awaiting the crane and lifting it up.
On the berth, of course it rained, and Phil hoses down the muddy foot prints we left on deck! |
Wednesday September 2nd 2015.
Brother in law Keith and I are at the boat at 0930 and hitch up trailer, fit light board and check all round. Keith finds a couple of soft tyres. Before we have started to pump them Phil arrives. Tyres pumped, grease applied to hitch and all checked OK. By 1015 we are on the move and by 1045 we are in Bradwell and sorting the boat for launch. Keith, Phil and myself have done this so many times virtually nothing has to be said, we set to and sort out the mast, removing the scraps of carpet and ties that stop the chafe when under tow, all are dropped into a box alongside the boat, for next time! Together we lift the mast bodily and move it aft till the mast extends some 15ft or so over the transom and the pivot bolt is in the heel. Then all the standing rigging is attached and I check to make sure I have got all the halyards the right side of spreaders or shrouds. As ever there is always one, or today two, wrong!!. Ian the foreman comes along with the bobcat. We work out that it is easier to use it as if we were hauling the mast up with our mast raising kit, instead of using the huge crane, so we just attach the inner forestay to the jib of the bobcat and that is manoeuvred right in front of the boat and away we go, lifting up, every now and again something catches, but with 4 pairs of eyes, including Ian's we are instantly on snags and in moments the mast is up and the locking bolt in place. Ian keeps the Bobcat attached till we get the topmast forestay on. He says he will do it this way with us every time in future. (We are about the only boat crew that he allows to work with him and I am one of the very few permitted to motor on and off the boat lift. ) Then all the rig is checked to ensure mast upright athwart ships and then tensioned to get the luff groove as straight as a die. The final adjustment of backstays and the inner forestay gives me that nice curve in the mast I like to see. Hopefully when we get her sailing the mast will be straight under full sail and the lee rigging will be just perceptibly slack... Phil and I set to with green sticky tape on all the pins and Keith checks the trailer then the bobstay and finds the bobstay fitting needs tightening. I tunnel into the bottom of the chain locker and between us we get over a turn on the 2 bolts and all is tight again! By the time we get this far we are all in shirtsleeves and it is hot, hottest it has been for days! We lunch, whilst Ian has his break and then the travel lift is trundled out and she is gently lifted by the strops off her trailer, her home for the last 20 months. As I open the can of antifouling to touch up the bits that were sat on the trailer, the heavens open! Soddes Law. We run for jackets and in torrential rain she is gently lowered into the water. Phil and I climb aboard and I key the motor, instant start. Exhaust checked OK! No inrush of water either! Bilges checked, dry as dust! We motor sedately round to the berth. Keith has the lines ready.. The new propshaft and bearings are much quieter, but the prop still sings! A nice note thought! The motor runs as smooth as silk on its new mounts and there is not a bit of vibration from the perfectly aligned shaft and motor, a success! On the berth we run the motor under load, in gear and charging hard, to check all out, no leaks anywhere and all fine. The only slight hiccup was the loo would not flush till I poured a jug of water in the bowl, suspect the pump was dry as a bone and not sealing , soon had it flushing through fine. Oh and a darned wasp got me! We were going to hoist and stow sails, a job that is much easier with 3 aboard, but as it was still raining we simply fitted mainsheet and boom and secured the boat, all seacocks turned off, (especially easy as they had been greased)! By 1600 the boat was left on the mooring and had already had admiring visitors! Over the next few days, with forecasts of F6 to 8 and rain, I will endeavour to load all the rest of the kit and connect all the electronics and fit the sails... Keith trailed the trailer off to his farm for storage for a couple of months and we are planing the first sails! John
|
||
|
Wednesday 9th September 2015. Disappointingly I have found problems. The 2 aux batteries have failed as well as the main Start battery. They take a charge and show 13.5 volts, but try and turn a single light on and after a moment the metre only shows 10.5 v. The tell tale window on the top of each shows clear, which means a fault, replace... They of course are a month over the 4 year warranty! replacements on order. Also found the bearings in the roller reefing have failed. We had problems with the gear when on the trip, as it spent a long time underwater in the rough conditions we had... seems the roller bearings are replaceable, at a cost. £140.00 However it has given sterling service for over 25 years, so time to replace. A new one will be ordered this week to be fitted over winter. The new version of the Plastimo 609 has an enclosed drum to prevent those annoying snag up when the line falls off the drum! It also has Delrin bearings instead of the s/s ones. which should be an improvement. SeaTech sell a complete system for less than £400. I would have liked the SailSpar one, but at twice the price..... Other little problems have arisen that I have to see to, I will be replacing the 2 backstay rigging screws with a pair just 1/2 inch longer, as it is a job to get the ones I have fitted to fit. The backstays were cut shorter on purpose 3 years back when we re rigged, but we expected a little stretching, this has not happened, so replacing the screws is easier. As I have them, carried aboard, as spares!! One silly item missing is the hose pipe end fitting?? No idea where that went, but it is the bit that has to fit the tap in the marina, so have to find one before I can fill the tanks! I am off to the boat later to double check some measurements before buying the new roller reefing gear.... Thinking to myself that if I can safely remove the old gear, and strip and replace the bearings that is saleable, nothing else wrong with it. (Part of me is saying repair what you have and carry on with it, nothing wrong with it otherwise...). We will see. John
|
|||
 The latest 609 drum has a protective cover. I am going to replace the existing reefing with one of these, everything else is the same and as it has worked well for 25 years, apart from the occasional trip to the end of the bowsprit to untangle lines.... An enclosed drum with put an end to that. I will see if bearings can be replaced on old one and if so will sell it on! |
Tuesday September 15th 2015 At last I have sorted the electrics. It was the Aux batteries, now all the lights bright and the volts up. Cost me 2 more batteries. The old ones were 1 month out of warranty!! How do they know?? I remembered the hose adapter too, so could fill water tanks. Had the Engine started and running in gear for an hour whilst I worked aboard. All tools packed away, the carpet laid, over a dry bilge! (Carpet is that wonderful 'FloText' kitchen carpet), I got the off cuts from my sisters new kitchen 25 years back, they are still going strong! Every season they are scrubbed on the table in the garden and left out to dry, takes 10 minutes to dry!! This year I re-enforced the back of the carpet where splits have started, with Gaffer Tape, should do the trick. I have found that my Plastimo 609 roller reefing gear is still made, almost identical, just that the lower drum now has a cage round it to prevent rope jams. Mine needs replacing, or rather the ball bearings need replacing. I have found I can buy them from Seatech for £140 for the two ball races, but have also found a local shop that will supply me with near identical for a fraction of the cost. Not going to do anything yet. Will remove the gear when I lay up and then replace with a brand new set up and or and repair it. If I buy new I could repair the old one and sell it. Does not owe me much, bought it in 1986!!! I really try to look after my gear and I have been repaid handsomely with long and reliable service from most kit I have aboard. Took down my newest bit of kit today, a 3 inch diameter s/s tube mast to fit to stern deck. Tried it, but base needs modifying, so back to engineer with that today. He is machining the bearings to fit inside it to take the upper, telescoping part with the radar mount. Hope to be able to see what's near me in the fog in future! Cleaned off all the dirt and mould from my inflatable last week, but to my annoyance there appears to be grit in the valve as it slowly deflated. Got to take some soapy water out and pump it up again to see if I can trace the leak. Yes as I guessed, dirt in valve, may have been a spider! Sorted. Surprisingly so far none of the parts I have worked on over the last 20 odd months have given problems, it is other gear that I simply expected to drag out of store and reuse, that has had problems.... but when I think about it a lot of that gear is well over 20 years old!! Do like getting my monies worth! Changed the backstay rigging screws for slightly longer ones to avoid the problem we have of the wire being just 1/4 inch short! Now the rigging screws can be connected without the gymnastics! John
|
||
 Keith Darian and Sue our first sail in 20 months!!
And we got sails up with the girls aboard!
but it was like a millpond!
Keith on the helm sailing at 2 knots down the Blackwater..
Passing The 'Mia Amigo' Radio Caroline, in very glassy conditions, motor on and heading for home!
|
Sunday 20th September 2015. At last, all that effort made worthwhile. Yesterday at noon we let go the moorings and to the waves of many friends in the marina quietly pottered out into the Blackwater. Fenders stowed and all on deck tidy but no sails out yet. A slow motor upstream towards and eventually to, Maldon. We checked the motor under load, got 6.2 knots at full whack, 3000 revs. (the prop has been over pitched to reduce top revs.). We tried and tested all the new kit including the cooker and went through all the gear on board to test it. Full marks! The wind was on the nose all the way up to the Fullbridge at Maldon, where we arrived at the top of the tide. Slowly puttering down with the ebb the genoa was unrolled, (with difficulty!), off the Maldon Prom and by the time we rounded the buoy heading for Osea the main was up too. We then had a gentle sail down in decreasing airs till eventually off St Lawrence, sails were dowsed and motor restarted for the last mile or two home. In the gathering dusk even the light were tested! We got back into Bradwell as the light failed and everyone had gone home. My crew for the day, Darian, plus my sister Sue and regular crew, her husband Keith. We had a great day so went off for a celebratory meal! I still have a couple of jobs outstanding, one is to fit lazy jacks, which may take a little head scratching, but the first bit of line is already in place round blocks fitted to the spreader roots and I have a packet of nylon thimbles to use to split the jacks up, we will see. Also decided to change the inflatable, an Avon typhoon 2.7m, it has only 2 chambers, plus a inflatable thwart, and have found there must be a leak between the two chambers as you can inflate it fully from either of the two valves, so I have it up for sale and have bought a new WavEco 2.6m with inflatable floor, a total of 4 compartments. It is heavier but more sturdy.. We will see. John, grinning from ear to ear!
|
||
 The new dinghy. Heavier but 4 inches smaller, should do me for a few years!
Darian, my boss soaking up the last of the sunshine, September 2015. |
Tuesday September 14th 2015. The dinghy arrived yesterday, eventually. Very uncomfortable and shifty courier driver, especially when I queried why the web page indicated it had been delivered the night before! I saw that online and complained.. As it was right at the back of the van reckon it had been there all yesterday.... Good news is Mailspeed reimbursed me the delivery charge! Think the Dinghy will be OK, but pumped it up and checked it, heavier fabric than the Avon typhoon but smaller tubes, so bet that means a wet bum! Took delivery of a couple of nice stainless drop nose pins, to use with my new telescopic radar mast, under construction.. plus some waterproof through the deck fittings for the cables. Another decent weekend coming up, another test sail.... and the boss likes this, hardly a breath of wind! John
|
||
|
|
Saturday 10th October 2015. Fiddler's Green and crew had an open day to show other halves the boat, the gear and the improvements since last time out on the first leg of my 'Fiddling Around'. For 3 hours kit was inspected and I tried to give all the reassuring answers... at one time we had over 10 on board! We then repaired to the marina bar for a meal. 12 crew and other halves and our newest recruit... The date for departure has been set and the various crews have the dates of their stages of the trip. It will all be a bit flexible come the time, it has to be, but we now have firm starting points. How far we get on various stages will depend 100% on the weather!
|
||

|
Sunday 11th At 1100 Fiddler's Green sails out of Bradwell with my newest crew member aboard. Have to say he was extremely relaxed about the whole thing! Well he is only 6 weeks old! On the left Rafferty, his mum Jenny, my daughter with me and with his dad Oly! Jenny will be with me on part of the trip and Oly will be in charge of Rafferty, with hopefully a little help from his granny! We were only out for 3 hours but on the plotter screen behind Oly and Jenny you can see we were sailing at nearly 5 knots at the time, (with the tide!). Just under genoa running upstream.... Amazing what snags come up though, just before we set off I did my customary check of the bilges and was alarmed to find a small trickle of oil!! I traced it back to the dipstick of all things. The rubber bung attached to the dipstick had become detached and slid up the shaft, allowing a tiny amount of oil spray to leak out. What a simple issue! So next week have to buy a new dipstick! You think you can think of every eventuality, but that is one that never crossed my mind! The preparations continue! Next week I have to fit the new s/s telescopic mast I have designed and had made.... More on that later. John
|
||
|
|
November 9th 2015. We have been laid up secure in our new barn for a few days now, sharing it with hundreds of tons of wheat! When the crew, Keith and Phil, recovered the boat, or the Marina travel lift did, at just 10am, we had only been afloat for only 2 months, so the bottom was clean and took seconds to wash off, we used our repaired mast lowering gear to lower the rig and by midday we were loaded up and ready to roll, but very damp as it had fallen out the sky for all the 2 hours! 2 hours later she was all secure again and we had stripped the roller reefing off and dismantled it. The ball bearings, mild steel ones were red with rust. The 25 year old Plastimo 609 gear came off very easily and to ensure we got it reassembled correctly I took photos. I found from Sea-Teach that the gear today was the same, but now with Delrin and stainless ball bearings and the drum has a shroud, so I bought just a new drum unit today. £199. Strangely a complete, new 609 reefing system came up on EBay when I entered 'Plastimo 609'. Starting price £200. I have to admit I was tempted to wait a few days to see how the bids went, but after speaking to Stewart at Sea-Teach I realised the drum they were selling was £70 cheaper than real price and why did I need any lengths of spar or other parts? Mine was fine.. So I am committed to just replacing the drum. The bonus is that the new drum design has a shroud to prevent annoying tangles... Have to just remove the 2 rivets holding the top part of the old drum unit to the lower end of the spar and re rivet the new drum on and then refit the chain plates from the old drum onto the new and reassemble, what could go wrong!? During the 2 months afloat we have checked out the engine alignment and mounts, the fuel system has had the air leaks cured and we have tested the new cooker. Batteries have been replaced and all in all everything is working as it should be, so apart from fitting the new s/s mast to the stern for the radar, all I might have to do next spring is polish and antifoul! You can bet your life I will find other jobs to sort! We have had some great days out with new family and friends, a Trafalgar mini cruise and one last wonderfully sunny day sail to round it all off, in November. I will add a little write up on those days out later... John
|
||
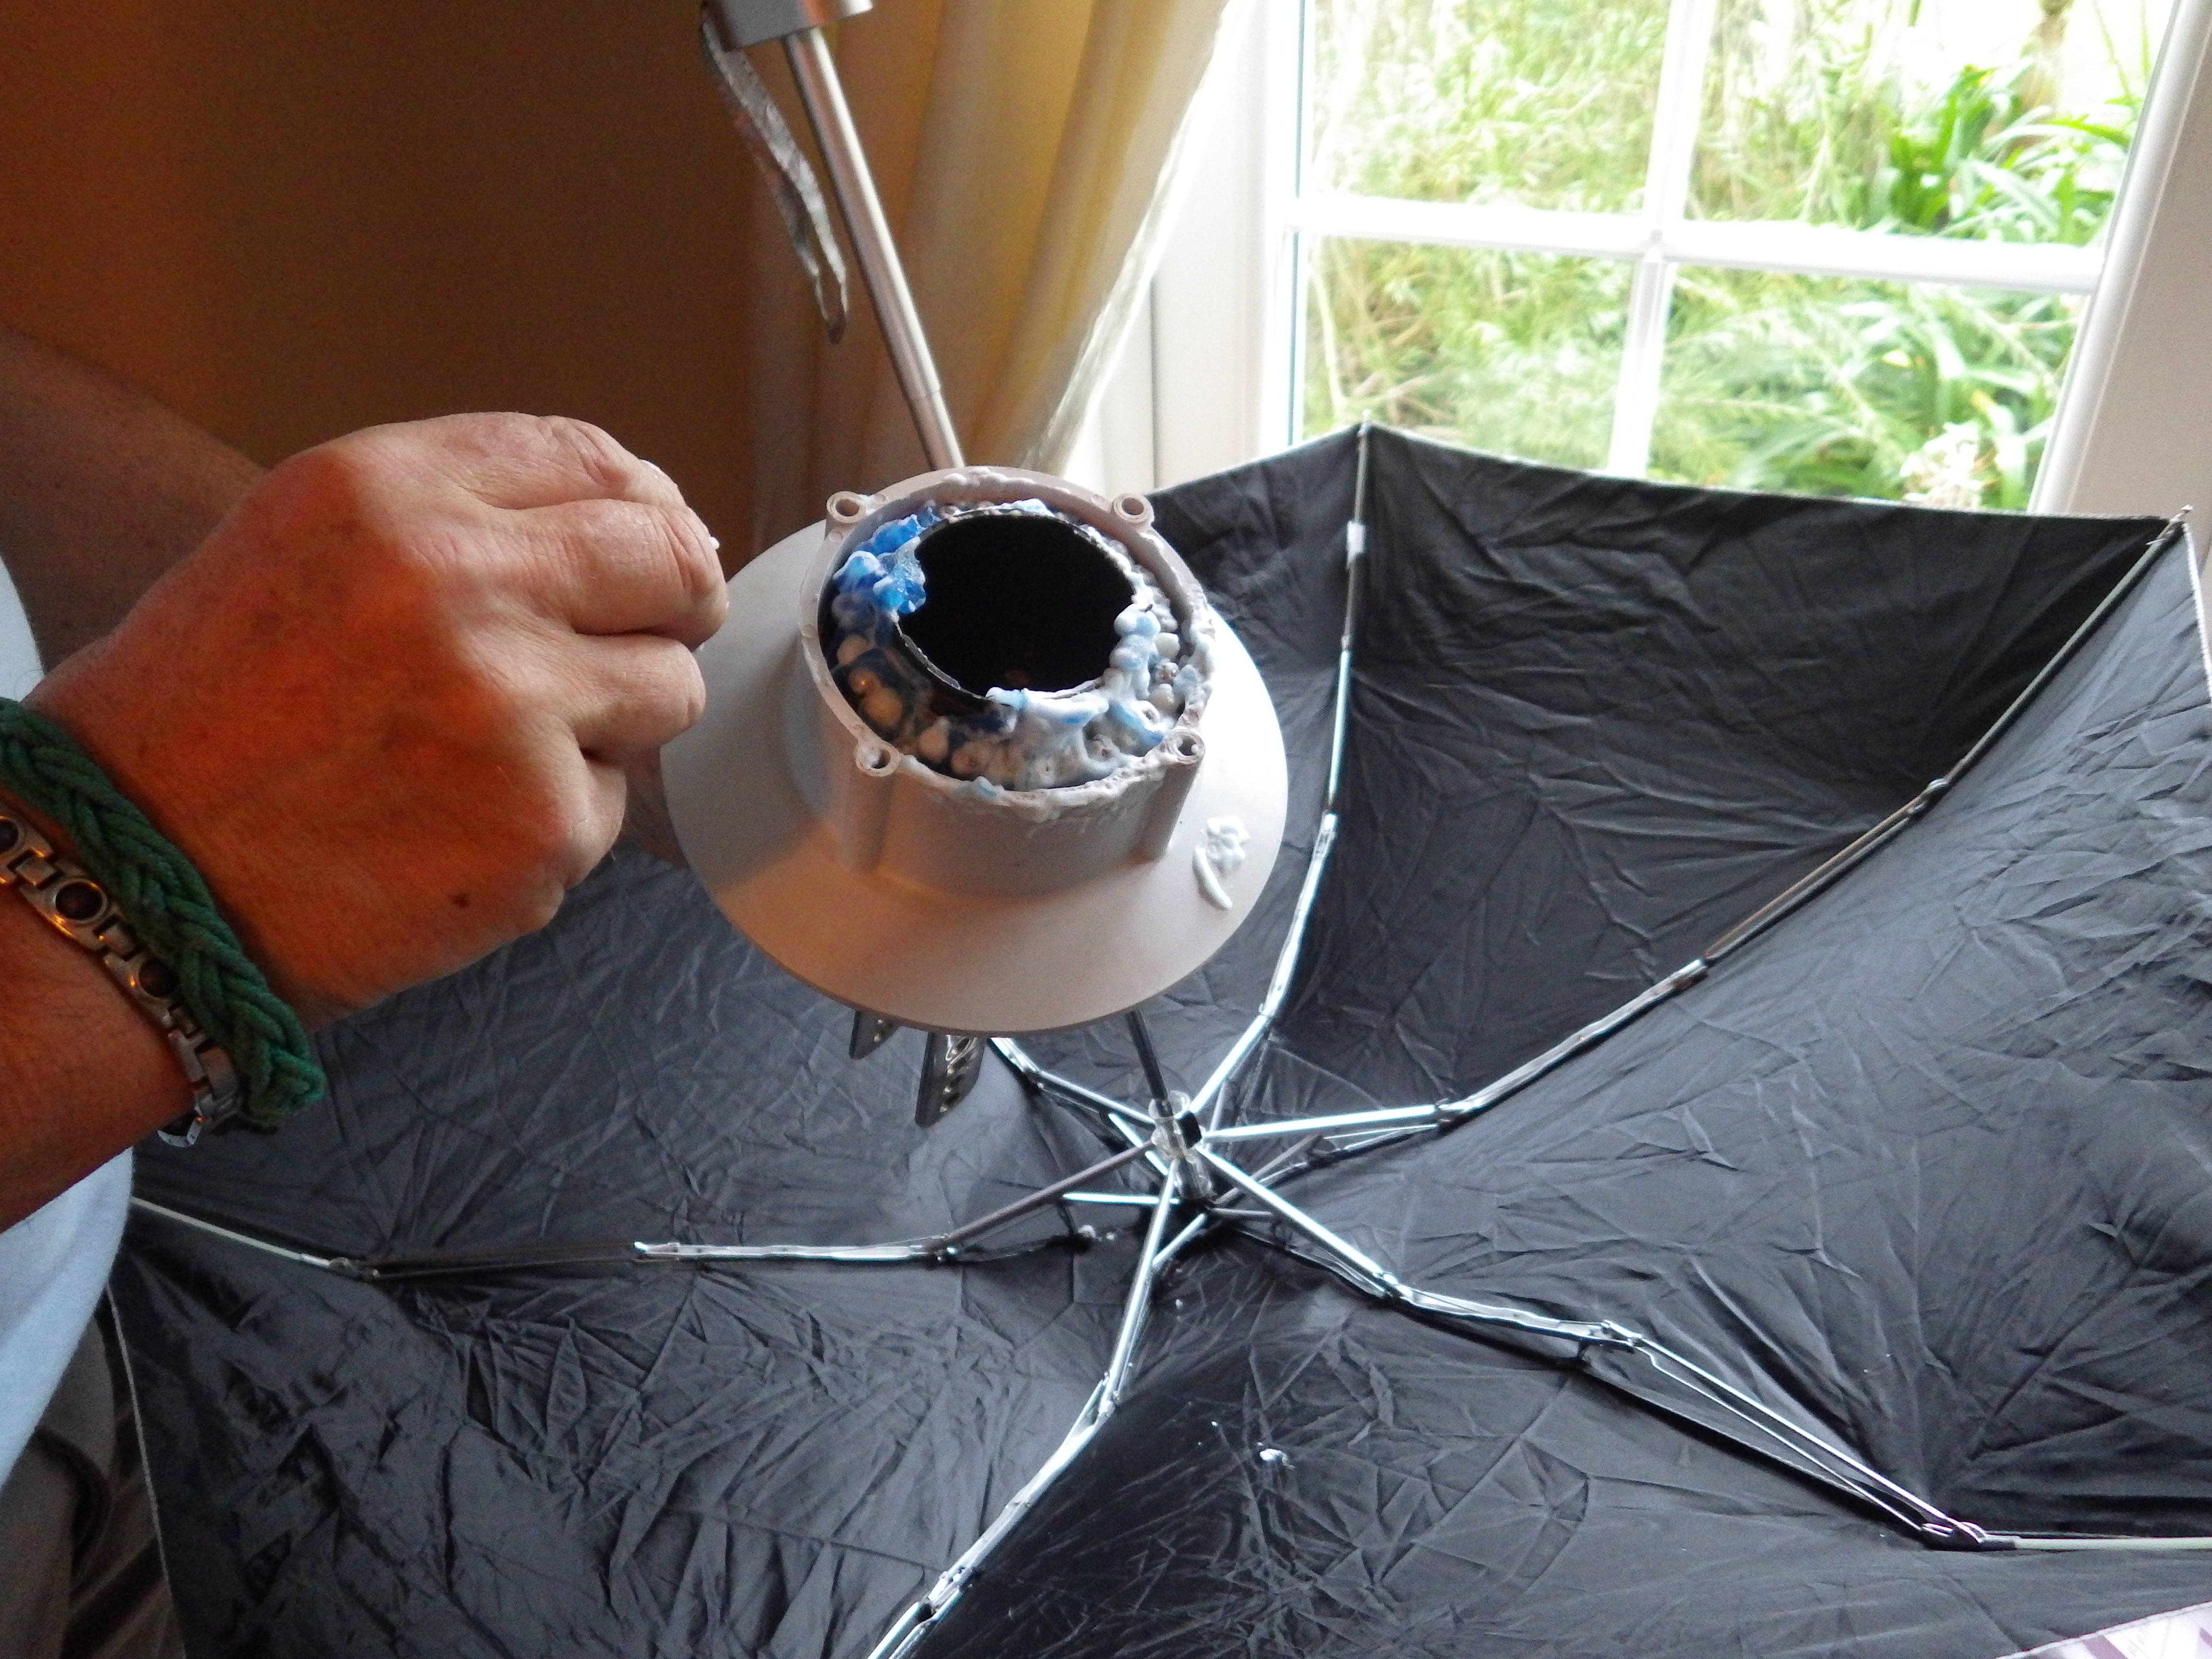 The new roller reefing drum stripped and ball bearings alternate stainless and Delrin, replaced glued in place with shaving foam!
The umbrella was useful as so many fell out, and the fun picking them up, all covered in foam! Definitely a 2 person job! Very tricky.
May 2016 and the new drum is in place!
This is the two part silicone rubber putty I have bought to make the sealing plug for the hawse pipe, cost £11.00 and hopefully will prevent water getting below. |
November 25th 2015.
Well I found out what could go wrong... despite the reassurances from Sea Teach the foil sections are different. Mine is over 25 years old and does not fit the new drum top, Rats!! A year or two later they changed the shape of the foil and had I that later smaller section foil, no problem. so the new drum would not fit the foil... Oh bother! However I went to see Dave the rigger, he suggested that if the tops of the drums were the same inside , why not just swap tops!!! Clever chap!! I took the old one apart and yes found the bearings were seized solid, that's why it had been difficult to reef and un-reef the sail!! (Not really surprised as it had spent a while under water on our trip up to Scotland, as we stuffed the bowsprit into steep seas!!). So then I took the new drum and bearings apart. I was ready to catch the loose bearings, or so I thought, but they went everywhere! Why do ball bearings bounce so well! Approx 6mm s/s and Delrin ball bearings, dozens of them! I counted them all up and I appear to have found them all.... 32 of each, put on one side to replace later. I then I removed the top of the new drum and turned it over to see if it would swap over, was it the same?? I checked the inside of both tops. Darn it they were very slightly different... but only because the original had slightly thicker plastic to hold the steel bearings.. what if I could get it machined to take the later s/s race?? I could and did, £25.00 later the s/s ball race from the new drum fitted into the top of the old one, result. (I could still even refit new old style bearings with a 1/2mm shim all round it....)... Or indeed if I damage my foil I could get replacement later foil section and fit the new top part on the drum when it would marry with the later section, best of both! Now all I had to do was get all those ball bearings back in...??? As the s/s races do not hold the ball bearings captive I was going to have to glue them in with sticky grease, then once all back together, dunk the drum in the sink, in hot washing up liquid. I think that would work, but would be messy. The most unlikely alternative solution to this little problem came from a mention on the Leisure Owners Association web pages. The solution was not to use grease, but honey!! Clever! That apparently washes out far easier and would not leave marks in the boss's sink. I will be putting that to the test tomorrow! As it is cold the honey will be thick and sticky, could not be better! Once I have the drum reassembled, it is only a case of riveting it back onto the foil. Before I do that I removed the top halyard swivel and stripped it, (it runs up the foil). Had to be worth checking it.. It came apart easily enough and with a squirt of WD 40 the bearings were flushed out and found to be good. Cleaned and re-greased and refitted with the same 'O' ring seals they would do fine. (being atop the rig they were out of the salt and corrosion!). John Post Script. Darian and I reassembled the roller reefing gear, not eventually with honey, but with something Alex at Plastimo/SeaTeach suggested. Shaving foam! Easier to wash out! Great, but the mess! As you drop the balls in, it foams up and the foam changes from blue to white, and as half of the balls are white Delrin, they disappear! Was a real comic turn, two of us with shaving foam everywhere, in the living room over an upturned umbrella, to catch stray balls! And we dropped several, picking them up with ever increasing amounts of foam on hands and everywhere till we collapsed in giggles!...
|
||
|
Trafalgar Cruise 2015. John S. and myself aboard for a few days in the Blackwater and its creeks. Time for John S to acclimatise to FG.
Did not take John long to get the feel of FG!
We enjoyed a couple of crisp days sailing
And a couple of great creek sunsets, before the rain and wind arrived.
Holed up in Salcott we waited out the rain..
Back in Bradwell the Lazy-jack lines and hardware came out and I ended up tied to the mast!
Sure it has to go through here somewhere!
Open Day. On board FG with the other halves to show all the boat and all the gear. My sister Sue and Mo trying not to laugh!
Phil, Brian and Keith crew members, deep in discussion... how to throw the skipper overboard?
John showing off the new cooker, even newest crew member Rafferty came aboard. Along with Val, Sue, Katrina, Darian and my Jenny.
We finished off the day with a meal in the marina bar, You can just see Oly and Jenny down the far end and John S in the FG jumper on the left, opposite Phil in his!
The next day we crept out to give Raffi his first sail, Oly, Jenny and Raffi on board for short sail in the river.
|
January 19th 2016. It had been a little while since I added anything to the page. Not because nothing has happened, but because other events sort of took preference! For one thing we had a decorator in and the whole of the cottage, downstairs, had to be emptied and then re filled, a mammoth job! Add to that we went away. So now the festivities and disruptions have become memories and life can carry on. I have reassembled the roller reefing bottom drum and it is all ready to rivet back on to the foil. Just put the pics on here of us with the shaving foam and the umbrella! At the same time I was incidentally offered a defunct roller reefing gear, the same make, Plastimo, but a later version. It was off a wrecked GRP boat and a friend was stripping the fittings off the mast before they cut it up for £30 of scrap, I kid you not! The roller reefing spar was sawn into three lengths and I bought it for £60.00 and my friend the rigger has now found the extra lengths of spar and the joiners I need to rebuild this gear. So for now it is to be stored as a back up set. I can reuse the drum I have bought with the later original top on it if I need to, or simply re oil the bearings in the salvaged drum.... either way it is reusable. However the foil on my gear is larger and beefier than the later Plastimo gear foil and, as I have now modified the drum to fit it with the latest bearings, that is the one I am going with! The gear has been great for over 26 years and I cannot praise it too highly.... On board the boat in the barn, all expensive gear has been removed and is stored safely at home. We have not taken sails in for valeting as they were only on the spars for 9 weeks and are OK. We have had the benefit of those 9 weeks afloat to test and try all the modifications and all are great. The last thing we did was fit the lazy-jacks, and after using them for just a couple of times I am amazed I have never been tempted to fit them before, they work, and so well. Just have to fit a couple of blocks to the back of the tabernacle and a jammer to the cabin top, then I can adjust it and slack it off for fitting the sail cover. Job for when we are back afloat. I have drained the water tanks, even though the boat is in a barn, just in case. I have also filled the diesel tank to prevent an any condensation. The new radar mast is made and 'dry fitted' and seems to fit the bill. I have yet to make a shaped timber foot plate and then will drill through and bolt the base to the aft deck. I have made a pair of clamps to secure it to the stern rail and am shaping a pair of support struts to stop fore and aft and athwart ships movement. Will be strong when finished and add an extra handhold when using the transom ladder! In doing this I have realised I can also add a new mast support into the mix, so I will be able to do away with the temporary pole I use at the moment to stow the mast on, when mast down for the winter. This temporary pole is mounted in a wooden foot, sat on deck, safe yes, lashed to the rail, but it means the boat cannot be steered afloat as the tiller cannot move... Now the thinking here is if I can incorporate the mast support into the strut, I can lower the mast onto the radar support strut and still motor and steer.... so possibly another canal trip, the Forth and Clyde, can be incorporated! If the trip goes swimmingly well, next summer, once we have completed the circle, I could nip through the Glasgow to Edinburgh canal, out the other end and back down the east coast! Retracing our steps, some of them, from 2013! At the moment I have to just get a helping hand to help me raise the mast a few inches so I can sort the support out. I will then reuse the top of the old crutch and have it welded to the radar mast support. I have all my ideas on paper now, just a case of cobbling it together. Waiting for spring and a little warmth. Other jobs, I will need to touch up the Sikkens on the rubbing strake, but just touch it up, should take half an hour! I went down today and have measured up for another idea. Punching into steep head seas, in 2013, we shipped a lot of water on deck, that found its way below through the vent and hawse pipe, so am measuring up for a pair of timber bulwarks, strapped to the legs of the pulpit. The idea is that these should deflect some water from coming aboard. They will need to be approx 5 or 6 inches high at the bow, tapering off to maybe 3 inches aft before rounding them off. Seen these on other boats and think it could help. In addition I have just bought some silicon rubber compound, a 2 part putty that I intend to make into a plug, moulded onto on the chain that will properly plug the hawse pipe! I have a perfect shaped tapered mould, all I have to do is cut a slot in the bottom of it so I can thread it onto the chain. See pic in last section of the log. Once I have plugged the hole in the bottom I can fill it with the two part putty and once it's set I will have to cut the mould off to remove it, but it is disposable! Should make a far more watertight seal than the knotted rag crew Phil put on after our trip to Wells! I may even be able to mould this by hand into an egg shaped rubber plug on the anchor chain. It is rather like plasticine in consistency and the two parts simply need to be mixed by rolling them together, a pair of rubber gloves should be all that's needed and hopefully I can make a faired off plug that will stopper the hawse pipe nicely. You may recall we found a perfect seal for the inside of the Dorade vent, in the hardware shop in Wells next the Sea, a 3 inch sink plunger! Inserted from below it seals that vent perfectly. Do not want the carpets floating in future! Only other job for spring is antifouling! And as all clean and smooth that will be easy for a change! There are a few bits that flaked off with the pressure washer, so a bit of sanding on the underlying primer and a patch or two before the whole boat is done should mean a very smooth finish again. With temperatures down to freezing for the first time this winter, I am now concentrating on work indoors and in the workshop... One job just done is the acquisition of a third, identical, hand held VHF radio, cheap, on EBay. New and in its box!! And I managed to get a free charger to replace the dead one, courtesy of Raymarine! In future I intend to have 3 radios aboard, all waterproof, one in the panic bag, one in the charger and one on deck! Plus a spare charger sealed in a plastic bag, in case! I will be replacing the fresh water filter again, even though the one on board was only used for a few weeks, as they 'expire' after a year, so will start afresh. Better safe.... Apart from checking the oil and water in the engine, all other jobs on it done... running smoothly! All charts will be corrected again, downloading corrections later... and I will be updating the Navionics card this month as I have a free update as part of the renewal deal... Crew all primed and after the 'crew and family day' all the snags sorted, and crew allotted approx dates to join ship... Crew man John Stevens and I had a few days aboard together in October, to familiarise him with F.G., so all go there! So we are looking good for a June departure! John
|
||
|
January
28th 2016 Spent a little time pensively upgrading the Navionics SD card for the Lowrance on the computer yesterday. It appears to work so I must have been successful. I will pop down the boat and connect it up soon to check it. I have found that I can update the card as many times as I like till the end of May, so as the system works I will be doing it again and again so I have the latest chart corrections before we set off. I am working on the radar pole/mast at the moment, collecting bits and bobs and with any luck it will be all sorted shortly. I will get the camera clicking.... Yesterday I was shifting the 3 duff batteries ready to take to the recycling yard and out of curiosity checked the volts. 2 were down at 10v but the largest 110 Amp hr one still had 12v? So I put the battery on charge with my CTEC clever charger. It tests the battery and shows up any faults. When last tested it failed the battery. This time it has passed with flying colours and appears to hold a charge? So I am going to try putting a load on the battery and see how it reacts. Could be there is a little life left in it yet, but as it is beyond it's crumble by date not sure it will ever go back aboard. More later. John
|
|||

The extra bulwark timbers fitted!
Not only do they fit OK but with an extra coat of Sikkens will tone down to t=about the same shade! They do not look out of place.
|
February 2nd 2016. I have just downloaded the last of the corrections for all the 20 charts I suspect I may be needing on the next leg, plus I have borrowed back some of the charts I sold to my colleague Martin, so he and Gill could make their own way round in 2014. (See the 'Blaze around' log!) I have just got the ones for the east coast down to Harwich back and have downloaded all the corrections for these too. Now I have to commandeer the dining room table to correct them! I have also just bought a new phone case for my iphone, so it does not get wet! A bargain at £6.00 instead of over £40!! The EOG EBay page again. As before the mobile phone will be the means of updating the log on line, so have to try and protect it. Supposedly to IP68 so waterproof to 2 metres for 30 minutes, but as I cannot hold my breath that long hope not to test it! I am going down the boat with some 3ft long lengths of cardboard this week and making a template for a pair of raised bulwarks forward. I am thinking of fitting them above the toe rail, attaching them to the legs of the pulpit, the idea is to deflect water from the deck more. I have a suitable bit of Iroko to cut when I have made the template and some great clips to fasten to the uprights on the pulpit. With a bit of judicious shaping I think they should look fine.... and be substantial enough. However as we have had a cold snap, may not be tomorrow! John
|
||
 Not my mast but you get he general idea. I have designed mine to sit on deck and telescope down for storage. |
Sunday February 7th 2016. Spent some time over the weekend cutting stainless steel bolts for the radar mast to length and opening up holes for them in brackets I have had made. Also shaped a timber wedge to fit under the foot of the mast. Took the lot down Sunday and had a dry fit, got the mast as near upright as I can get it and the wedge fits exactly, just have to sand the edges of the timber now and then coat it in Sikkens. Fitted the telescopic top part into the base tube and it all slotted together nicely. Measured and double measured for the new support for the mast and lifted the mast up and rested it on chocks so I could remove the crutch at the stern. Measured up the barn door and checked that the mast would still clear when the new crutch in place, it raises it quite a bit, but sadly still not enough to stand under it, so if we do transit a canal with the mast down, either I will have to make another crutch to raise it more, or we will have to duck! I will pop in to see my s/s welder friend tomorrow to get him to fix the crutch to the radar mast support. Bolted all the clamps in place to take the support struts but was amazed how firm the little radar mast was, standing loose on deck and just clamped to the two rails of the stern rail. It is all coming together easier than I thought. My adage of draw it out, sleep on it, then measure at least twice, before cutting, is working. My little brain is working overtime wondering if there is a way I can have 2 mast crutches aft, one for towing and another taller one for motoring through the canals... will think on that! A fold down one???? Crutch on a socket and second on longer socket...? mind in a whirl! I will take a load of pic soon to add to this section. John
|
||
|
Wednesday February 9th. Got the radar mast support bar back welded up and that will go down for fixing at the weekend. I have realised the AIS receiver antenna can now be fitted on top of it! This will increase the AIS range to well over 6 miles, a bonus! I do not doubt this strut/support will also end up with other items hanging off it! For one thing it will be the right height to mount the video camera on, so it has a good view forward! Will be borrowing that from the lad again for this trip, and hope to add a rudimentary 'sight' to it so I do not miss the darn dolphins this time! Was hoping to get to the Maldon chandlery this week with my shopping list. I am impressed that they are cheaper than anyone else for charts, for chandlery, pilot books you name it... All for now. John
|
|||
 Used genoa, will be altered to fit F.G. |
February 17th 2016. This section should be printed in red, or tan really! I have just found and bought, a used tan genoa in good condition from Sea-Teach. £125. I have been searching the web and local sailmaker for some time now looking for a replacement for my 26 year old roller reefing Genoa by Kemps, that was looking just a little jaded. It, like all my sails, is inspected and valeted annually with any broken stitches repaired, in generally in good order, but at 26 years of age it will not last forever. I replaced the main 3 years ago, before the old one failed... (kept ashore as a spare..) So hopefully I am taking the old genoa and the one I have just bought to my sailmaker next week. He will cut and reshape it as the luff is at least 6ft longer and will need a new luff rope for roller reefing and reshaping to get the clew higher! Been told that this and a sacrificial strip will be about £200 so the whole lot about 1/3rd the price of a new sail..... Should be strong enough to replace the old Kemp sail and be good for the trip. I will then still have an old mainsail and genoa to fall back on for years to come!!! How long can we keep sailing...? I drew the line at £900 for a new sail, to last another 25 years.... John
|
||
 |
February 28th 2016. I have splashed out on another new bit of kit. as a mate of mine says, there are no pockets in shrouds so why not enjoy it! A new 'fish-finder'. Now I am not a fisherman but I have been watching, with interest, the new generation of video sounders that can now give an accurate picture of the seabed beneath you. A clever idea especially for those of us who like to take the ground sometimes. So I chose a dual DSI & HDI machine, not an HDI sounder?? No I did not know the difference either, till I researched and spoke to Dean at 'Bottomline'. Its the frequencies they work on. Bet your echo sounder, like my 25 year old VDO instrument, works on 200htz or less, great for penetrating the depths, but not good for detail. The one I have chosen can work on 83/200htz, but can be switched to 455/800 only for the detail. The reason for the 83/200 and 455/800 is that they send a chirp of different frequencies out, not just at one frequency they use all that band, very clever, all solid state electronics.. Haven't things moved on since my old lead line! Yup, still got a tub of tallow to arm it... Added benefit of this is that the old VDO one can work away at the same time giving simple depth readings and the other one will give detail, if on 455/800htz, (plus still give echoes from whales!). Until I started looking at these I had no idea it was so complex. I eventually bought a 'Lowrance Hook 5' from 'Bottomline ltd, in the Isle of Man, you will find them on EBay. Though Force Four were actually doing a slightly cheaper deal on a near identical one. Went to Dean as he had been so helpful.... The screen size was important, I could have bought one for half the price, but I tested the 3.5inch screen and I could not see it from 4 or 5 feet away, had to be the 5 inch version. Fitting it is to be the next job, as it has a transducer that mounts on the transom and trails behind. Considering mounting it on a swing down timber support, so it can be hoisted up when not in use, to save fouling! We will see. John
|
||

3/4 end fitting for top of tube.
hnge fitting to take the end cap and allow transducer to sewing clear of the water when moored, to prevent fouling! |
March 12th 2016 Spent some time this week designing and making a swing down bracket to mount the new downscan sounder's transducer.. I had a bit of 3/4 stainless tube, attached to a seat support I picked up 30 years ago and had never thrown out as I thought it might come in handy! the transducer bracket fits the end plate on the tube and I have just bought a top end fitting and a pivot to mount on the transom. I may have to put a slight bend in the tube so the bottom end is more vertical, but will have a dry fit on the transom first as I do not think it will make a lot of difference if the tube follows the angle of the transom. I am hoping that I can fit the hinge fitting so the transducer will be far enough immersed to allow for our sailing angle, max 20 degrees, (after that I'm reefing!!). I intend to clip it into one or two pipe clips on the transom and have a lanyard attached to it can be pulled up to stand upside down when boat is moored. I sanded more off the bit of teak I am shaping to fit under the radar mast yesterday, and took a bit off my fingers with the sander too, Opps! hoping to get down to the boat and have another dry fit. With any luck I have at last got the shape right, it is angled in 2 directions to fit the deck.... If I have, I will be drilling the holes in the deck and the fairing piece and then measuring for backing plates and bolts to secure it. Going to bed all down on a butyl rubber bedding... Going to take the little sander down next time and prepare a couple of bare spots on the epoxy coating under the waterline so I can re prime and paint with antifoul shortly. Getting there, slowly John
|
||
 |
March 15th 2016.
Been down to the boat and sanded the antifouling on the chines, where it had come off, probably rubbed by the lifting strops when we came out last year, but found a few places elsewhere where it was flaky and I have to wire brush the bilge keels. Seems the primer did not stick well to the new epoxy.... Too waxy? Epoxy gets a waxy surface when it cures, and I bet I did not wash it off well enough... Got to remove any flaky bits and abrade and wash, then touch up with primer and a coat of antifoul just so the surface is smooth for the next coat. Pointless allowing it to get rough again. Bought a couple of clips to clip the new transducer tubing into on the transom. I would have thought I may have had a suitable size clips in my store, but no, every other size but not 3/4. I am going to have to have the tube bent slightly and I am also thinking of adding another length of tube, as a hinged handle to allow me to deploy and unship it without leaning over the stern... more sketches on paper! Tried to get some Sikkens on the raised toerail sections I have made. They create a small raised bulwark right up in the bow. Hopefully it will help deflect water in heavy seas! I have shaped some backing pads and hope to take the parts to the boat next week to drill and dry fit the brackets that will hold it all in place, then back to the garage for more Sikkens. I managed to 'dry fit' the radar mast and drill the fixings for that too. Just have to make a backing pad for one of the fixings, and give it a coat or two of primer and Danboline before masticing in place... With a little warmer weather jobs will be easier to complete. I went back to that 100Amp hour battery that I had problems with, tried to put a load on it, sadly as soon as I did the volts dropped to less than 10, dead cell, so another for recycling! John
|
||
 |
Wednesday 23rd March 2016. Made a discovery today, my radar mast is 2" too tall! Sausages! not surprised in a way, the methods I used to calculate the height were complex to say the least. In actual fact I am less than half an inch out, but by lowering 2 inches I will have clearance under the barn door frame! Darian suggested I let the air out the tyres! Very good and yes I had considered it, but as the tyres are at 55psi, the time it takes to re-inflate them would be a delay I would not need. Fortunately it is an easy job to modify and as it is not yet fixed, easy to remove and get back to my engineer. He will make a much better job of cutting the stainless than I would. On the positive side I have reapplied Sikkens to the raised toerail/bulwarks forward, in the garage, and shaped a pad and dry fitted it, for under the mast foot, and that is now primed. More primer and then Danboline to come over the weekend. Can do that indoors in the rain! Come on its a bank holiday, of course it's going to rain! Been dry for weeks..... I have also untangled the wiring for the Radar, it has two multi junction boxes in the wiring circuit that were all new technology to me, Ethernet, Simnet, NMEA2000 all words I have learnt this month.. I have realised that one cable supplied as standard was far too short, but I will not know exactly what length cable I will need till it is all hidden away on board, up the quarter berth! I do know I have a 20 metre reel of radar cable and I have asked to swap it for a 10 metre one as there were 2 different lengths depending on brand name on the box, and they sent the expensive one instead of the one I ordered, so hoping that by sending them the long expensive cable back I can get a discount on the NMEA cable I need to replace. will all make sense one day! I also ordered a cover for the fish finder, to protect the screen. Do not quite understand why it is an additional item? I have measured the angle of bend needed in the s/s transducer pole that I intend hinging on the transom and have bought a pair of clips to hold it in place when sailing, also a couple of s/s fittings so I can attach a small handle to it, reachable from the deck, to raise and lower it easier, we will see... When done I will photograph it, a picture says a.... As the cold snap seems to have passed, I am hoping to be able to get away and get some painting and varnishing done this weekend, but as ever at Easter we are watching out for 'Travellers' on the land near us, so am standing watch at times. we have a Barrister on call now and can stop anything, but only after it starts to happen... Which will mean trauma... Here's hoping for a peaceful Easter. John
|
||
 Antifouling time!
The 3G Lowrance scanner itself, to be mounted on a pole in the back of the boat. Do hope it is going to be worth all the trouble and effort!
A 'backbone'. has to be powered and allows various devices to 'speak' to one another, NMEA2000.
interface box to be hidden away and connects radar with screen.
Some typical wiring connections, mine does not go to the engine, but it appears to want to connect to everything else bar the heads!
My prop as I like to see it. |
Friday 25th March, Good Friday. Spent a good few hours in the barn today, sun blazing through the doors, warm too at 15 degrees! Managed to sand and wire brush off all the areas where the antifouling primer and thus the antifouling did not stick last season. The got a coat of primer on all the rubbed down patches and even a bit of antifoul, till I ran out of useable paint, needed a drop of thinners and I did not have it with me. I will be back down over the weekend to touch up all the primed patches and will try and make the bottom as smooth as possible before I roll the last 2 coats of Antifouling on. I always give 2 coats and then any left goes round the waterline and on the outside faces of the bilge plates and rudder, these are in the sun so can attract weed growth. I use between one & half and two x 2.5 litre cans on Marclear on F.G. every time. The river Blackwater, like all the Thames rivers, has become so much clearer since the cessation of Sludge dumping 10 years or so ago! Time was when you could only ever see 6 inches down on a good day at neaps, now anchored in 3 metres on springs, I expect to see the crabs on the bottom, what a change! This means the sun penetrates better and so the green stuff grows... Sorted out the last 2 cans I have of Workboat Red Antifouling and they plus the thinners are in the back of the Moggy ready for the bottom to be painted. Having finished under the boat I also removed the new s/s radar mast, it was not fixed in place as yet, so it was easy to remove. Why remove it? My own fault, despite my best efforts to calculate the clearances in the barn I got it wrong. With the mast finally set in position the height of the set up could now be accurately measured and I am about 1/2 inch too tall! Darian suggested I let the air out of the tyres! Yes it would work but its such a pain pumping the tyres back to 55psi afterwards... takes forever... This new barn has a slightly lower lintel on the doors! So I have figured I can cut it down by 2" and that will allow at least an inch clearance when the scanner is fitted. (I will still cover the scanner with a protective cover when not in use and with a lump of foam inside it when trundling out the barn!) Back at base I sorted most of the tangle of wiring for the radar and its compass, learnt a whole new vocabulary in the process! There is a multi connector that the scanner is wired into, that in turn has an 'Ethernet' cable up to the Screen, the Lowrance HDS7 plotter, then there is a NMEA200 cable to the 'Backbone', that in turn has connections to the screen and to the remote clever compass unit that I have to find a suitable mounting point for, near the centreline and near the waterline. That poses a separate problem, it may yet be fitted in the heads! Plus each of these bits of kit are also connected to 12v! Wiring is a nightmare. I have measured for all the through deck fittings that I will need to run the cabling through, from the radar and the fish finder to keep it under the decks and out of the way. I searched the internet using our EBay page and Google Shopping and the cheapest source of deck glands, as they are called is my local chandlers in Maldon again. Marinestore. Amazing. A parcel of 5 ali covered fittings is on its way to me! There are plastic ones available, but they degrade and are not half as strong. Over the Easter weekend , whilst it is raining and the gales are blowing, typical British Bank holiday, I will be back down to try and fix some of the multi connector blocks needed for the connections to the Lowrance plotter/Radar screen an measure up for at least one new NMEA2000 cable, as the one supplied was silly short at 18 inches! I found a few minutes to clean off the prop with a wire brush and will be back with the polishing mops and will spend an hour or so getting a mirror finish again before launching. Very therapeutic! I then coat the prop with a thin smear of Lanolin, seems to assist. at least I never get barnacles on it. Some boats pulled out at Bradwell have literally balls of weed and barnacles on the end of the shafts! And they wonder why they do not motor so well. So many have told me they antifoul their props, but using the same soft 'eroding' antifoul that they paint the boat with! On a prop, if you must take the easy way out and paint, it HAS to be hard antifoul formulated for fast powerboats and props! As an ex professional boat man, I know that polished props perform, all my workboats had polished props... Still I can understand that it all takes time, I spend at least an hour a year polishing mine every season.. John
|
||
|
April 5th to 14th 2016.
I have been bowled a Googly!! Admitted to hospital (twice) in great pain, turns out I have kidney stones. I am one of the lucky ones who is never normally ill, so this has really knocked the feet from under me. After a 'procedure' under a general, I was sent home, only for it to reoccur 24 hours later even worse and I developed an infection... dosed with morphine and antibiotics for 2 days before release again, I am at present recovering slowly and just about able to type this.. Will be a while before I finish off the antifoul and get the radar mast sorted! In the meantime I have to go in for the op to get rid of the stones, at the moment I just have a plastic device inserted into my kidney to stop the cannon balls in there blocking the tubes again! Time till op? Your guess better than mine, so the 'Fiddling Around 'will be postponed, again! Rats... Boats nigh on ready, so are the crew, its just the skipper has too many barnacles to get going! Now has to be delayed till 2017! For the moment just content to be able to go the the loo! fun and games... John
|
|||
 Sun cover purchased for new fish finder. A little surprised one was not in the box... |
Friday April 29th 2016 Over a month since I have been able to pat the boat's transom! Managed it today. Really knocked me for 6 this kidney stone problem. I am knackered by 2100! And am still in limbo waiting for the hospital to call me back to zap the 2 cannon balls they found... Though I am pressing ahead with launching, hoping the weather will improve... I do not think I will be ready and fit to set off on the trip this summer... Crew have all said to postpone till next year and if the fates are with us we will try then! Crew Phil has offered to help on Sunday and as luck would have it I had a call from the engineer today to say the Radar mast has been shortened and he has made the bend in the s/s tube I am making the Fish finder transducer bracket from! So I picked them up and went to the boat. Arrived outside the barn just as hail and rain struck! Managed to get inside dry, just and tried the bent s/s transducer bracket, perfect fit! So back to base and I have sorted out all the bits I may need for Sunday to paint and varnish and get that mast on. All loaded up. Hoping to get down Saturday and do a little light preparation work so we can get the varnishing (Sikkens) and antifouling on. And the sun has come out! John
|
||
 I bought a set of longer thin s/s bolts to fix the raised bulwark I have been making for the bows.
Extension NMEA cable for radar. |
Monday 2nd May 2016 Spent 8 hours working on the boat yesterday, Sunday, with Phil. I had managed to get down the day before and rub down a couple of bits of Sikkens on the rubbing band where I had damaged it getting into my berth last season. (I have a huge teak pole in my berth!) Just little scrapes, easily sanded and touched in. (That's what a rubbing strake is for!) So the next day all the gunwale could be lightly sanded, washed in white spirit and re 'Sikkened'.. looks great. We also managed to antifoul her, amazing what a coat of one colour does, (Used the last of my cans of Workboat Red..). Crisp clear waterline and good coat of paint. I will add another coat around the waterline, rudder and bilge keels next week to finish off the tin. Will take one and a half cans, approx 4 litres. (Do not quite finish it all off, have to save a little in a can, as I have to have a few brush fulls to hand when we launch to get at the bits I can never paint when she is on the trailer!). I have made and dry fitted a pair of short timber, (iroko) toerail extensions, sort of mini bulwarks. I have arranged them to bolt to the legs of the pulpit and the idea is they will deflect some of the water that may otherwise go on deck and as there is a fairlead on the toe rail, with act as a top cover to retain mooring ropes so they cannot jump out and damage the top of the adjacent toe rail. They have had several coats of sikkens now and with these new bolts I can drill and fix them. If they do not do any good I can easily remove them with no ill effect. To finish the day off Phil and I fitted the new Radar mast on the port quarter. It is bolted to the deck and the top frame of the transom framework, to both rails of the stern rail and has two support struts. Feels extremely sturdy. It is telescopic so I can lower it for the canal or to get through the door of the storage barn! The two support struts have yet to be fixed in place, next week. One of the struts now has the mast crutch on it and I have also got room to relocate my AIS receiver on it, raising it 2 feet and extending its range with the added height. Another bonus. I can now also steer the boat with the mast on the crutch as the old mast support pole was simply stood on the stern deck and of course fouled the tiller. This could prove useful if I get to navigate the Forth and Clyde Canal next year! Today, the Bank Holiday Monday it is grey and dismal, no sails visible on the Blackwater, so still not missed any good sailing days. And today I am recovering, sore from all the exertion yesterday, having been laid up for a month! Now I have to sort the additional wiring out for the new radar and fish finder, something that just takes patience and not a lot of muscle! Will be launching mid month at this rate. I managed to polish more of the prop till I could see my face in it, just one more session then a coat of Lanolin. Just a quick wash down and a polish all round then reeve the halyards and we are just about ready! Feeling positive! John
|
||
 New suction pump to remove gearbox oil without getting a mouthful! |
Sunday 8th May 2016.
Spent 4 hours aboard yesterday , or rather underneath. I managed to put the second coat of antifoul on and am looking at sorting radar wiring etc. this week. I picked up my modified genoa Friday, a good used tan sail I had the sailmaker cut down and re shape for me, trouble is he fitted a really dark brown sacrificial strip, looks terrible... instead of either using the excess sail cloth to make one the same colour as the sail or fit a light tan one to match all my other sail cover, dodgers and spray hood. Go to go back. Always a shame when they don't get it right. And unusual for Lonton and Gray. I fitted the last s/s support strut for my new radar mast and fitted the AIS aerial to the top support and taped up all the wiring. Sawed off the extra long s/s bolts and I ordered some new s/s jubilee clips to wrap round the 2 supports I have drilled and screwed to the top part of the stern rail, do not want them to ever move! Today back at base I hope to make a pair of small Afromosia pads to glue to the transom so I can fix the bracket I have made for the new fish finder. I would rather screw into these pads than the transom itself! As time telescopes I am finding more jobs to do! And it does not help that I am knackered after a session working on the boat.. have to take the next day off to recover. Still no news from the hospital re a date for cannonball extraction! Hoping to launch soon, but have to get all these new gadgets sorted before I do, impossible to do afloat. Speaking of new gadgets, I had a mail from Navionics re updating my SD card of charts. I went to do the update, thinking it would be the last one I could do, as they only offered a 1 year renewal before and was pleasantly surprised to find they offered a discounted further years updates, taking me to the end of May 2017 just before the NEW planned departure date for the rest of the 'Fiddling around' trip! Jumped at it. It is 0945 and the temperature outside is registering 24 C! Going to be a scorcher, unless the harr blows in again from the sea. Relax in garden day, for a change. John P.S. managed to make two neat Afromosia pads from off cuts in store. All my exterior woodwork, handrails, rubbing strakes, toe rails were all made from Afromosia, cheaper than teak, and stronger, especially for samson posts. So these are the same long lasting timber.
|
||
 10 stainless jubilee clips for just a few pounds!
|
Tuesday 10th May 2016. Took the refurbished Genoa back to the sailmaker, he agreed to replace the luff tape with a thicker one, 6mm was too small for my spar groove of 8.5mm. He also agreed to replace the muddy brown sacrificial strip with one to match all the rest of my canvas work and make me a radar scanner cover in the same material! For cost of labour, as he made a ricket! Nice one! Took delivery of a box full of jubilee clips today, will be using them to further secure the radar mast struts. Cost £3.00 for 10, 4 for the job in hand the rest for the bosuns stores! Our EBay page again! Off to the boat now to trial fit the Afromosia pads and fit the clips on the bases of the radar mast struts. Drill charged up so I can polish the last bit on the prop, then I can lanolin coat it...works for me. Over the next few days I have to polish the outside of the hull, reeve the halyards and wire the new toys. Visited marina today and squared launch with the foreman Ian. He wondered where I had got to. All for now, just time to spend an hour on board. John
|
||
|
The new fish finder s/s pole on the stern. in stowed position. |
Saturday 21st May 2016 Spent the afternoon on board polishing the hull and topsides and then fitting the radar scanner and its associated wiring. Took forever on my own as wires had to be fed through the boat and it was impossible just to push them, they needed pulling as well. Did not help that after getting all in place I found that part of the new deck socket it passed through was upside down and I had to remove the lot and start all over again!! By the time I returned home I was exhausted! However I also managed to fit the swing down bracket I had designed for the fish finder's transducer and that all appeared to fit OK. Will need a little fine tuning as the handle I have made to push it down and lift it up may get in the way of the stored Seagull, but will have to wait till next week to figure that out. May need twisting sideways slightly, or shortening! I have sorted the tangle of new and weird wiring associated with the radar and all cables are now long enough and are routed as much as possible out of harms way. I may have to re route some later after I try things out... I am off there again tomorrow to fit the sockets to the deck so the wiring passes through sealing glands and no longer drapes around the companionway! Much neater job. I have the halyards to fit after that and the forestay on the Roller reefing drum to reassemble, relock the 'Norseman' wire terminal and end fittings. Bit of a jigsaw puzzle but I have a pic on the camera to go by! Wednesday launching day, with Friday as a 'fall back' date it I cannot get all sorted in time. John
|
||
 the new Transducer pole as vied from the side in the stowed position.
rolled out of the barn, the new radar pole can be seen on the stern with the dome covered to prevent the owl droppings gathering on it!
Ready to roll off to the marina, paintwork gleaming!
Ready to go in the slings May 2016
Stalwart helpers Phil and Keith look pleased with their handiwork! |
Friday 27th May 2016.
She's afloat! My thanks to crew Keith and Phil for turning out to assist, without them it could not happen! In addition Keith, the trailer towing captain, has taken the trailer off for summer storage in his orchard, locked away from prying eyes! We had fun launching. Apart from sorting the tangle of lines, wires etc., we found the new radar dome had to be removed because it got in the way as we tried to raise the mast, the spreader came in line with the dome so we could not leave it in place. Pretty easy to remove. Means that the dome will have to be removed before we lower the mast at the end on the season, no such a bad thing as it can then be stored safely ashore! However the mast support I built into the stay for the radar mast has to be strengthened, as it has no fore and aft strength, and moved alarmingly as we shifted the mast back from the road transport position to the 'ready to raise' position, with the mast and the rigging hanging 15ft over the stern! Keith came up with the answer to that.. make the s/s support more symmetrical with a matching angled support on the starboard side... will have to wait till we come ashore for that as it means removing the strut and mast support and welding an extension on to it The other failure was my clever bracket for the fish finder transducer, it was too complex and still had not enough leverage to allow it to be mounted or un-mounted! Phil sorted this one out, maybe I have to convert it to a sliding bracket, so the s/s tube simply slides up and down through two pipe support brackets so that it can click out of if it fouls weed or anything... May be able to do that whilst afloat.... more head scratching... So more little jobs to sort. On the plus side I managed to get all the wiring sorted for the radar etc and will be mounting the remote compass for it up forward, once I get a chance later. I have picked a location for it well away from any magnetic or electrical interference. and just within reach of the cable attached to it, though it is a straight forward NMEA 2000 cable so can be extended if needed. We got the genoa hoisted and Phil's face was a picture when he pulled the reefing line for the first time, it whizzed in, bit different from the hellish friction in the old drum and bearings! Success there! Could not get the main on though as I found I had not got the cover? Remembered I had sent it back to the sailmaker to have the new cover's plastic shock cord hooks reversed. I had not had it back and despite visiting the sailmaker several times had not been informed it was ready.. Tried to contact them Friday morning but Ian the sailmaker had gone away for a week, and no one there knew anything about it! Will try again after the bank holiday to see if they can find it. If I can get it back I will fit the main sail and the cover etc., before I swan off on holiday! Saturday 28th May. The forecast for the Bank Holiday is F6 and some rain so the marina Saturday was not as crowded, with many packing up and going home! Managed to get the electronics aboard and plan to take another van load of kit down Sunday, dinghy, staysail boom, life raft and more. Now all we need it some gentle breezes and sunshine! John
|
||
|
|
Sunday 30th May 2016. Figured out how to modify the swing down bracket for the Fish finder, simply rig a block and tackle! A length of 6mm line down to an eye and a block, mounted either side of the two nylon clips I fitted. That is all it needs to be able to pull it into position and a simple line to raise it. Only problem is going to be getting to the transom to screw an eye and a block in place, when it's afloat.. dinghy job! The pair of heavy duty nylon pipe clips can be cut slightly to simply become rests for the s/s tube when the transducer is lowered into position! KISS. Keep It Simple Stupid! My levers and bars system was far too complex! Took a while, but got the fish finder set up yesterday, so many options! I suspect I will end up changing the screen colour several times till I get it 'right'. However, I found it does not interfere with the standard VDO sounder, so I can have it on at the same time, as I have opted for it to work at a different frequency. Better for downscan information... I have now adjusted the new Finder to read the same depth as the echo sounder, the depth under our keel.... Even shows the fish.!! Well suppose that is what it is supposed to do! Also turned on the Radar and wonder of wonders, it works! Could see every boat on the pontoons and the clear water in between! Power consumption less than 1 amp!! At the moment I cannot overlay it on the GPS screen as I have yet to mount and install the remote compass, but that is not now going to be a problem, I hope!! I found a very suitable place for it, out of harms way and away from all magnetic influences, under the port bunk in the focsle. As a bonus, a large boat with AIS transmitter fitted entered the marina whilst I was setting all up and the Lowrance alarms went off to inform me, so that AIS antenna is working as well! Did the normal tests of VHF and the other GPS set all working OK. Still not filled the water tanks and I have yet to place the Seagull on board, but apart from that almost everything slotted back into place. One hiccup, a slight leak from the base of the Lavac! Cannot have that. Will turn smelly in no time.. So a new sealing gasket ordered with our EBay page straight away, £12.00! Should not take too long to sort, just messy! Have yet to service my Seagull, (think I remember how to do it!) and that has to be fitted on the transom, along with the new transducer bracket and the radar mast... getting a bit cluttered back there! Have to wait for the wind to drop before I tackle one other problem.. for some reason I got the Staysail halyard on back to front, so need to rig a messenger line and take it down and turn it round, then I can sort the boomed staysail out! Needless to say, yesterday, under the watchful eye of the assembled crowd on the marina bar veranda, I got all the kit out to rig the staysail, before figuring the halyard was wrong, had to hastily drop it all down the forehatch and wander off! Nice to get a few of the locals coming to say hello and commenting about the great paint job. They are amazed when I tell them the cabin top was painted last summer for the first time in 27 years! The hull last painted 5 years back.... she does look smart! Well done to crew Phil for his efforts there. John (Very proud skipper!)
|
||
|
June 1st 2016. Nip down the boat to check all is OK as we are off to the Scillies by car and ship first thing tomorrow. I do however manage to turn that errant halyard end for end and get the staysail on, also despite F4 SW winds from astern get the main on the boom and now I have collected the missing sail cover, secure that. All now shipshape. John
|
|||
 The radr mast, strapped to the stern rail and with diagonal support forward. You can also see the top of the Fish finder transducer sticking up, the black bit.
The radar mast and scanner do not look out of place. |
17th June 2016. Back from the Scillies and a brilliant week, back to storms rain and more rain. Floods everywhere. The weather is getting daft in the UK. I get the 'Rate' compass out to fix it somewhere in the boat. Has to be away from any magnetic influence, low down. Locating it is trickier than I imagined. Eventually find a spot just forward of the heads on the port side, hidden under the port focsle bunk. However after trying for an hour realise it MUST be fitted with the cable exit aft so that means making a wooden bracket. Make sketches. At least all the cables are run, lift the saloon berth base for the first time in 26 years to run the cable! Loads of fluff! A test of the radar with the compass temporarily in place reveals it works perfectly. I can see every boat around me and the seawalls, with the clear water in between. Great. Then turn my attention to the Fish finder transducer bracket. I made it far too complex. Remove the s/s tube handle and sketch out a solution simply involving bits of string. home and search the bits box. Bingo a pair of Holt Allen dinghy fairlead blocks, tiny ones. Back to base and start making compass bracket. John
|
||
 The mast and scanner all fitted.
The bar with the AIS on it will have to be strengthened, with a welded on diagonal to match the other side.
Close up showing the drop nose pin and the straps securing the support struts. The mast can be lowered for winter storage!
The foot of the mast is secured to strong backs under the deck and incorporates a drain!
New through the deck glands seal the wiring in. |
24th June 2016, a new dawn, the UK is leaving
the EU. Jubilation here! I take down the new ply and hardwood compass bracket down and fit it, standing on my head in the focsle! All safely secured well out of the way. I manage to take down several boxes of tinned food and dry goods and stow them aboard, part of the huge stockpile I bought for the trip, it will get used later this year when the lads join me for days out. just local sailing for now. Put the Seagull on it's bracket. It is a bit tight as there is now the radar mast in that corner, but my measurements were correct and it is in place. The transducer for the new fish finder just stows clear of the Seagull, so that worked too. Now time to pump up the new dinghy and sort the operating system for that transducer out. Spend half an hour with my nose inches from the water, hanging out the dinghy with a junior hacksaw, manage after several attempts, to shape the double pipe clip arrangement I fitted, into a very neat simple thrust cradle for the s/s tube. (Not that there is any thrust from it!). I then attach the two black holt Allen fittings so I can secure a line to one loop the line around the back of the s/s tubs, through the second the other side of the tube and up to the deck. A simple up haul is fixed to a s/s fitting just above this on the tube. hauling up and a little outboard on this with the other line slackened and the transducer swings up and into the stowed position . Lowering it, then hauling in on the securing line pulls it snugly into the cradle. Simple.! I will have to find another of those tiny holt Allen fairleads, just to guide the securing line up the transom and then a simple jammer and that will make a neat job of it. All tools and the dinghy stowed neatly away. I was hoping to take F.G. out for her first putter tomorrow, but now the weather forecast has changed, more rain, so sea trails will have to wait, not taking the boss out to get wet! John |
||
 The Lowrance plotter screen showing F.G. as a black Arrow and painting radar on the AIS contact nearby and beyond it a large vessel.
This is the large Vessel, the 'Ross Revenge' or Radio Caroline!
This hatch is the replacement for the flimsy one that I found broken on board. with some Treadmaster on the top it should be strong and safe to walk on. |
July 2nd 2016. Eventually get to cast off and make our way out into the Blackwater. Tide was not great but the weather, at last reasonable. We puttered out and tested the motor, the charging system and many items that had been onboard a while, pumped out the holding tank and boiled the kettle a few times. The best bit was turning on that radar at last to see how it worked. It uses just 1 amp of power and super-imposes radar on the plotter screen. I was concerned the radar echoes would be large and obliterate details on the plotter. I should not have worried. On the left you will see a picture of the plotter screen. The top pic shows the screen with Fiddler's Green indicated by the black arrow shape with red line ahead of it. To the starboard side of us is a large triangle, with dotted line ahead of it, which is the approx location of an AIS equipped vessel sailing up the Blackwater with us and just ahead of it and over lapping it slightly is its radar contact. A few seconds later the AIS triangle jumped forward to overlay the radar blob. The large Radar reflection to my starboard side is Radio Caroline! Small echoes are craft without radar reflectors. We even picked up fast moving blobs and identified them as wet bikes and when we tuned the radar in to for a very close range look, we could even see seagulls flying past making echoes! I was disappointed that the Thirstlet buoy did not show up as more than a spec, but it has no reflector and looks to me as it it is polythene! Even dinghies showed up sailing round us. Good thing that the radar does not obliterate the plotter display. I have yet to adjust the heading so the radar painting aligns perfectly with GPS heading, it is a few degrees out at the moment.. just a bit of adjustment, via the on screen menus. The remote 'Rate' compass that controls the heading seems to be working perfectly and is now nicely tucked away on its own little mounting shelf under the port forward berth. Sadly there has to be a down side to a day out on the boat and it was the 'new' flush hatch I had fitted last year to the cockpit floor. I found, as soon as I had stepped aboard on Sunday, that is was smashed. There was a large crack across it and hole through it! Sold as a deck hatch with non slip moulded into it, it has proven to be just too flimsy. Cost about £35.00 and not sadly worth a quarter of that. I went back to the boat with the tail end of a tube of Sikaflex a day later and sealed the hole and crack. I spent some time searching the net again to no avail, then visited Houdini windows in Southminster. I hoped they would make me a hatch.. The chap there pointed me at the perfect hatch, solid Ali and flush would take a lot of punishment, should do for £800!! As I recoiled he showed me one he made, had a pair of handles on the outside though.. Mmm maybe, only £400 he said.. Yes OK... Back on the internet and an hour of searching later, Marinescene chandlers came up trumps with a thick Perspex hatch with no external handles but a socket for a winch handle. If I covered it in Treadmaster... I used the EOG EBay page and £85 later I was the proud owner. 8th July 2016 The hatch arrived today and I am impressed. The Perspex is 8mm thick and I can jump on it, yes it has an internal handle and lock that I will not use and a stay that restricts the amount it can open, but that is removable. There is a generous rubbery seal and it appears that it will be really watertight as well. It is less than 3/4 of an inch high, so should not present a real obstacle in the cockpit floor. John Stevens quickly researched when I spoke to him about it and found the best glue to use on the Perspex is epoxy, so I am off to check out if I have a spare sheet of green Treadmaster in my off cuts that will be large enough, if not I know I have two self adhesive Treadmaster pads that can be applied even more simply. As the wind bends the trees double outside, we now wait till the weather improves enough to let go our mooring again! The river is empty! John
|
||
 Hatch with Treadmaster fitted. |
August 2016,
Just had my personal barnacles zapped so with any luck I will be fighting fit for the rest of the season and next year.. Went to the boat to check her over at the weekend, not sailing as yet as anaesthetic taking a time to wear off... and the motor failed to start, air in the system. Nuts! Thought I had sorted this.. So now I have to take the cockpit floor up and undo all the connectors and check them. All the connections are new and fortunately there are not too many of them to check.. Have now bought some Hylomar blue, which I am told is the best sealant.. Whilst the floor is up I will bring it home and take out the damaged hatch and fit the new one. I have to glue in a small strip of timber to make it fit better... John
|
||
 The two short hoses removed, you can see the crimp on end clips after 22 years they failed.. Should have changed them 12 years back I guess! |
August 23rd 2016 After visiting the boat last week and finding the motor would not start because it had again got air into it I admitted defeat and asked Steve of Althorne Marine services, who now have an office in Bradwell, to have a look at my pipes... Steve briefly owned an Eventide and his father John Rook had his boat next to ours for a while. John has effectively retired now leaving son Steve in charge. I went down and removed all the screws securing the cockpit floor and shipped it up to my van. I can take it home and fit the new access hatch.. at 1000 Steve met me aboard and started inspecting my new tank and associated pipe work. Apart from a couple of clips he managed to get half a turn on the securing screws and checking the CAV filter for leaks and washers, nothing untoward found. He moved into the cabin and instantly found a pipe that was not just loose, it fell off! Turned out to be one I had never touched! It was not on the suction side but on the pressure side between lift pump and filter. Fitted by Beta 22 years ago...... Years of use had caused the pipe to shrink and it was only secured with those crimp on hose clips that are near impossible to tighten... Steve suggested replacing all hose with the correct BS coded stuff and proper clips.. I had spare new BS standard hose aboard and after a quick trip to local store, the Jubilee clips too. Steve popped back and fitted new hoses and clips. After a very brief bleed the motor burst into life. Steve had it running hard, in and out of gear to check and subsequently declared it fit for use! Cost me an hour of his expert time! £40.00. well worth it. At home I removed the hatch that had cracked from the cockpit floor, a useless device, cost over £30 and was supposed to be strong enough to walk on... not. I had to glue a small sliver of ply into the new aperture and cut the hole a couple of inches longer each end, easy job, and the glue, (epoxy) went off in an hour as it was over 30 degrees in the garden. We have a heat wave, (officially!). A short time later and a tube of Sika sealant was opened and used to seal the new hatch. The refurbished cockpit floor can come back to the boat tomorrow, as I have my grandson staying here assisting me with stripping old Seagull motors, he can help. Too hot for much work stripping Seagulls tomorrow, and as it is so hot I plan to go out and test the motor, being out on the water is a better place than at home in this heat, especially as some clown has cut through the water mains locally and the area has no water! Got water and beer aboard! F2 southerlies beckon! John
|
||
|
Friday 26th August 2016. Feel a great deal better now that we have been out on her. Wednesday afternoon the grandson, Brandon, and myself, slipped out into a near empty River Blackwater in 30 degrees and a F2 cooling breeze... We sailed and motored and sailed and motored for four hours, returning just after HW with grins from ear to ear. Not only had I got the mainsail up for the first time this year, but the motor performed faultlessly and no leaks. To top it all we sailed in company with 4 harbour porpoise! Only ever come across these in twos in 40 years plus sailing the estuary and working on the London river, so to have 4 cavorting around us for ten minutes was a real bonus, and just off Pewit Island near Bradwell. Tomorrow I hope to fit the lazy-jacks and their control cleats etc. Got to be done quietly in the marina. When I was out I got the strings out, but it was just a confusing cats cradle, so will wait till I can concentrate.... I have just one main job to finish off now, and that is the lateral support strut for the radar. It also carries the AIS receiver and there is the support for the mast, for trailing etc. it needs strengthening.... So I have to shape a bit of inch s/s tube and have it welded to the support across the stern so it is stronger... make it match the tube on the port side.. have the tube, just got to get measuring tape and pen and paper together so I can make an accurate drawing, before I take the tube to be shaped.. then remove the existing tube and take it for welding together.... Looking forward to next year and the continuation of our 'Fiddling Around'! John
|
|||
|
Tuesday 30th August 2016 Happy birthday to Keith one of my stalwart crew! Yesterday Keith and I, with our better halves, had a great day out on the river, drifting, motoring and sunbathing. It was the August Bank Holiday Meet and we were host boat in Bradwell. Weather of course for Saturday and Sunday was foul. Made up for it Monday. However at the end of the day, as we are slowing down in the creek about to enter the marina, the Beta Marine died.... What!! Fortunately we had enough way on for me to land on the visitors pontoon and Keith caught a quick turn to stop us running into the back of another boat! Out spanners and bleed the motor, thought I had got rid of the air leaks.... well as it turned out, I had, there was no air in it at all??? So why did it stop... We started it up again and could rev it like fury and it all sounded good. No smoke, no odd noises nothing amiss. However after it had been at tickover for a minute or two and we attempted to set off again, it died again! Now this was getting silly. Why should it be able to run in or out of gear, at speed, yet die at tickover? Bear in mind a complete new fuel system, from filler to motor, all new pipe work, every inch of it, and all new fuel and clean filters etc... Very odd I had replaced the lift pump with one with a hand lever on it so I could manually bleed the system easier, by hand pumping, and a pump or two produced floods of pure diesel at the air bleeds, so that was working OK, the only other thing was the main, and expensive, injector pump... I got it going again and we set off again for my berth, this time I gave the motor some welly pointed it down the channel leading to the mooring, and slipped it into neutral, expecting it to die, but figuring I had enough way on to reach the berth. We slid in very neatly and were moored in a trice. The motor then carried on happily ticking over?!? I could rev it, idle it, engage gear and motor against the mooring lines and it never missed a beat. I give up! I have a couple of ideas, maybe there is a slight blockage in the new air bleed off the tank? Maybe the lift pump is not working as well as it should at low revs?? Or maybe the injector pump has an internal fault that only manifests itself at tickover when it has been running a couple of hours? I have made arrangements to meet Steve the engineer down the boat Friday. Beta Marine seem to think lift pump, but others suggest that a 22 year old injector pump is due a service...Either way it is annoying as this little Beta has never let me down before... Will ponder this awhile, but have got to get it sorted, ASAP! John
|
|||
 Cheap 12v 'facet' pump for priming fuel system. |
Thursday 1st September 2016. We think we have cracked the problem! It is the lift pump. Seems when the motor was running with the old tank and the fuel was gravity feed, there was no problem. In the new installation book it now says the pump will not lift enough for low tanks and an in line electric 'Facet' pump should be fitted. I have had this confirmed by several on line forums and again by Beta. The pump is OK when motor running hard it will suck OK, but when you slow down to enter the harbour or moorings or into the marina, just when you do not want it to fail, it will, as the pump does not lift well enough at low revs... So I have ordered a cheap solution, a £15.00 electric pump which should arrive shortly. It has to be wired off the ignition switch and uses just 1 amp, but will lift the fuel from the bottom of the tank... so they say. If it works I may even buy a second as a spare! Relieved it is not the expensive solution that I need, an exchanged or serviced injector pump! they are £250 plus! John
|
||
 Pump installed close to top of tank on timber support and restraining timber for tank. Mounted on rubber washers.
Proper jubilee clips can be tightened with a small ring spanner, to make sure perfectly oil and air tight. As this side is the outlet it will be under 5psi pressure! |
Sunday 4th September 2016. Spent a few hours on board yesterday. Set about organising the addition of the lift pump. Lifted the cockpit floor, 17 long bronze screws..... and started to fit the new pump to the tank support and retaining timbers. Felt the first drops of rain on my back 10 seconds into the job! It was not supposed to rain till 1800! Three hours later. Soddes Law. I fitted the pump, then braced my self and cut the s/s braided hose with a hacksaw, and fitted hose to pump and just as a I was about to start on the electrics the rain stopped, thankfully and the sun came out to dry me and the underside of the floor! I had a problem with the outlet hose at first, it dripped, but I re arranged the clip and added a second and all OK. Wired the pump through a fuse to the ignition switch. Tried it and it clicked away with no leaks, you can tell the pump is working as it clicks like the one under the bonnet of my Morris Minor. I have mounted it on rubber washers so lessen the vibrations from it. Apparently it works by vibrations?? You can hear it when you are pre heating, but as soon as the motor fires the noise is lost. As I laid the cockpit floor back down so the rain started, 17 screws later and it poured! good timing. Fired the Beta up and it started instantly. To check, I stopped it then with the pump working I bled the secondary air filter, so easy to do as the pump feeds it fuel so you have no need to manually pump and work the bleed screw and arrange the cloth to catch it... Hate the smell of diesel aboard so all has to be scrupulously clean... Ran the motor out of gear at max 3600 revs, ran it in ahead for 30 minutes at 1400 revs, merrily charging as well, to put a load on the motor. (worst thing you can do is run a diesel with no load, glazes the bores.). The charge rate however was a paltry 3 amps as the batteries were fully charged from the solar panel with 14.7 volts on all three banks! Solar panel, a 32w flexi on top the spray hood doing its job so well! Whilst the motor was purring away I set to clearing up the mess inside, should have taken a picture! I had to have everything out of the quarter bunk, all the stowed kit, panic bag, plotter, log, fish finder, bins, auto pilot, boat hooks, then cushions, then all the mast lowering kit hidden underneath the berth base and then all the boxes of engine spares, just to get to the jubilee clips! Need a bigger boat. Add to the heap, the engine box lid and associated carpets and I jammed the interior up totally! When I was clear and sorted fortunately the rain had stopped, so out into cockpit, lift hatch and a wipe round with kitchen roll paper. Not a drip anywhere. Played with throttle, down to tickover, ahead, astern, revved, idled, ahead under load and idled. The Beta did not miss a beat! I think we have it sorted. I will be out for long motoring trials next week as summer is supposed to be coming back, today it is grey and very windy, F5's plus. As the motor needs the extra lift pump I have bought another to carry as a spare. Seems what I have found may apply to many motor installations, so if you decide to fit a tank lower down in the boat, so the fuel has to be lifted out rather than gravity feed, or indeed to fit one high up but with the outlet pipe on the top of the tank (as recommended) so it has a dip tube to the bottom, you too will find you will need an electric pump in the system. I have used a genuine 'Facet' pump for £15.00. Beware there are cheaper Chinese copies that may not be so reliable as the original American ones. Before I left the boat I checked the fuel gauge. The tank was just over half full. Maybe 9 or 10 gallons aboard. I filled it full (16 gallons), last year, when we laid up. I have not refuelled since, so I have used 6 or 7 this year, that's all. Next time I go down I will take a couple of 2 gallon cans full aboard. I tend to buy fuel at my local garage, one because I know and trust them to have decent fuel, (they service my van and car), and two it is only a few pence dearer that the red bought at the marina. (A few pence more because I do not claim part of the red is being used for heating to get out of the 20% tax.. Beware if you do this every time you fuel, as your details are automatically now sent to the tax man, if they find you have no heater.... you could lose your boat!!!).. I have been mightily relieved the cutting out problems we had were nothing more than the lift pump. I was looking at several hundred pounds to have the injector pump and injectors looked at! I have been so pleased with our choice of Beta Marine for our motor, hoping that with the careful servicing we give her, she will go on to keep us motorised for many more years. John
|
||
|
Monday 12th September Never got to the boat last week, F6 again! However I went down and crept up on the motor instead, started first touch of the button! Filled the fuel tank to the brim, took just 5 gallons, which is all I have used this year, shame.... suspect I may be using more before we lay up... Whilst I was there offered up a new bit of s/s tubing and marked it for welding and cutting.. Went down again this evening and again crept up on the motor, instant start! Really pleased. Off out for proper engine trials later in the week. Took the support for the radar mast down, with the assistance of Darian holding an umbrella upside down under all the fixings as I undid them, she caught one 10m nut for me! Taking the s/s tube from the boat to the engineer along with the marked bit I offered up yesterday. When they are welded together I will go back and offer them up to the radar mast again before finally having all the end fittings welded on instead of just located with grub screws. Much more secure! Lot of visits to boat and engineer, but will be worth it to get it right. Have also determined the speed log can hang on the new support too.... I am getting into the 'Fiddling Around' mode again! So much so that I am off to Ireland on a fact finding trip shortly. It is really to take the boss to find her roots, but I will be checking out moorings too! All for now, John
|
|||
|
October 2016 The season is over, we have been out to celebrate Trafalgar and remember Nelson, now it is time to take the kit off and bring her back to that nice barn again for the winter. Last week I had the s/s rail support for the radar mast modified, to my pattern with an extra leg, and I fitted it just before I went out on the 21st. It fits and has made the rail 100% secure. I will be removing in in the next few days so it can go back to the engineer to be s/s welded. Then I can guarantee it will not come apart! At the moment the end fittings are only secured with tiny s/s grub screws. The motor problem has been overcome and now with this new rail the wobbly mast support and radar mast are sorted. I have been over everything on board this season and believe I am sorted and ready to sail away next season in the knowledge that everything works! I have even added a pair of toggles to the back stays to make it easier to reconnect in the spring! (the new backstays were just a smidge too short to easily connect, toggles made the backstays 1" longer...) In the next week or two I will continue to empty the boat, carefully putting gear into big plastic containers, all first cleaned, (halyards and covers etc.) checked and sorted, ready to take back next spring. As ever there will be kit that need servicing, lifejackets, torches etc, and items that will be out of date, tide tables etc, that have to be weeded out and recycled... But with any luck all will be in good order to put back aboard next year. One little job will be to top up the diesel tank and add additives to the fuel. Always better to leave diesel tanks full, no room for any condensation... However it will add another 160lb to the boats weight on the trailer, (16 gallons @ roughly 10lb a gallon!). I have decided the main does not need washing this winter, neither does the staysail, not been out in the wet at all. And the genoa will go into storage, with the old mainsail, as we have a replacement. Will I get to sail off south and west next year? We will see, will depend a lot on the fitness of the people I have in mind to crew, and a couple of them have serious medical issues so that I do not think I could risk having them aboard.. But I have a grandson and nephew who are expressing interest and certainly the grandson would be a great asset. Time will tell, have no idea how I will be by next summer, will be pushing 70 then..... there is little doubt that all these adventures should be started much earlier in life if we are to be better placed to succeed! If I do not go I will be pleased if I can continue to sail the Thames Estuary.... for a few more years... The boat is OK! John
|
|||
 A soft plastic winch handle holder to fix to the tabernacle.
The 12v power adapter, takes anything from 10 to 30v and gives a steady 12v, that should work!
Reel of 4mm line for new motor-sailing cone uphaul. |
November 2016 Fiddler's Green is out and tucked away secure in my neighbours new barn! Just before we hauled out I topped up the diesel tank so there was no space for condensation to form, so not allowing water to collect in there and added a Cetane enhancer and injector lubricator... I could not say I noticed a difference running her since then, she always starts on the button and runs as smooth as silk... but maybe next year it will show. Also in the mix is a fuel stabiliser to stop the diesel going stale and a separate dose of anti diesel bug, just in case. It is the Boy Scout in me, be prepared! I have always said that seamanship is 90% preparedness! We hauled out in double quick time, I was down early at 0930 on the 3rd and the marina guys were ready, so I puttered her into the lift and by 1000 when my gallant helpers arrived she was up in the slings ready to pressure wash. Glad to report that once again she is the cleanest boat to be lifted. The EU45 (Marclear) had done the trick again. Apart from 3 dizzy barnacles on the prop nut again, (surely not the same three from last year?), and a slight jelly growth on the underside of the bilge keel and ballast keel where I had scraped the antifouling off by sliding over the sands to get into my favourite places.. she was as clean as a whistle. One job we needed to do before anything else was to remove the radome. as we found out in the spring it got in the way of the spreaders, but this is good as the radome is now stored away at home, safe and secure. The marina crew helped us lower the mast by using part of our mast lowering kit, the bit that keeps the mast in line as it descends, and just by using the halyard on the Bobcat bucket the mast was down and safe in a trice. The newly re enforced radar mast support doubling as a very secure mast support. With the three of us aboard it was not too heavy a job to lift the mast gently and slide it forward to rest on the padded pulpit, the top of the tabernacle with another load of old carpet, and the new padded crutch at the stern. I will get the new support end fittings welded at some time over winter, just have to take a temporary wooden mast strut down so I can un bolt the stainless tube. Once welded I can be sure it will never move! I removed the anchor chain before towing away today, all 50 metres of it.. (to lessen excess nose weight on trailer). I was surprised to see a lot of what looked like rust, but after it was unloaded at base it turned out just to be mud, all cleaned off and all OK! Do you mark your chain? I used to paint it in white bands, one for 10m 2 bands for 20m and so on, but the paint always came off. I now use bright (Green of course) cable ties instead. They manage to go round the winch and remain in place and you can feel them in the dark, much easier! By 1400 she was tucked up cosy and warm. All the remaining lines and halyards, fenders etc. removed and back to base for cleaning. Locked up and secure. I went back a couple of days later with containers of hot water and detergent and washed the topsides down, removing the traces of black from the transom and dirt from elsewhere. I will probably cover her to prevent the dust from the hundreds of tons of wheat stored in here from getting on her. You may recall we had a problem with the hand held VHF set, on out 2013 trip, it failed to charge. The bright red/green indicator lights did not show. I have found a simple cure for it. I had resorted to replacing the charger base during my 'Fiddling Around' trip and it then happened again, just as we were hauling out last week. Turns out there was nothing wrong with the base unit... Because the charger is mounted at the back of the chart table you cannot really see the led indicators clearly... When I took the base unit out and tried again on board, where I could see the indicator lights better, I could see there was a faint, but different colour led showing. Orange. A quick look at the instruction book told me it meant too many volts! Seems VHF chargers do not like working with more than a 12v supply! As my batteries are charged fully, with the help of that clever charge regulator, to 14.8v, this is too much and the charger switches off! Anyone else had this happen?.. At home on the dedicated 12v supply from the 240 volt transformer it all worked perfectly again.... I think I have found the cure! A £14.00, 12v power supply, as fitted in a car cigarette lighter for powering a 12v TV! Gives a stabilised 12v supply when the input is anything from 10 to 30v! (As it turned out it did not give 12v, so later used another simpler device!)I will be fitting that shortly! got to simply cut the end fittings off and wire it in. Another problem I had was where to stow the winch handle for the mast winches and anchor... Did not want to have to carry it back to the cockpit every time... So using our EBay page bought a nice handle pocket, where to mount it the next problem, hoping I can cable tie it to the tabernacle... We have another handle in the cockpit, in a nice teak holder.... though it is a fiddle to get the handle in! I also managed to buy 2 x 10mm s/s toggles to extend the backstays. I had fitted one I found aboard in the rigging bits box, but could not find another to match it. Ended up going to a firm on line and they actually had a pair for £13.00, so they have arrived and will be taken down and fitted to the backstays shortly. This will make re-rigging it easier next spring. When I remade the rigging in 2013, it was just 1/4 inch too short! When I put all the halyards and lines in the washing machine I had one length of light line go funny... it developed lumps of the inner core in bulges out through the cover, every foot or so. No idea what happened there, maybe 40 degrees was too hot for it. However bought a cheap reel of 4mm line using our EBay page again. (Lawn mower recoil start cord!). I have yet to rig the solar panels on top of the boat, (and maybe on top the cover). There is a large clear skylight above the boat and I found last year that the 2 x 20w panels, even inside the barn gave enough power to keep the 5 large batteries, nearly 500 amp hours, topped up all winter, that saves carrying them ashore! All the halyards have now been dried, on the living room radiator, and untangled, (good job that!! Especially with a cat helping....) and carefully stowed in the huge plastic storage boxes for the winter. Yet to take them to garage though, as it has been a little wet here and do not want them getting damp en route! Very pleased so little to do this winter, did it all last year! One job for spring, take the life-raft for it's first service... Time to hibernate! John
|
||
|
November 10th 2016. I have started collecting a few bits to use for F.G.'s winter refit and one of the jobs will be to replace the pear shaped zinc anode under the hull, near the prop. It is about half gone this year. It has lasted about 7 years though... every year I normally just wire brush it to expose clean zinc... This is internally wired to the sterntube and to the motor and to ensure continuity the prop shaft is wired around the flexible coupling by means of a springy stainless strip that rests on the shaft. I think it is the attention to little things like this that has ensures F.G. has fared so well over the years. These are not difficult things to research today with the web, but 26 years ago I had to do a lot of reading! MG Duff were the people I went to for advice then and they are still rated as the experts. Having seen a couple of props recently that had badly de-zincified, it was advice well taken! I have yet to take the solar panels down to the barn, but will next week. No rush on this as the battery banks, all three of them, were all showing a healthy 13.5 volts and by the Nasa marine Battery condition meters, all charged to 100%. I am looking to replace the fender covers I fitted 2 years back, they have not lasted well, fading badly. One thought was to find 6 pairs of track suit trousers in Kelly Green and use the legs! Could not be any worse than the fender socks I have. Off to search EBay! John
|
|||
|
November 25th 2016. Spent the morning at hospital again yesterday, supposed to be the final check up and signing off after my kidney stone problem. However I had an X-Ray and it showed up what they think is a stone fragment they missed! The surgeon, Danny Swallow was great, realising I had this trip planned and being a sailor himself, he insisted he would get me back to double check with a CT Scan then get any bits left zapped before I set off in June! Cannot have that becoming a problem halfway across the Celtic sea! Not what I wanted to hear really, but they were very sympathetic to the trip, and me so hopefully.... On the positive side, and back aboard, I have the new winch handle holder and it looks as if it should be easy to strap it to the mast with cable ties. I also have the regulated 12v supply for the VHF charger, and again it looks easy enough to wire that in. I have yet to rig the solar panels on top of the boat under that skylight again, just to trickle charge the batteries over winter, but the batteries are topped up at the moment and last winter the panels kept them that way so feel they should be OK to fit later, when I get time... and it is not too cold! I got the radar scanner cover back from the sailmaker, but sadly it is just too tight! However I was told to bring it back if it was not 100% and I can see how to easily rectify the problem, it just needs a seam unpicking and a triangular gusset stitched in, to allow it to be fitted over the dome neatly. I have walked round the boat and the only thing I have noted so far is the anode needs changing, and I have a spare! Oh and the prop needs polishing again of course! I am going to try painting the prop with some tap de-scaling gel this time, as it seems there is always a layer of attached salty silt on the blades like a hard water deposit. This is difficult to polish off, but if I can dissolve it..... So looks as if the boat needs very little work, it is just the skipper again, and some of his prospective crew!! John
|
|||
|
January 2017.
Reluctantly I have had to postpone the rest of the trip again, for this season and perhaps indefinitely. For one reason I have the kidney stone problem back, for another a couple of the prospective crew have other medical issues, and lastly because I am at the moment embroiled in a financially challenging project here at home, that I want to give priority to. I cannot say too much at that stage, but if it comes off I will be very busy for a while! And skint! I will be continuing to fit F.G. out and treat her as if I was about to let go the mooring on that adventure, to ensure she is as near ready as can be, fortunately after the work of the last couple of years there is really very little to do. I have paint and the parts I need, the anode and other odd bits, so I hope not to have to dip into my scant reserves for a bit.... At the moment F.G. is safely out of the weather in the barn and the batteries are fully charged from the solar panel array I have arranged to catch what sun gets in. I do need to look at the trailer brake cables and to that end Keith has donated a coil of flexible galvanised wire. I just need to figure out what year the Transit rear brake hubs are for 2 pairs of handbrake cables. I am lucky in that my local garage has offered to get them for me if I bring in an old cable as a pattern. So as the weather improves I will be trying to keep up with fitting out, as well as sort 'the project'!! John
|
|||
|
January 28th 2017. Though the planned resumption of the round UK has been postponed it does not mean that fitting out stops. I have the Anode to fit to the hull to replace the part worn one and I hope to go down with some 'de-scaler' gel to apply to the prop, the sort you de-scale kettles with.. to see if the deposit of scale can be more easily removed. I intend applying the get then cling film wrapping the blades to keep it there, see what happens after a day... I discarded the fender covers I bought for her last season, they were in a state after just one season, faded away and thread bare. I found a leaflet when clearing out my office, relating to a great set I bought some years back and could no longer find, that is because I was calling them socks when I searched the net and they are actually called 'Fender-fits'!!. I found an address in France and sent them a mail, was pleasantly surprised when I got a reply in English from Robert. I had asked for bright green and had noticed on their site it was no longer listed, but he said he had enough left to make me a set of covers. After a little difficulty paying I took delivery of a really bright green set of thick furry soft covers, ideal! Or they would have been if the were long enough. Sadly when fitted my fenders looked like a schoolboy who had out grown his trousers and was showing his ankles! I mailed Robert and I am pleased to say he has offered to make them again, but longer this time, so the parcel of covers is on it's way back to Cannes! I will post pictures when they return. He has also offered me a second set very much discounted, as that will exhaust his material! Cannot resist a bargain! Apart from occasional visits to the farm to check the batteries, (still beautifully topped up), not much to do until it warms up a little! John
|
|||
|
February 7th 2017. My Darian has been in hospital for 10 days now with a burst appendix! ????? She is going to be there a while longer yet and as I am doing 9 hours a day on travel and hospital visits so not a lot of boat work going on! However I did get a parcel from France a day or two back, the 'Fender-fits' returned, or in fact a new set of longer ones the same colour. Now they are perfect! I have only just managed to get to the barn today, first time in a fortnight, to pat the boats transom. as it was just 2 degrees outside the barn not exactly fitting out weather as yet. Get my boss fixed first too. John
|
|||
|
April 2017. Big gap in the diary! At least my boss is out of danger and back home and of course she is back working, though I do not think she should be. They still have not properly dealt with her burst appendix, but that seems to be the way the NHS works these days, put her on another waiting list... We have been ever so busy here since Valentines day, as we amazingly managed to buy 2/3 of an acre of farmland behind our cottage, that came to us out of the blue. Borrowed money to buy it and by selling off excess boats and boating gear have already paid well over a third of the asking price back, working on repaying all this year.... Have to sell more Seagull bits! At the same time, as Fiddler's Green needs so little work, I have been concentrating on sorting access to the land and with the help of sister Sue and brother in law Keith, we have cleared the site.. It was knee high. A local lad has helped me pipe the ditch to get access and at a stroke we gained another huge area in the garden, room enough to hide the trailer for the summer!! Great so that means I will easily be able to service it... One weekend in mid March a load of helpers came along, including our Fund Manager Brian and wife Mo, Database Manager John and a lot of friends locally and we planted 900 hedging plants and 200 odd trees, we planted a wood! We have another day planned for the end of April to finish off the planting for now, then we just have to sit back and watch it grow. And it is.. almost visibly! We have called it 'Bluebell Spinney' and will be protecting it as a permanent woodland. A bit of a dream come true for me! We plant trees, live in a wooden cottage and built a wooden boat! I have been visiting the boat every week and patting it's bottom, but now I'm loading the van with Antifouling and sand paper etc and hope to get the bottom painted by Easter and launch a week after it, before we have our planting day here... I have to do little externally. Change the main anode, which has at last half worn away. I think it has taken at least 7 years to do so, which means I do not have an electrolysis problem. Others I hear having to replace them annually! That would really worry me... I hear of people losing blades from props because they corrode by electrolysis. You have to have proper sorted out protection. The main anode is earthed internally to the engine and the keel and the prop and shaft have a stainless connecting 'brush' rubbing on the shaft inside to keep them in the same circuit. this was all worked out for me 30 odd years ago my M.G. Duff, the specialists. Seems they got it spot on! I will be trying some sticky de-scaler and cling film on the prop blades, to see if I can shift the scale like deposits I get on my highly polished prop every year. I never get any fouling. then applying the battery drill and polishing mop to get that mirror finish on the blades again.... will report back on this idea! I may wipe over the rubbing strake with another coat of Sikkens... will take half an hour a side! Great stuff. Then a coat of polish (Mer) on the topsides and the mast and she will be about ready....
A few days before towing out of the barn I reeve all the nicely washed and stored halyards and take all the mooring lines back aboard. Even the permanent shore lines go through the washing machine and I have even found some new Galvanised shackles for them as the old ones were going rusty. (Galvanising on some things not like it was!) I will probably service the motor afloat. It is easier... and an excuse to go and sit on board in the sun and just relax! On board, apart from the motor service, the only job on the work list is to fit the regulated 12v supply for the handheld VHF charger. I thought the charger had died on the first stage of the 'Fiddling Around Trip' in 2013.. (boy was it really 4 years ago!!!... ) and replaced it only to have similar problems, turned out it was over voltage in the supply to the charger base! Batteries are that well charged! This simple bit of kit will cure that. I am sure I will find other little jobs to do when afloat, but really she is just about ready to go anywhere! I have the 'new' genoa ready to fit, so she will have sails that will be good for another 20 years... The old main and genoa are stored as spares.... tired but serviceable.. Next major job is for the NHS to get me back in and zap the remaining barnacle in my Kidney, then I shall be ready to go anywhere too... The trees can just grow on their own! John.
|
|||
|
May 12th 2017. Just back from boat. The antifouling is on, with Phil's help a week back, just fitted the new anode and Sikaflexed the securing bolts to protect them and antifouled the Sikaflex. This seems to work as when I removed the old anode, peeling off the 7 year old Sikaflex from the securing nuts, the old nuts were only slightly rusty. New nuts and washers fitted. The sails and ropes back aboard. All washed and clean. The mast and roller reefing spar polished, with Mer, ready to fit halyards. The rubbing strakes touched up in a couple of places and looking good. I have polished the topsides with Mer and buffed most of it up to a very high gloss, will finish tomorrow. The experiment on the prop using de-scaler worked, a couple of applications and the scale deposits easily came off with a Scotchbrite scourer. It took me an hour and 3 batteries in the electric drill to polish the prop back to mirror finish! Tomorrow I will coat the shiny prop in Lanolin. This seems to work for me as I never get any fouling on the prop and it must improve its efficiency. I see other boats dragging balls of fouling around on the propellers. I really cannot see how painting a prop with a soft eroding anti foul is a good idea. It does not take many revolutions for the antifoul to erode all the good bits away, leaving a prime habitat for marine growth, but every year down the marina I see the people painting heir props with the same tin of stuff they are putting on the bottoms. If you are going to paint the prop it has to be a different, hard antifouling... but these are never as effective so you still have a problem... Polish them! Pushing ahead with boat maintenance now, will be running the motor ashore and doing the engine servicing too, to save time as Darian and I are both back to hospital for tests and treatment in June so will be out of action for a week! After that hope to be able to spend a little time afloat. Launching date to be sorted, when I have caught up with my towing captain! hoping for Friday as the wind and rain may have abated! John
|
|||
|
Tuesday 16th May. The launch day has been moved up a day, to Thursday. I looked and thought it may rain less! I have been able to be spending a little more time on the boat, now the new woodland all planted up and growing. Yesterday started the motor with my simple 5 gallon container of water hung on the stern and a hose from it leading to and poked into the seawater inlet. A garden hose trickling into the 3 or 4 gallons of water stored in the container to keep it topped up. There is a hole cut in the side for the exhaust to empty its water back into the container. I got this idea from Peter North of Wedjit. I built one for John Stevens to use on his Glasstide... easy to do with a few plumbing bits, just have to find a scrap 5 gallon (water) container. The ones I used were in fact originally oil containers, but easily cleaned. Notice one of our members has copied the idea (it is on the website somewhere!) and has published it in PBO this month! I can run up the motor for at least 30 minutes ashore this way, get all the oils nicely warmed up and then, as yesterday, drain engine and gearbox oils and refill, change filters too. I used my new £7.00 oil suction pump on the gearbox for the first time, so much easier than sucking on a long tube by mouth, but I may miss the taste! I looked at the anodes on the heat exchanger, there are two, and found them totally gone. In just one season.... Replaced one but could not find a second in my box of spares aboard, so will replace the other one afloat, easy job.. (Have just bought a length of 10mm zinc anode to cut up and fit into the old anode brass bolts. A lot cheaper to recycle the bolts than buy new every time! I hope you have checked out that motor, we rely on them so much these days, but fear some rather ignore them.... I used our EBay page last night to buy a length of bare zinc rod, the anode material and a replacement oil filter to leave aboard. Like to keep one of every filter on the boat, just in case.... Along with belts, pump rotors, even down to a spare Ali exhaust with water injection... they do not last forever... 7 years is about right. New on has only been on a year so far... I refilled the stern tube greaser and whilst doing it I noticed a tiny trickle of water coming from aft and heading forward! A leak"!""! I soon found it was from a gallon plastic bottle of antifreeze stowed aft, I had moved it and it had cracked. A lesson here, older plastic bottles seem to degrade! I whipped it off the boat and laid it leak upwards on the barn floor. No more leaks. Took it home and decanted into a newer gallon bottle, a just emptied windscreen wash bottle made of a better more flexible polythene. I managed to remove the antifreeze labels and switch them to the new bottle too! Back down to boat today to tidy up, put tools away etc, but not before I have done one last job, fit longer stronger screws to the fish finder's swing down bracket.... Then she is ready... to go back in... loading all the bits comes later... And as I am away to Northampton as a witness in a court case next week and then back in hospital, do not see any serious use till mid June, the longest day? John
|
|||
|
Friday 19th May 2017 She is afloat! Yesterday Keith and Phil turned out to assist me, and with Keith towing, Fiddler's Green made her way back to the marina. The lads work with me like a well oiled machine, hardly anything needs to be said, we all know what has to be done, so by 1100 the mast was in position in the tabernacle and all the wires attached loosely in place. Ian the yard manager arrived with his little BobCat crane and I coupled up the hook on the jib of to the crane to the Staysail halyard. Crane jib retracted, mast rises! Within 5 minutes mast is up and secured. As Ian says, its best way to hoist a mast, saves all that faffing about with his huge crane! Also saves us rigging the A frame I carry and using muscle power! A quick coffee and then all the rigging tensioned, fenders and sprayhood rigged and boat uncoupled from the trailer. We leave the boat chained down as it is more stable whilst we are wandering about on deck... The 4 remaining heavy galvanised rigging screws removed from the bilge keels, that had been holding her rigid to the trailer... There is another at the bobstay fitting holding the bow down to the bow support, but that has to come off before bobstay is refitted to bowsprit. Then lunch. After lunch, at 1400 the boat lift straddles her and the straps are attached, in a matter of moments she is hoisted off the trailer and we walk the trailer out from under her so I can get in under that 3.5 ton of Eventide with the antifoul paint pot and brush, to touch up the bits the trailer masks! By 1430 she is back in her element. Engine runs beautifully and all works just as it should. Oh and by the way the postman had delivered me the lengths of anode the day before so I was able to refurbish the old anode bolts and nip down and replace the last one that needed doing yesterday... I have so far redone 5 anodes and not used half of the material. A new anode from Beta £20.00, 5 refurbished by me for less than £6.00, far less... In moments Phil has the hose out and is clearing the owl poo off the deck. My environmentally green farmer where we store her, has a Barn Owl box installed.. the owl uses the mast as a perch! Large deposits! I nip up to 'thank' Ian for his sterling work sorting us out again and by the time I return Keith is filling the water tanks... brilliant, this crew is priceless, could not be doing this without them! The sun is still shining when we are in the berth, so boom is fitted, mainsheet re fitted, and mainsail and genoa fitted to spars. I will refit reefing lines and get my head round the lazy jacks another day! The Genoa was fitted for the first time and I had forgotten I had to fit new lanyards, a quick rummage through the 'ditty bag' to find suitable cord.. It went up smoothly and looks good and I even managed to get the reefing line on the drum the right way round! The newly made genoa, made from a larger near new sail cut down, all fits well and now the sacrificial strip matches the sprayhood, dodgers and sail covers. I even have a cover on top of the radar, back on it's little s/s pole at the stern, the cover will stop the seagull muck accumulating! I bet the radar will work just as well with the cover on.. we will see. As we were tidying up it began to drizzle, so we called it a day and packed up. The only blot on the day then occurred. A small approx 15ft Mayland motor boat arrived. Open fishing boat with tiny cuddy and wheel steering. What looks like a brand new Tohatsu 70 on the back! We though he was heading for an empty berth opposite, alongside other similar boats. The revving and disturbance had anyone nearby out, and just as well as he had to be fended off several boats as he did several circles. After 10 minutes of the fiasco, he, the helmsman had not a clue and the crew none either, we established they were coming to berth along side us! you would have never guessed by the manoeuvres! After another age and more revving and circling they got close enough to grab hold of and gently move them into the berth, by hand... No lines ready and when he did find some, he threw the lot at the jetty without making the end fast on board!! No fenders my side either!! Turns out new to boating... older that us and first time out! I have offered to teach him.... It is either going to be a steep learning curve before he is safe or he is going to cause an accident or damage and maybe worse. Good case for certification of boat owners!! When I catch him again I will be having a serious talk with him. In the friendliest way... Of course now every time I go down I will be worrying that he will have collided with me and will be checking the boat for damage! I do hope he is insured as from the little we have seen, someone will be claiming off him very soon. Now I will wait for the much needed rain to stop before heading down with the rest of the kit. I will be filling the van several times. Sunday looks as if it may be dry but tides are Neaps so early or late HW's to get the trolley down to her... Hope to be ready in a week for the first trip out... John
|
|||
|
Sunday 28th May. The Whitsun bank holiday. For the first time in four years I have not had to worry about Travellers and be up a 0500 waiting in the road, just in case. So it was a very relaxed John, aided by grandson Brandon and my long suffering Darian, that was letting go at 1100 that morning. There was not a breath of wind, the Bradwell wind turbines has slowed to a stop. So we had a day of engine trials, as I expected all performed effortlessly, not a hiccup anywhere. All the preparation and testing ashore paid off. All jobs on board done bar one... I tried to fit a 12v regulated supply for the hand held VHF charger, but it did not perform, Do not know why but I could only get 4v out of it not 12??? As I had cut the accessory socket plug off the input and the small plug off the output I could hardly send it back so a waste of money. (About £13.00). I later went on the internet and after a day or two of searching found a small Vero board with a Zener diode and a capacitor all wired up and sold as a regulator for cars with batteries under charge by alternator or Solar panel, to only give a 1 amp 12v exactly output. cost? £4.00. Do not know if this will do the trick but from the little I know about Zeners from motorbikes I think it will be perfect. Now I just need to find a small housing to mount it in, with maybe a larger heat sink as it may get warm... On a bike they are air cooled... I suspect this one is supposed to be in an open to the air application, not marine.. This arrived and was fitted easily, and works perfectly. voltage at charger now spot on 12v, even if main battery voltage buzzing at 14v! I digress. I managed to test the GPS, the plotter and the radar and yes it works very well with the cover on, thought it would.. Tried the new fish finder as well. About the only bit of kit aboard that did not get a test was the oven. Oh and the heater, it was a lovely warm day! Regular crew wanted to be out when the Sailing Barge match was on, and that is the 17th of June, a Saturday, so planning to be out there for the day that day... Having emptied my garage/boat store now and the cupboards indoors where we store some boat kit over winter, I am puzzled at still not finding my sleeping bag... Will have to ask Keith where he got it and what they were called and buy another. It's disappearance has foxed me all winter. On the run up to Whitsun I had spent a couple of hours aboard most evenings and had managed to stow all gear properly, rig the lazy jacks and even security mark and put a name on the tender. All ready to go. I had also met up with my boat neighbour, Bill, who admitted he was learning fast and had taken on board my comments about not revving the nuts out of the huge outboard and doing tings gently, he had been practicing and had got in and out the berth several time with little fuss now. He is ex Merchant Navy, Cunard! An Engineer but never a boat handler before... Even so I have left extra fenders out, donated him several and left a 'slivet board' outside my fenders to further protect our topsides! Always carried one aboard for coming alongside a rough wall! His boat counts as one! Pleased to say the solar panel over winter has kept the batteries fully charged and the trip out for 6 hours under motor showed they were charged as they were only taking half an amp charge or less most of the time. The NASA battery monitors show all 5 batteries fully charged. One thing I did find on putting gear back aboard was that all my flares were now out of date. Having said that I am aware, having done the Pains Wessex flare demonstrators course, that they only give flares 3 years, but they expect them to be good for more and 5 years is a norm, so one pack of my flares has a year left in them, so before I set off on the next leg I will be replacing the box full in the panic bag. Also in the bag is my LED flare, which has no expiry date! Just change the batteries! There is a case now for simply buying another LED flare and ditching pyrotechnics all together.... The flares in the life-raft will be renewed shortly as that is in for service at the moment, not due back aboard till July, but I am not planning a long trip just yet! I have a new up to date SD card for the Lowrance Plotter, but try as I might I still cannot get Navionics 'Chart installer' program to work. Very annoying as twice now I have paid for a years updates and have been unable to update as I used to be able to. Their program will only work on Win 10 now and my Win 10 machine cannot make it work. 2 years back I was able to do updates using the Eventides Vista machine or the Win 7 business one. Contacting Navionics in the UK, again and again has got me no where, only I now have an admission that sometimes they cannot make it work either! I have written another strong mail complaining and if this does not produce a result I will be contacting the company in America. Personally I think they know their program has a glitch, but are just betting owners give up trying to update, and bet not that many even bother. I do not know many who even update paper charts, let alone electronic ones.... Anyway the season has begun and I hope to get many more friends and family out this year.. John
|
|||
 The superb little FastFind 220. Funnily enough PBO this month has just published a write up on EPIRBS and PLB's, which this is. (A Personal location Beacon.) |
October 22nd 2017. The end of another season, not I have to say, the best. Either sunny and too windy or wet! Not spent a single night aboard nor gone far. We have only refilled the water tank once too! Some may say though that is because I carry so many beer bottles aboard!.. However we have had plenty of long day sails with a few different friends and family and been able to test all the kit aboard ready for setting off on the rest of the 'fiddling Around' next summer. We had two silly gear failures this season, both electrical and both sorted by my contacts at Mansbrite in Maldon. The first was the old original MLR Decca that I use for waypoint navigation down below. The power button became intermittent. Mansbrite had a spare and fixed it. I did not use the next bit of kit, my vintage 'Stowe' trailing log, just went to turn it on as a quick test and it was dead.. thought it was the battery but after checking and swapping realised it was more serious. Again the on/off switch had failed. For this one no spares now available, but Mansbrite found a suitable rotary switch to make it work. Other than those two items everything else aboard was tested and found to be working correctly! Before next season I will have to replace the box of flares that have now time expired. Tossing up but feel another LED flare coming on. Also thinking of another PLB (personal location beacon) for the crew, as the prices have tumbled on these now. At £169 nearly £100 cheaper!! I have had one in my oilskin pocket permanently for 4 years now and we have one of the older sort in the panic bag, but a second for the crew may be a thought. Another expense I am considering but will wait till I remove it from the boat.... the anchor chain. It is 8mm galvanised but not 'calibrated' so occasionally jams in the winch. It is also made up of two separate lengths joined with a 'joining shackle'... and that is slightly rusty.... So as an insurance and to make winch use easier, it may be a good £200's worth. We will see when I take it off the boat, along with the anchor, before we tow her to the barn. The saga of the Navionics SD card went daft come the finish. They took my old card by post and even then they could not update it! They ended up giving me a new one! They do have a glitch in their program. The card is valid till May next year and can be .... in theory.. updated on line..... I know what will happen again next year.. I will have to send it back by post again, but at least we will have it up to date just before we set off. The mystery of my super warm sleeping bag was solved when we turned out a cupboard at home, there it was, buried under spare duvets etc. We had obviously washed and dried it and stored it 'safely' away. It was rewashed, just in case, said the boss... and stowed aboard. Must remember where I stow it next week when it comes off again, unused! The handheld VHF radio charger now works brilliantly, thanks to the new bit of electronic circuitry, so that the handhelds on board can be cycled and whilst in store charged. So now at the end of October time to start removing the kit for winter inspection, cleaning and storage. Will try and haul out before it snows! John
|
||
 A position I hope never to adopt! Shows the little FastFind 220 in use with the antenna extended and pointing skyward. This transmits a homing signal to aircraft and lifeboats etc and the unit itself transmits also to satellite and Coastguard HQ with our boats details and position, clever |
October 31st 2017 Took a run over to Burnham on Crouch this afternoon and picked up a new McMurdo Fast Find 220 Personal Location Beacon, plb. Bought it on line but arranged to collect, save it getting lost in the post! Now I will have two on board, one in my pocket and one in the crew's! My local Maldon and Burnham Chandlers are the cheapest on the net for many things, this included! Thought it had to be a good bit of lightweight small safety kit that all the crew would appreciate. At the same time today I packaged up my original Fast Find 220 that I bought for the first leg of the trip back in 2013. I could not get the battery to test, so I have sent that away to a firm in Torquay that I have dealt with before. They fitted a new battery on the smaller 210hz location homing beacon I also carry in my grab bag. The battery was supposedly good till 2019, but the test on it failed. Could be a dodgy switch, but it is better to have it checked out. Now looking at another LED flare for my Christmas stocking, I have removed the old flares from the boat. I will use the old hand-held red flares as bonfire lighters and dispose of the parachute rockets as I was shown at Pains Wessex many moons ago. ( I carefully strip them and then dump the contents in a bucket of water, till the contents disintegrate. The detonator is then safely fired off on the now empty container, with gloves.. to neutralise all.) As I got my little Morris Minor van back yesterday, with all the sills repaired and good for another 20 years, I am now in lay up mode and will be scooting to the boat when the tide its up, to offload all the kit and gear. Seems like only yesterday I was taking it down to the boat... John
|
||
|
November 2nd 2017 Today I had a mail from the coastguard EPIRB registry. As I suspected they confirmed a minimum 10 week wait to get my new personal location beacon registered! Good job I did not wait till next May to buy it! Also had a mail from the service agent re my old one. They say it tested 100% on all radio frequencies and gps and the new battery is good till 2024! Same as the new one. As a matter of course they also replace the disposable pull off top and the antenna, then test for water tightness as well. All good. Expecting it back today, very quick turn round. Spares Marine Torquay. McMurdo agents. Last week I had a stroke of luck, for 2 years I have had an EBay search running to find a good battery for my old Toughbook laptop that I carry aboard. (Use it for updating the website from the boat, via my mobile.. clever!). www.justlaptops.com sent me a battery the other day for £22.00. Well pleased. I have charged and discharged it a couple of times so far and the battery life has increased from 1 hour to near 2 hours now. Magic. The original battery lasts 2 minutes now! Though I do not use the laptop on battery power alone, it is always plugged in when in use, to a special 12v supply, the battery must have life in it in case the plug comes out or the electrics go off momentarily.. (Reminder to fit that guard over battery switches!). It is all coming back together slowly. Certainly all the gear aboard is up to scratch! I have charts to sort and update of course and next years Cruising Association Almanac to buy, but plenty of time over winter to do that. Will be having a crew meeting after winter to discuss the trip and try and answer all the queries from the two new crew. Hoping to set off mid June and take two months to get back to Troon, with 4 different crew. Then if it works out, maybe Sister Sue and Keith, plus my Darian, can join/rejoin me and we can have another 10 days or so to sail up the Clyde and then lower the mast and putter up the Forth and Clyde canal from Glasgow to Edinburgh, with a detour to do the Falkirk wheel? Plans plans plans! Good to make them, even better if you can achieve them, especially with the help of good friends. I hope to. John
|
|||
|
Friday November 3rd 2017 The weather has been dry and still for a day or two now, so today took the opportunity just after midday, to nip to the boat. I quickly ferried the two heavy bits of kit off, as the tide began to drop, just about managed to push the trolley up the slope loaded with life-raft and inflatable. Within 2 hours all the sails were down as well, bagged, with all the halyards off and all ferried to the van. I left a set of large plastic storage boxes aboard to stow all the remaining kit in and bring home later. Apart from the dodgers and the spray hood everything else outside is just about sorted. Oh, of course there is a Seagull still to come.. Have the Staysail boom and the telescopic Genoa pole to come off as well, but I had filled the van to the roof by now! Got home for a late lunch and still the sun shone, so mainsail and genoa were carefully spread out on the drive, checked for any damage and then carefully folded and stowed away. As they have only been out a dozen times and have not got wet this year, no need for valeting. The sheets and halyards will go in the washing machine, when the boss is not here to complain, 'easy care 30' does it every time! I was checking the old tub of flares in the shed and found I have several parachute rockets to dismantle and make safe, but also found I have at least 8 hand held smokes. Well out of date... These have to be gently prized apart and the smoke making material washed out, no other way to dispose of them. When empty the detonator is fired off. Bit of a faff. Remember letting a couple of old ones off many moons ago, on a very dark still night, up a tiny creek. No one could see the smoke, which just lay heavy and filled the creek, so no false alarms, but the next morning, as dawn broke you could see the reeds above the high water line, all along the creek edge had gone orange! It took a good rain shower to wash them clean and to this day I wonder if anyone wondered what on earth had happened there! Memories, good to have them. May take another run to the boat Sunday, supposed to be dry after tomorrows threatened downpours. May get time to get most of the rest of the kit off... then it is time to remove the green tape on my rigging and slack it off a little in preparation for lifting out. Bet I still have two more van loads of kit to ferry home, check over and store, always amazes me how much there is. John
|
|||
|
November 10th 2017. The tide was high this afternoon and it had just stopped drizzling, so time to take a trolley along to the boat and fill it up with all the remaining bedding, food and bits of clothing. Two trolley loads and filled the back of the Morris Minor van again, boat hooks and oilies, charts and canned food. I just have to slack off the rigging over the weekend and remove the boom, I stow it below for towing, nicely padded and strapped to the support poles for the table... Stowed all the kit away, after checking it, so all stored ready for next season. Taken the hand held VHF's ashore and popped them on the mains charger, they instantly went to trickle charge as they were still 100%. Will check them during the winter. I have cycled the replacement laptop battery a few times and that now will work for a good two hours playing a music CD. The original battery would only last 5 minutes! Well pleased. Ordered up an SD card for the new ships camera. This is a miniature waterproof Hero cam mounted on the Radar mast support, so it has a good view looking forward. Battery life about 2 hours but it can be turned on and off remotely with a WiFi controller, clever! The idea is to marry footage from this with that from the hand held camera to make another series of films on our return. I have all the charts indoors awaiting correcting.. A nice job on a cold winters day, an open chart instantly conjures up vistas of distant ports and landfalls in my mind. What a wonderful thing the human brain is! I am lucky in that respect, I can look at a chart and envisage what an unknown place may look like too, not everyone can do that. Well all has been checked and double checked on board and all in fine fettle for next year's adventure. Just have to get myself and the crew fit now! We will be having a crew meeting here next spring, so the new members of the crew can see the route, ask questions about the boat, the safety gear, the kit they may need and the timings of changeovers etc. The latter in the hands of the weather gods of course! With any luck this time next week F.G. will be safely tucked up in her new secure barn, under the watchful gaze of my farmer friend's CCTV. John
|
|||
|
Friday November 17th. The 'crew' turned out here on Tuesday and with their assistance the trailer was easily manoeuvred out of the garden, into the road and hitched to the Land Rover. By 1030 we were in the marina organising trailer and waiting for the lift out. The weather was warmer than the day before, 10 degrees as opposed to 5, but no sunshine, still not too cold... do not do cold anymore. Nor wet! One year it snowed, not fun! As she was lifted and the crane motor turned off, Keith said he could hear something... our motor!! I realised we had got off before she was lifted without turning the motor off, it was still ticking away gently on board. It is so quiet you cannot hear the engine running, especially with the crane diesel running. Quick as a flash Ian the foreman directs the pressure washer into the water intake, a few seconds later water exits the exhaust... Phew. She only ran dry for 3 or 4 minutes.. Ladder out and I nip up and hit the stop button! Now I am doubly pleased I fitted the new Jabsco 'Run Dry' pump cover from 'Speedseal'! I will remove the impellor and change it anyway over winter, but I will look carefully to see if the rubber blades have any damage after the episode. The new cover has special Delrin bearing plates to allow a rubber impeller to run dry for 15 minutes at least without damage, or so they claim! The fact that water quickly exited the exhaust as soon as the pressure washer was applied means the pump had not broken up and was still working, so hopefully it did what it said on the box! Normally a pump will disintegrate after 30 seconds without water! If that had happened the water would not have got through... By midday the boat was out and washed off, again Ian said it was the cleanest boat to come out. She was lowered onto the trailer and chained down. I lowered the anchor to check the chain and found, as I had suspected, a few badly rusty links.. so that will have to be replaced, for safeties sake. The old chain will do for a mooring... After lunch the mast was lowered, simply using our rigging geometry to steady the mast athwart ships and the Staysail halyard attached to the bucket of the Bob Cat, which simply gently trundled forward to allow the mast to lower neatly into the new crutch at the stern. We should have remembered to put the trailer brakes on! The trailer of course started to move forward towards the bobcat! Not a problem really as it came down smoothly, just a little quicker than planned! The mast is then moved forward to rest the base on a padded pulpit and supported in the tabernacle top and the stern crutch, all neatly in line. It takes the three of us to do this, even without halyards, it is heavy. In the spring it is of course dressed with all the halyards and a lot heavier! Need to find a young strong helper!! An hour later all is secured and we are on the road, to arrive before dark at the barn. All battened down and tidied and hardly a word spoken. What a great team! A day later I come down and check the solar panel is working and all is secure. Was going to wash down the decks, but too achy from Tuesday. I do remove the spray hood from the frame however, realise there is no need to remove the frame now as the sprayhood now zips onto it! The washing machine at home is on its fourth run now, all the covers and canvas work washed and drying. Half the halyards washed and dried so far... another couple of loads to go, (Easy care 30!). I am amazed owners do not look after their ropes and covers this way, it is so easy and prolongs the life of ropes tenfold. Salt crystals left in ropes cut them to bits internally. Nothing worse than a dirty line to heave on too. Thursday the 16th it is still warm so with warm water I shampoo the cabin top and deck and for good measure around the transom to remove any traces of soot. A quick hose down and she is sparkling clean. A walk round and any blemishes in the paint work are checked and for the most part they rub up clean, no damage. I always sweep clean the bit of the barn before I use it, and afterwards, as grain is sometimes stored in here. Got to keep in with the farmer! So all laid up securely for winter, now it can snow! John
|
|||
|
Wednesday 29th November 2017. I was down the boat a few days back and wrapped the prop in cling film, then introduced some 'Viacal' de-scaler to the prop whereupon it spread evenly all over the blades under the cling film. It instantly started gently fizzing, so I am guessing the layer of hard material is rather like lime scale, as I suspected. I left it in place for a few days, then inspected it and yes, the blades are shining through the cling film, the dirty coating mostly gone... For good measure I added a few more drops of 'Viacal' to each side of the three blades to recoat the prop. I will come back in a few days and remove the cling film and hopefully scrub off the last of the scale easily with a nylon kitchen scorer. This experiment seems to have worked well and may well have saved me an hour or two of scraping and polishing. Last year I managed to scrub off the scale with Viacal on a sponge, though it took a while, and under it the prop was so smooth it only took minutes with the electric drill and the metal polishing pad to bring it back to full mirror finish. Should be even easier this winter! Some think it is over the top, but a polished prop gets no fouling and is so much more efficient... now it appears I found the easy way of getting it back to mirror finish... John
|
|||
|
January 4th 2018. I have the 20 year old plus old anchor chain back here at base, off the boat, and yes it has rusty sections, so I really want to replace it with a new, all in one, 50m length. (I do have a couple of joining shackles in the chain at the moment, one halfway, as there were two 90ft lengths joined, plus another where the chain had to be cut and ditched, to be later recovered and rejoined! My crew borrowed the boat and only told me about the lost anchor and chain after they had been back to recover it!). the joining shackles have to be hammer riveted onto the ends of the chain and this of course knocks off some galvanising, so they always rust and when they do the rust spreads to other chain around it in the locker... I have been scouring the net for suppliers of good but affordable calibrated 8mm chain. It should be calibrated to better fit the anchor windlass and the price starts at £220.00 for a 50m length. Today I had a mail from a chandlery I use often, Mailspeed, they are doing a special offer that brings the cost below £200, just have to save enough pennies. Hopefully in the next week or so, before the offer goes.... That will remove one worry. The other costly item is flares... Do I buy a tub of explosive pyrotechnics as I have always done that only last 5 years max, Approx £80.00 or pay just a little more £100, for another LED flare. I am impressed with the one I have in the panic bag. Battery powered totally waterproof and safe. You can turn it on and off at will and turned on will last 6 hours, then you can change the batteries! Having to dispose of old flares is a problem these days, time was the coastguard collected them, or the dealer you bought the new ones from took them. Today no one will take them. I am lucky I was shown how to deactivate them carefully years ago and recently have disposed of all my hand held red flares (bonfire lighters!!) and old parachute flares, dismantled safely, but the smoke flares are tricky and I have a bucket full of them to get rid of next... So I am leaning towards a new LED one... I used to carry a white anti collision flare too, but now I have a mega bright waterproof LED torch to carry aboard next season! (And a rather nice red or white LED work light as well!)... Went to boat today just to pat her transom. She is safe and sound.... Nothing to do till it is warm enough to varnish and antifoul. Engine service and change galley water filter and that should be it. So for now just browsing the charts and the new almanac! John
|
|||
|
Tuesday January 9th 2018. I ordered that chain last Friday....Today the length of chain I ordered and paid for from Mailspeed got cancelled. Seems although they have over 50m of chain, actually 67m, the longest bit is only 13m!!! the clown asked me if I wanted that and would I mind joning it! A paper pusher in an office certainly not a sailor! So I said, as they have already got my money and I was not in a rush, I was not worried if they hung on till the next drum came in and I would have the first 50 metres off that. The sheepish reply was ' We are not going to get any more in!' So it sounds as if another well known name is about to disappear, 'Mailspeed'. I got my money back today. I will now have to pay just a few pounds more for the same thing but this time I can order it through the EBay page on this site, which will mean we will be able to get a small kick back to support the site from the sale. Just have to sell a few more Seagull bits with customers paying into my PayPal so I can buy the chain. Before Christmas, last year I was looking at the same chain and they ran out, so hope to get in before they do again. Delivered on a small pallet. So free firewood too! John
|
|||
 Seen one link you have seen them all! Not going to tell you there is 50m here! |
Wednesday 10th January 2018. I have bought the new chain, using our EBay page, or at least I have paid for it, lets hope this company has it! I eventually paid another £45, so a total £245 for a 50 metre length, but of a higher quality UK made chain. Grade 40 not 30. This chain is made from higher grade steel and galvanised of course, calibrated to fit the windlass. So it should hold under heavier loads and be easier to wind on the anchor winch as it should not jam as the other chain did occasionally. The difference in cost between the standard chain offered on the web and the stronger stuff was just £25.00, well worth it for peace of mind. Imagine yourself off a rocky lee shore in a blow, relying on it!! Better to be able to sleep soundly at anchor! I hope to recoup a little from sorting out the original chain and removing the good bit, probably 25m of it and selling it. The remaining rough bit of chain may be used in a ground mooring where it will not matter once it is in the mud, as it tends never to rot any more under mud. The ground chain on the spare mooring at Tollesbury is in the same condition last time I checked it, a year back, as it was when laid in 1973! Will be marking the chain every 5 metres as before, with 10 metre markers in the way of one cable tie for 10m, 2 for 20m and so on, then smaller ties in between for the 5m markers. Passes round the winch OK and easy to feel in the dark as well as see by day! John
|
||
 |
Saturday 13th January
Damp and dismal outside and I am still trying to throw off a bug I developed just after Christmas. So not venturing outside a lot. So back onto our EBay page and just bought a new water filter using it, cheaper than anywhere else. I spent a happy hour sorting out all the charts I have for the trip, mostly Imray C series charts. I went onto the Imray site yesterday and downloaded all the corrections available for all of them, bar 2. These two have been reprinted so no corrections. Maybe there will not be a lot of alterations but to be safe I will be ordering new copies of these charts from the Maldon Chandlery. John down there undercuts every other supplier, especially the sharks on EBay that charge 20% more than list for out of date charts! Do be careful. Price at Maldon £17.20, seen them for £26.00 plus and when you check they are the old edition that no corrections are available for, no conscience some people! Now I have all the corrections printed out I will start on the corrections, will take hours and hours as there are at least 20 charts to correct! One or two have 3 pages of corrections! I have spoken about this before but feel it is worth repeating. There is a trick to correcting charts. You do not start at the top of the page! Instead you go to the last correction and work backwards up the page. Reason?? Often you will find an earlier correction is 're-corrected' later. This way you avoid doing the corrections twice! I use very fine tipped waterproof pens... As the charts have a plastic surface... and the fine correcting pen I use on paper charts, rubs off!! Good way to spend these dark damp days. John
|
||
 Map of the Scottish Canals. Bought using our EBay page. |
Wednesday 17th January 2018. Visited the boat today and took a few careful measurements. I needed to know what out exact draft was when we were in fresh water, so comparing the photos I have of her in the canals, Caledonian and the Crinan, and the waterline, I have been able to figure out she draws exactly 1 metre in fresh water. In salt it is about an inch and a half less. Reason for this? If I want to finish off our 'Fiddling Around' trip this year with a canal trip, I need to know. The Union canal, to Edinburgh, from the Falkirk wheel off the Forth and Clyde canal has only 1.06m. I spoke to the Falkirk Wheel operator Ian today and he told me the depth in the approach to the wheel, the wheel itself and the narrow tunnel just east of it was 1.5 m, but after that the depth can go down to 1m and they do not recommend a draft of more that 0.9m. Will be close! Trying to work out what effect leaving all the mast, rigging and halyards ashore will have? And thinking what else could I leave ashore? If my brother in law agrees to tow the empty trailer up all he way to Scotland and meet us for this last bit, we could leave things like the spare anchor and maybe life raft and other heavy kit in his Land Rover whilst we did the canal to Edinburgh and back. That could be the extra inch or two that we need! Boss suggested I leave all the Fray Bentos meat pies behind in Scotland before setting off for the canal trip too! Thought I may have eaten them by then! Could certainly leave the suntan lotion behind! And all the paper charts and pilot books for all the rest of the trip! They weigh a ton! Sure it must be possible. Would like to treat my regular crew to one last week or so on board before with celebration meals every night! Before we ship her back south! I'm told there are a good number of great eating houses along the way, so can empty the tins from galley stores! Also worked out the air draft for transiting the canal, with the radar mast down we would have an air draft of just over 2 metres and even with it in the raised position less than the 3m needed to get under most of the fixed bridges, so it seems do-able! (You are not permitted to operate radar in the canals anyway... maybe that is something else that could be left ashore, the scanner!). For the rest of the trip, I have been reviewing the charts carefully. There are lots of new obstacles along the way, that were not there a few years back, wind farms mostly! No real problem for our trip, just extra things to fix our position with! Worked out the run from the Scillies to Ireland is 150miles. at 6 knots 25 hours, at 5 knots 30 hours. That is one leg it may be better to have three aboard so we can stand watches. good news is there is nothing between the Scillies and Ireland, no rocks, no sandbanks and no traffic separation zones to worry about, just a lot of open sea! The planning gets complicated here as it must be better to take a third hand on board at Penzance or before, to save the additional worry of the ferry ride to the Scillies. Today the postman delivered the new charcoal water filter for the galley and I used our EBay page to buy another copy of the Scottish Canal guide.. that is on its way. After the storm last night will be popping down the boat later. We had a couple more dead elms collapse into our plot, more firewood! John
|
||
 Bought this used set of dividers yesterday, £9.00, good to have a decent pair at home to do chart corrections! |
Saturday 20th January. Snow in the air but not settling! Visited the barn today and it still has a roof! I checked the batteries and found the solar panels under the skylight have them topped right up at 13.9v! A good result. Am working on an idea to completely empty the boat of every bit of movable gear, she still has crockery, cutlery, pot and pans, mast lowering kit, loads of heavy warps, some heavy tools, two spare anchors, even loads of removable fire extinguishers and all the foam cushions. I could easily include all the locker lids too. Once empty the intention is to run her down to the local weighbridge on her trailer and see what she weighs in at. Recall weighing her some time back and on the trailer with all the kit aboard she was 4 tons, so looking to remove half a ton! It is amazing what some of the kit weighs, the rope and spare oils etc add up to a few pounds! I already have the main anchor and chain off and the outboard and dinghy, but there are two more anchors still aboard.... plus loads of long heavy warps.... so hopeful it will be possible that I can reduce the weight enough to make this possible. Assuming it is possible to reduce her weight to the 3.5 tons all up on the trailer, Keith has agreed we can tow her home... on our trailer.. I would not be happy for anyone to tow her if she was not legal. It is a 400 mile trip if we make it back to Troon, Largs or Inverkip... I have made enquiries to rent a transit van or similar that can take a ton. So if.... we make it back to Scotland, to complete the trip, we will be able to offload all the kit into a rented van to make her 'street legal' for the tow home! I bet when I offload the kit next week, some of it will not go back on anyway. Do not think I will fit in that wetsuit now for a start! If I fail to reduce the weight by 250 odd lb I then have the option of unscrewing the internal lead ballast, as a last resort! (And removing the cooker and the fridge batteries) Even gas bottles will come off for now. I have confidence we can reduce the weight really considerably, even the bunk cushions are heavy, they are high density foam! We will see. Going to get the grandson along to assist me for a few days, that will make the job easier! For now, as it is so darn cold out there, happy just to browse the charts and pilot books and the newly arrived map of the Clyde and Forth canal! Back on our EBay page yesterday and bought a used pair of nice brass, single-handed dividers, for doing the chart corrections... they should arrive soon. When the rain, sleet and cold goes away I will be laying out the new 50m length of chain and marking it every 5m with cable ties. got these off the boat today, yellow and green of course! John
|
||
|
Monday 22nd January. Snow did settle for a bit Saturday and it was cold with it, but it soon went when the rain set in! Too cold to do anything though. Today the sun was out and with temperatures in double figures, I took the opportunity to flake out that nice new length of 8mm calibrated chain and measure and mark it. However I feel robbed, it was half a metre short! Hey ho, it is not going back, but told the trader what I thought of him! Marked the chain at 5 metre intervals with coloured cable ties, green in between but yellow on the 10, 20, 30 and 40 marks. 5 yellow ties at 49.5m! Cheapskate.. Knight surplus chains. Arranged for the grandson to come over at the end of the week and help me unload all the kit still on board! Realised I have an old pair of wellies on board that last time I looked had cracked, so they can be ditched.! And I bet I will have a job to get into that wet suit stored up forward! Can see that being permanently removed! Would I replace it... maybe... not been used since I loaded it on 5 years back, or has the mask and snorkel that must have been aboard 20 odd years... The pair of dividers I bought via our EBay page arrived today, they are like new, great, I can get on with the chart corrections now! Realised I will have to sort out the laptop again to be able to edit the log on the website from the boat. I am certain the log on codes have altered, so will have to load all up here and have a trial run. Also have to start a new page off for the 2018 chapter, to run side by side with the original. May be calling on the webmaster to assist here. All seems to get very complex! On my office desk I have the new camera, I have to figure out how to work that too! Have to put the SD card in it and charge its battery so I can have a trial run. Hoping I can mount the camera on the new radar mast strut aft, looking over our heads and forward.... If it works it could be great to have extra footage to add to the videos I intend to make again. Actual shots as we enter or leave ports, where before we were always too busy with steering or fenders and warps, to grab the hand held camera! Might even catch the dolphins on that camera next time! John
|
|||
|
The second LED flare purchased, from now on I will not be carrying pyrotechnics on board, except those packed in the life-raft.
The new charts ordered.
|
Thursday 25th January 2018. Have a mail from my local chandlery, 'Mailstore' in Maldon, Burnham and Mersea, last night, offering me a 15% discount on virtually everything they had bar electronics. So after a quick search to check prices elsewhere, I went to their site and ordered the second LED hand held flare! The discount made it very cheap. Today I spent an hour double checking all the charts I have, their publication dates and the updates and corrections dates. All those I have been able to download. Found there were five important charts that have been updated in the last year that I cannot properly correct, so again went to Mailstore and ordered them. In total I have saved well over £30 on items I had to buy to be safe and from an outlet that already undercuts everyone else by a considerable margin. Support your local Chandlery! This will also save me several hours trying to update an out of date chart, not clever! So that is all the extra bits needed for the trip bought and paid for. Yesterday I went down to the boat and brought home the wetsuit I carry, amazingly I could get it on, wit a struggle, as the waistline needs to reduce to be able to slide into it easy. But with assistance! So that will go back on board! Along with the good mask and snorkel, (No fins!). Oh and I was wrong about my wellies, they were the good pair, I had slung the old pair a few years back, save another £20.00 there! Not so sure about the Yankee Jib. It came with the boat back in 1983, brand new and has a bit of history. I sold it once to the owner of an Eventide 24, but he gave up on the restoration and sold the boat to Barry, the brother in law. When Barry sold the boat later, still unfinished, he presented it back to me, sadly with a mouse hole in it! So I had it repaired and stowed it away, where it has been ever since, still unused! Think I will leave it ashore just for the trip! So now time to get cracking on the chart corrections. Today I am picking up Brandon, the grandson and we aim to totally empty the boat over the weekend. Will be a lot easier with 17yr old muscle helping! John
|
||
|
Saturday 27th January 2018.
With the help of the grandson, I have loaded my little Morris Minor van up to the roof twice today with kit and gear stowed away in all the hidden lockers and cubby holes on the boat. Each time the little van has been right down on her springs, so we estimate we have removed in excess of 7 or 8 cwt so far! And we have not started on the galley, the cutlery, crockery pots and pans and utensils! Have a feeling that will all be rather heavy. Oh and found one of the focsle lockers still full of lifejackets, harnesses and spare oilies! Had forgotten them! My garage floor is covered to a depth of 18 inches nearly. Some kit has been found that I had clear forgotten about, for instance on top of the loo holding tank I found a nice pair of flippers to go with the wetsuit and mask! Certainly there is a lot of kit that has not seen the light of day for a while (years and years!) and some that will not be going back on board, other stuff, like the first aid kits, that needs a good sort out and replacement bits purchased! Wonder how many spare halyards I need to carry really?? And bits of heavy copper cable? The right size for the starter motor on a Caterpillar digger! Real heavy. And a second set of jump leads? Forgotten them.. boxes of nuts and bolts, screws, electrical fittings and terminals, enough to open a chandlery or a workshop! Add to that the mast lowering gear, a super heavy 3/4 inch drive socket with huge long lever, to fit the main keel bolts and a sea searcher magnet! The cache of extra heavy stilsons etc. found in the bilge and sack of huge shackles weighed in at a few pounds alone! After spending the previous day helping a chum shift old glider parts and nearly breaking our backs, today we collapsed in a heap after the second load off the boat. It can stay in the van overnight and will be sorted tomorrow! With any luck we will get all the rest off Sunday... Then it has to be sorted and checked. (Once the boat is taken to the public weighbridge most of it will be loaded back on! That will take longer I suspect). At the end of the day we both noted that the boat felt much more 'bouncy' on the trailer and checking the wooden chocks, they had become loose, as the boat trailer suspension had relaxed and gently lifted the boat as more and more weight was removed. Not wanting to take bets on the final all up weight of boat and trailer when empty, but I have a feeling it will be close to if not below the legal limit! Time will tell. John and Brandon. Monday 29th January 2018. Brandon and I have been back to the boat today and have filled the little Morris Minor van right up, yet again. The crockery and pots and pans, the contents of the lifejacket locker and finally a few of the cabin sole boards and the carpet on them that I could easily lift, the boom was in the way for others... We think we have every single bit of kit off. However, as we kept finding treasures, including 5 cans of Baked Beans, hidden under the fridge.. cannot be 100% certain there is not something lurking in an odd corner. To my amazement I filled a holdall with extra clothing, tucked away in the wardrobe area.... The crockery and pots are all destined for the dishwasher, for the first time in years!! They could do with a deep clean... But to my amazement we found loads more crockery than I expected... do we really need 8 side plates and cereal dishes! Or saucers come to that! And why have I got an egg poacher? There will be a few adjustments when it all goes back aboard! The garage is now to be the base of operations as I carefully go through all the kit, that will be fun. Highlight of today was the arrival of a huge cardboard box in the post, I had no idea what it could have been. Inside deep in 2ft of polystyrene crisps was a nice new, small, LED hand held flare! The box and packaging will be recycled! Tomorrow I will be speaking to the local company that runs the weighbridge, to see if we can take boat there and unhitch her on the scales, to get just the weight of boat and trailer. Lastly heard from the Chandlers that all my new charts are on the way! Things getting serious now. John and Brandon
|
|||
|
Friday 9th February 2018. Yesterday Keith towed F.G. out of the barn and the mile to the weighbridge. We unhitched the trailer and left the boat and trailer on the weighing platform. Looking at her and then the lorries that were using the weighbridge, she looked very small... I was optimistic.... Paying my £10.00, I was horrified to read the Weighbridge ticket…. 4.4 metric tonnes! I am astonished. Keith and I weighed her 24 years ago, when she was still relatively newly launched. She was then 4.3 Tonnes on the trailer. (Keith reminded me that I must have put the original ticket into the 'Boat building log Book'. I had... Found the old ticket, dated May 1994! ) Back then, in 1994, finding out she was twice as heavy as the weight limit of the suspension systems on the trailer, it was severely overloaded.... led me to rebuild the trailer.... with a lot of help from Keith.... I bought and we fitted, heavier Indespension suspensions and larger 5 stud Transit hubs and wheels (I spent hours crawling round under Ford Transit Vans in scrap yards, collecting bits, brakes hubs and wheels!) We added an extra axle to make her a 6 wheeler. The extra axle was the same as the other two, a 6 x 3 inch Rolled Steel Joist.... Made the trailer capable of taking 4.5 metric Tonnes.. Tonnes and Tons, Metric and Imperial! Not sure which was the greater, they are close though, so had to check, the Imperial ton is 2240 pounds which is 1016.047 kilos! So the trailer is good for 4.5 tons Imperial, which is 4572.21 kilos. A six wheeler was unusual at the time and I had all the legal boffins at the Met Police traffic HQ at Scotland Yard, scratching their heads to research the 'Construction and use Regulations' to figure out how we could do it and what, if any, safety features we had to have. Eventually all they could come up with was that we should be fitting side reflectors! We did. I realised the additional axle etc. of the trailer would add weight to the trailer, so by increased the all up weight capacity to 4.5 tons I thought we would be safe enough. Nothing would collapse. As it turns out the normal weight of boat on trailer with all the kit we have temporarily removed, must be that or a smidge more. (Then when afloat I add all the really heavy stuff, life raft, outboard, anchor and chain, inflatable etc. loads of rope, boathooks and all the regular gear, charts, clothes, food.. fill water tanks, etc. That always lowers the boat a couple of inches into the water!) In addition to upgrading the suspensions, all the tyres were now to be commercial grade 6 plys. At first I bought cheap part used tyres, but in the last years I could not buy used any more as the size was only used on one 'Commer' van, so rare. The guy offered to quote me for new. I was expecting these large commercial tyres to be prohibitive, but no, just £50.00 each. They were a darn sight cheaper than the tyres for my car and only £15.00 dearer than the previous, slightly dubious, part used ones, so now all replacement tyres fitted are new ones. Four replaced so far. Have the last two to do this year, as they are just showing slight tyre wall cracking. Then all will be new. (We also have a good spare...) The wheels and tyres are kept covered in the summer to keep the sun off, it is sunshine that degrades them... When she was weighed before, in 1994, she had loads of kit on board. Keith took her to the weighbridge, (I was still recovering from slipped discs..!!), towing her from the farm where she was stored, to a weighbridge a little way away. I wonder if we had just finished installing the Beta motor in her and were off to Tollesbury to launch. I cannot recall being there as she was weighed. But I recall him giving me the weighbridge ticket.. and reading it I see I signed it??? I must have paid the £3.00 fee. Brain getting fuzzy! I thought that when we rolled her onto the weighbridge this time she must be lighter than she had been 20 odd years ago as there was lot of weight in the stuff that Brandon and I removed, probably off her for the first time ever, last week. Seems I was wrong. I must have also have somehow added weight into the ‘bare’ boat, that was not there 20 odd years back. Hard to see where?? Talking about it with Keith we could only see the additional 3 x 10⁵Ahr batteries as extras….20kg each. Plus the larger fuel tank and 16 gallons of diesel, another 80Kg.. Hard to see where the all extra may have come from, certainly not the holding tank and pipe work! Nor the lower half of the Radar mast that is bolted to aft deck… Wondering if all the 100Kg of trimming lead ballast that is screwed down inside, was there last time?… Cannot recall... Even so the weight of all the kit laying on the floor of the garage looks as if it could easily offset that, so we came to the conclusion that the extra weight must be in the additional steelwork on the trailer…. After she is launched this spring, if we do not get caught and slapped in irons for towing her the 3 miles to Bradwell, we will weigh the trailer alone to find out how heavy that is.... I now am thinking of weighing all the kit we have just taken off, as we reload it, should be fun, not too difficult. I just stand on the set of scales and note how much extra it shows when I am handed a box of crockery.. Add the lot together! Just turned out a very handy set of digital luggage scales, you hook the scales onto a bag or string round a box and hold it up. Weightlifting exercise at the same time... Then I can deduct the weight of the trailer from the total and get a definitive weight for the first time in 28 years! So for the return trip from Scotland, assuming we get there..... plan B it is! Save up for the piggy back return trip on an artic trailer! Last time, 5 years back it was £1200! Quotes this year approx £1500! The Falkirk Wheel may sadly be out of the picture. (Or is it??). The Union Canal is just too shallow at .95m depth beyond the wheel, as we will not have a vehicle to load up with the heavy stuff to offload the weight to reduce the draft.... nor the ability to leave mast with trailer…. We could stop at the Falkirk Wheel if we pass, and, if they let us, we could take F.G. into the Wheel basin and even once round the wheel and back down, plenty of water in that part.... a thought! We realised, over a great curry in the local Indian, that it would still be very possible to traverse Scotland from Glasgow to the Firth of Forth, via the Forth an Clyde Canal, depth 1.5m We would be OK in the Forth and Clyde canal with mast and sailing gear stowed on top, though the sailing rig would be vulnerable in locks and from other boats of course.... (Had to double check the spelling of 'vulnerable', looked wrong, both to Keith, my proof reader, and to me, but no, its right!).. So we could..... by carefully transiting the Forth and Clyde, sailing down under the Forth Bridge, retrace our steps from 2013, going south down the east coast, back to the Blackwater... if only we had enough time! Plan ‘C’!! Think they will be 'D' to 'J' as well by the time I'm done! Now working on getting Brandon back after the weekend. I am off to garage now to sort out more kit and put it aside, never to go back on board, so far 6 unused cups and 8 unused saucers, 4 unused extra cereal bowls and one chipped and cracked plate! Seems a silly list, but I’m betting it gets bigger! Already evicted an unused sail and egg poacher! Fun Eh. As Rabbie Burns would say, 'the best laid plans.... Gang aft a-gley ' John
|
|||
|
Monday February 12th, 2018. Today took a van full of kit back aboard, all the floorboards and the bunk top locker lids, the crockery and cutlery etc. Every item has been weighed before placing in the Morris Minor van, so eventually I will know exactly how much weight I have loaded back aboard. It is so easy to weigh the gear I will carry on weighing it and logging it when the boat is a float until she is in commission. Including the outboard, life raft and sails etc... I will then know exactly how much she displaces, fully loaded. OK the food stuffs etc and personal gear may be difficult to weigh as it is changing all the time, but the general all up weight will be interesting. I was asked how the extra weight of all the kit alters her stability. Good question. The bare boat seems to weigh in at approx 3.5 to 3.75 tons. ( I will be able to say exactly one day soon!). The ballast is 1 ton, so she has a weight to ballast ration of a little less than 30%, maybe 27%. However it could be argued that a lot of the internal fixtures, batteries tools, lockers full of kit, low down, could add to that percentage. The Eventide gets a lot of her stability from her hull form, she 'leans' on her chine when sailing. Rather like the flat bottomed (I know the Eventide is not flat bottomed!) Thames barges, they sailed with minimum internal ballast and no external keel as they simply relied on the hull form stability. Having sailed a Thames Barge, (The May) in a real blow, I can vouch for that stability! So you cannot compare our Eventides to round bilge designs, that will need a lot more ballast weight to be able to stand to their canvas. Interestingly a test for this is done every time an Eventide owner steps aboard. We notice how little the boat dips as we board, compared to a round bilge design. At the same time we have to reef earlier and not allow our boats to heel as far as round bilge boats, who can go to uncomfortable angles and still sail. We are much more civilised! A loaded Eventide has a much steadier motion afloat, reassuring. So I am off to the barn again tomorrow, with another load of kit to go back aboard, maybe another 2 loads to go yet before I get my garage back. The moggy needs her warm garage! I have, however, been sorting the kit, not just throwing it all back on, the pile of 'Not wanted on Voyage' is growing. Today found two unused s/s toasters, you know the sort to put over the top burners of the stove... I have a grill, I have always had a grill... so why they heck did they get aboard! Also found a black plastic sack full of used plastic bags! Too many! The unused yankee jib was removed, as was the huge socket spanner for the keel bolts! OK this could be classed as internal ballast, but it is only ever used once in 5 years or so, when I pull out and replace a bolt, so can easily be left ashore... I have a feeling I will be finding more as I plough through the heap of kit! John
|
|||
|
Thursday 22nd February 2018 A chance meeting in the village with friend Fiona opened up an intriguing opportunity. Seems our neighbours, Andrew and Fiona, who we met in Largs 5 years back, have a lockup in Largs where they store the kit off their boat over winter. Fiona suggested it would be possible for us to leave our rig at Largs, thus reducing our draft considerably, and further reducing it by off loading heavy kit to their lock up for a week or 10 days whilst we motored the 4 or 5 hours up the Clyde to the Canal and thence to Edinburgh and back! This would enable me to take F.G. up on the Falkirk wheel, (and back down on it a week later!).... I think as plans go I must be up to 'J' by now! Sure with a bit of pruning of kit we could reduce the draft to the 0.9m we need to make it through! Hoping to reduce the draft for the canals by leaving the mast and rig ashore and heavy items like two spare anchors, outboard, life raft, dinghy, none of which should be needed for the canal! The grandson back with me soon, to do more moving of kit.. Friday 23rd February 2018. With snow forecast for the next week and temperatures plummeting, Brandon is over with me again and we have loaded all the kit back on board, and the little van is snugly back in her warm garage. She is loaded to the roof with 40kg of boat berth cushions ready to be loaded back today... amazing how much simple items weigh! We will put all back into its correct cubby holes later today and get the bunk cushions back on board! Another step in the right direction! John and Brandon
|
|||
|
Sunday 25th February 2018. We have totted up the weight of all the kit we have loaded back on, 376kg! Amazed! That does not include the gear that I load on every season, the spray hood and solar panel, the sails, the halyards and sheets, the life-raft, dinghy and outboard, the boathooks, mops and slivet board. The life jackets, life saving gear, electronics, charts.... I could go on.. When we are launched, I intend, just for the sake of knowing, to weigh up the rest of the kit before I load it. Then when we have weighed the trailer after launching, we can take that weight away to get the full cruising mode displacement! Thinking it may be nearer 4 tons than 3.5! Whilst reloading kit, I did find a kinked low pressure gas hose in the gas locker, when trying to refit the regulator and 'gas low' to the bottle, so one job more to do, remove hose tail and replace.... Bet when I remove it the date will have gone on the hose anyway.. Cheap enough to replace, to be safe! How many are aware gas hoses have dates?? Had to fight to get the focsle mattress in place. It was made in one piece as we were extremely short of material to cover the foam, had I more I would definitely have made this in two parts! But its back in, do not expect to remove it again any time soon! Took me an hour or so to reload all the lockers before Brandon could hand up the mattresses. Just the mattresses weighed in at 36kg! (They are high density foam for support!). With the bright sunny days the solar panels are allowing the batteries to charge, 14v charge recorded whilst we were aboard! Back at base there was surprisingly little that was not reloaded, left behind. Some old poly bags, a bit of crockery and two harnesses that are now surplus to requirements as we use the safety lines attached to our life jackets now. These will be sold. Celebrated finishing the job with a slap up meal down the marina! John and Brandon
|
|||
 A new Calor Butane regulator and hose for just £15.00! Is yours or your crews life worth £15.00? |
Tuesday 27th February 2018. As the weather is so foul today no chance of nipping down the boat, even if I did not mind the fact it was minus 2 Celsius! So instead I went to the EBay page on the site and bought a new length of Calor hose. As the regulator with the built in pressure gauge was so little extra I have opted to change the regulator and discard my old 'Gas-low' as well. See left. £15.00. the hose alone would have been £7.00. got to be worth it safety wise! I was trying to recall when I replaced the present regulator and realised it was before part one of 'Fiddling Around', so five years! As hoses and regulators only have a five year life..... So cold and so much snow in the forecast that the 3 inches we have may be nothing by the end of the week, time to correct charts! John
|
||
 My shiny prop! Takes a little time, but far better than painting them! Every year I see painted props looking like balls of barnacles, and owners wonder why they have no Umph in their motors! |
Monday April 9th 2018. Spent a few hours on the boat Saturday, or rather under it! It was a heady 18 degrees in the barn! I scoured off the remaining lime scale deposit from the prop with nylon pot scourers and fine wet and dry foam sanding pads. These were left over from restoring the paintwork a year or two back. An hour with the battery electric drill and a polishing mop and we have the shine back. Coated all the shiny blades with a greasy coat of Anhydrous Lanolin, a lovely messy job as you have to prise the stuff out of the pot, like solid grease, then melt it between the palms of your hands before smearing on. Of course as soon as you apply it, it stiffens up as the bronze is a lot colder than the hands, takes a bit of spreading! Prop now covered in a plastic bag, no not to test the rope cutter, but to protect it from me and the antifouling roller. Sadly not antifouling weather yet. Last couple of days here it has been damp and dismal only getting to 7 degrees today. I am hoping to gently sand any bare patches of exposed epoxy coating... with a little hand held battery sander and protecting myself with a mask.... It is very smooth and shiny in places.. and the antifoul fell off when we pressure washed at the end of the season. Sanding to get a bit of a key so the antifouling will stick next time! Got the back of my little Morris van loaded with cans of red stuff, rollers and brushes. Just waiting for the chance! I also took down the new gas regulator and hose, but again it has been so damp and cold since, not conducive to working on it! The only other main job out standing is the engine checks. I have my patent water tub hanging on the stern to catch the water from the exhaust, and the pipe from the bottom of it ready to poke up into the intake, so I can run the motor for 20 minutes to warm it up before I change oil and filters! Want to see how the water pump impellor fared first, remember, I ran the motor dry for 10 minutes or so last season when we hauled out. Engine OK, heat exchanger coped... The impellor survived as it pumped water again as soon as the hose was poked up the intake, just wondering how much it wore... It has the new Speedseal 'run dry' fitted to the Jabsco pump, so it will be interesting to see, will take a pic or two. Will be painting again with Marclear or EU45 as it is now called. Have enough red for this year and maybe next in store! (I do have a couple of cans of black and also a couple of white, so may be tempted to use them in the future if they do not sell!). Be different! Beginning to get sorted with other preparations for the trip, we have a Crew get together planned for the end of the month, where I will hopefully find out who can spare what time to assist me on this adventure. Hoping I can get enough crew or it will be cancelled..... All for now, just waiting on a little warmth.... Not seen any swallows as yet, so I perhaps I'm a little ambitious.! John
|
||
 New gas regulator with gauge. and new hose, no leaks.
The Jabsco impellor looking none the worse for the abuse I gave it.
Another spare in the spares box!
Anti-fouled and looking smart!
|
Sunday 22nd April 2018. In the past week I have been busy aboard but because I have also bee updating the computer, so unable to edit these pages till yesterday. Now working in whizzy windows 10! Last week I managed to get down and wire brush most of what I thought was loose anti-foul, and touch in any bare patches. Also fitted the new gas regulator and hose with the gas low meter built in. pleased to say it shows a leak free system! Another job ticked off the list was the water pump impeller. (remember I ran the pump 'dry' for 10 or 15 minutes last haul out...Oops! ) As it happens the impellor was totally undamaged! the 'SpeedSeal Run Dry', works. the pump was photographed and pics will appear here shortly. No difference to the new pump rotor I fitted, the old one goes in the spares box. Order another new one from Beta, so 2 new ones and 5 used ones in the spares kit!! Also a new air cleaner as the one on there had a bit of black belt dust on it. I may see if it blows out and if it does that will become a used spare too. Today I spent 4 hours and anti-fouled her. I had masked up the anodes a few days ago. At the end of today she has a good coat of Marclear/EU45 all over plus an second coat all round the waterline and on the rudder, 2.5 litres and a cupful. As I went over her I was annoyed at the amount of anti-foul that lifted off on the roller. Next haul out we will have to get the old anti-foul off. Still it is all covered. Never looks much till you take the masking tape off, then that reveals a clean crisp cut off line and she looks stunning again. I am knackered though. Was hot today, warmest London marathon, did not envy them! Great news is the swallows are back! Every year when down at the boat I look for them as the door faces south, today when sat down to the lunch my Darian brought me, the first ones hove into view, then another half dozen, then more. Feel summer has properly arrived now, though they are a lot later than last year, 3rd of April in 2017! Have a few more jobs to sort, gently wet and dry the rubbing strakes and toe rails and recoat with a coat of Sikkens, but fit the extra but of brass anti-rub band first.. When I come into my mooring I have a hurdy great teak post to squeeze past, makes it tricky so no-one wanted the berth, thus the discount by ignoring my bowsprit! I scratched a little varnish off last season when I 'missed'! I also have to polish the mast, and then fit the halyards. Fun job, monster knitting!. There is not actually a lot more to do, rig my engine running cooling set up to run the motor and than change the oils and filters. (gearbox as well). I have new fuel filters, but as the ones on have only seen 20 hours use, not sure it is worth changing them. I carry 2 sets of spares aboard.... Told the temperatures will be back down to the normal April levels next week, still good for the work I have to complete, then it is time to organise the launching team, may rope in a couple of the new crew for that... Talking of crew, we have a crew meeting here in a weeks time for all to swap ideas and the new crews to ask all those questions! All for now, John
|
||
|
Wednesday 9th May Just off to boat to polish mast and reeve halyards! Yesterday finished coating woodwork with Sikkens. Day before polished hull to a lovely shine. Tomorrow we launch, still 1001 jobs to do so off to boat now, back to this later. John |
|||
|
Sunday 13th May 2018.
Have been having great fun editing, all sorts of problems, but if you are seeing this we must be winning! F.G. is afloat, we launched Thursday, all went so well , mast sorted and raised easily with the mast and rigging geometry and a simple pull on the staysail halyard from a small Bobcat crane/loader! We tightened the rigging roughly, un-chained her from the trailer and she was lifted off the trailer and carried to the launching bay. Then there was time for me to crawl under her as she hung there and I was able to touch up all the bits of antifouling I'd missed, mostly where she sits on the trailer... After lunch launched and motored to berth. We sorted the rigging, got the mast amidships, tensioned it to get the bend in it and the tensions right. Locked up the rigging ready to tape up, Phil and Keith busying themselves sorting all. Then we came to put the genoa up..... Took me just a few moments to realise I had made a mistake. I had neglected to reeve the genoa halyard through the block on the front of the mast, about 9 inches from the top, so the halyard would not jam the roller gear... took me a millisecond to realise what I had to do, but a minute or two before I could bring myself to say it. I had to test those mast steps and climb the mast! So off home for bosuns chair and a harness/lifejacket. I spent half an hour up there. Was easy to climb up but a real pain re -reaving the halyard, it was so tight I could not get the halyard and the long plastic cable tie I use as a messenger through at the same time. My legs were shaking with the exertion by the time I got down. Good to have reliable hands on my safety line! After a cup of coffee, we sorted genoa and amazingly got the roller reefing line on the right way, then the main, but had fun with the three slab reefing lines and the outhaul, took a while to sort, but we got there. A swift half in the bar then home to stow the trailer in the garden. A very good days work! I returned to the boat Saturday evening, knowing it was about to rain and started to scrub the decks, the rain arrived on cue and the crowd in the bar thought I was nuts, scrubbing her down in the rain, suds everywhere, but all the bird poo and dust from the barn was cleaned away and gone, then a call from the bar, my dinner was ready! I will be down to her in the week to fit the staysail boom and all the dodgers and other kit that needs to be sorted, outboard, dinghy, liferaft etc. Plus carpets and then check all stored in the right places. A quick engine and gearbox oil change and we should be about ready.... Must say could not do this without the two crew... I was hoping to treat them to a canal cruise across Scotland at the end of the trip, but it appears the Canal is not not navigable! Shame, maybe nearer the time, but at the moment the Forth and Clyde is closed. All for now. John
|
|||
|
Saturday 19th May 2018. Most of the gear is back aboard. Have lifejackets , 5 adult and one child, being serviced, checked gas cylinders, all OK, now inflating jackets to see if they keep inflated overnight. fitting new lights to them. (batteries on some time expired, but they still work when tested...). check all straps and fixings.... The first Aid kit (s) all being looked at and updated. Will replenish when I go to Sainsbury's shortly to do the food shop, long life milk and tins, yes the Fray Bentos ones too! The 'Panic Bag' being checked and some items will be replaced, water, chocolate, spare batteries. And items replaced that have been out for the winter, torch, waterproof VHF, EPIRB, new electronic flare... I am off to the boat shortly with the inflatable dinghy and the life raft. tide is right for a level brow! Seagull motor yet to be checked and run up in the test tank, and then that and a fresh can of fuel for it will be going down. Already put spare cans of diesel on board, one yet to fill.. before being stowed. Have to service the main motor today and fit all the electronics and test... The laptop still here and I will get that operational with the mobile phone as its WiFi before placing on board. Will do a test edit on the log page. That should keep me busy for a bit! Closing my business 31st. John
|
|||
|
Sunday 20th May 2018. Feel I am getting there. Yesterday service the motor, changed oil and filters, all running sweetly. Also cleared the cabin of the tools and spares strewn everywhere. Old MLR GPS up and running, New Lowrance GPS/Plotter/Radar all tested OK. Navtext working, but needs the stations adjusted , at the moment it is set to 'All' so getting warnings of ice in Norway at the moment! Main VHF connected and receiving, will do a test call later. Dinghy and life-raft stowed. Back at base lifejackets are getting attention... Charts moved off the dining room table till I finish the jackets! Got my oilskin out to check, realised I proofed it last year and never used it, so that can go aboard. Also put a medium size lightweight 'Storm' brand oilskin aboard, may do someone. Hope to take her out in the next week.. Still loads to check and take down though, laptop next. John
|
|||
|
Thursday May 31st. I officially pack up my business today for the duration. Then I can concentrate on the boat. Over the last weekend, the late May Bank holiday, Harvey and Brandon joined me on board for 24 hours. The idea was to get them used to the limited space aboard, assist me with a few last minute jobs and in doing so, get more accustomed to the gear and sailing. We spent hours sailing round in ever decreasing circles, tacking, gybing, heaving to, and generally playing boats. They got the hang of it! Pleased to say the new anchor chain wound round the winch far easier, and also dropped neatly down the hawse pipe. We tested most of the other gear and kit on board and got used to wearing the lifejackets... A successful 24 hours! In the next couple of weeks I hope to get the remaining bits sorted, putting batteries in lights, filling the food lockers, rigging the rail mounted camera and checking all the chargers etc on board for all the different bits of whizzy kit we have now... and sorting the laptop so I can mail and edit the web pages from aboard. At base I have charts still to correct! then take down of course! (sealed in poly bags and stowed out of the way till needed). Just over 2 weeks to go now, time telescoping! John
|
|||
|
Viewed from the bar whilst I sup a cold ginger beer. Nearly ready.
Kit all stowed on board, but the MOB bag and the lifebelt stow either side.
Jackstay and all rigging secured.
Bowsprit with rigging wired and taped.
Anchor tripping line and buoy secured. |
Wednesday June 6th 2018. I have spent a few hours a day on board recently adding kit, checking kit, putting new batteries in things and going through the boat from end to end checking. I have replaced lashings on the guard rails and on the Jackstay one side, the other side to do. Re taped over lashings and moused shackles and taped them. Keep finding more jobs! got the electric drill out to check it, and it is as well I did, as there was no battery in the box.. to be added.. Darian keeps finding things for the food cupboards and I have not as yet done the Sainsbury's shop I have to do. Replaced the fluid and the batteries in the loo air freshener and put another in the Galley, did smell nice on board today. Replaced tiered elastic ties with the nice new Kelly green ones I found on EBay.! Look far better than random red, blue, black ones... Rigged the anchor tripping line and little green buoy to the pulpit with some, also put one round the roller reefing genoa. (always add a tie, just in case). I will wander round the deck every time I go down and I bet I find something to do every time. Bit of tape here, replace a lashing there.. Have yet to rig the line on the gooseneck for securing the third reef, found that and the downhaul for the genoa pole today.. I have had to buy 8 charts, as the ones I have are superseded and that makes correcting long winded and sometimes you miss a correction. I will sell all the charts on my return. Picking the new ones up from Maldon next week. Got to get some more large zip seal poly bags for the books and charts needed later in the trip. They can then be stowed away safely. Got spare log books to stow to, or refills for the log I use. Making room in the quarter berth for John Stevens bag, he is coming over Friday. Got a set of oilies from Phil for Harvey to try, and if they are too big for him maybe Brandon... Douglas Gill, old but barely used.. I was hoping the rain would have washed the anchor chain clean so I could stow it, but sadly it caked on with the heat, a quick rattle of the chain and it fell off so chain stowed.. Oh, just thought of another job, stopper for Hawse pipe! got to cut the bung I bought in half and chew out a section for the chain..... So back to correcting charts, another 4 to do then the new ones, bound to need some corrections... John |
||
|
Click here to go to the 2013 ship's log page
Click here to go to the new 2018 ships log page
|
|||